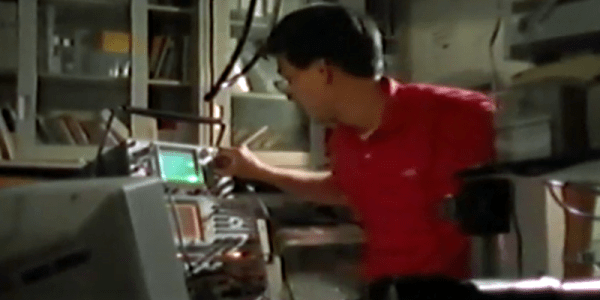
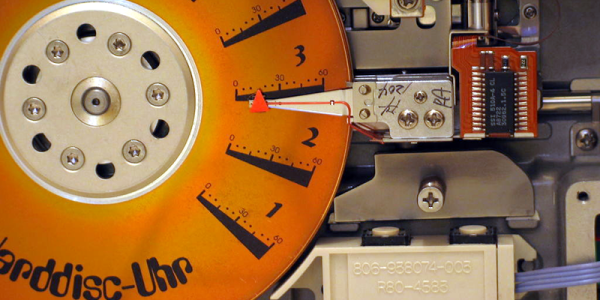
You always hear that people talk about the weather. But it seems to us we see more clocks than we do weather stations. A case in point is [frank_scholl’s] clock made from an old hard drive. We found it interesting that the clock has no microcontroller at all. The custom PCB is all digital and uses the line frequency to drive counters which, in turn, drive the motors.
The one catch is that you have to have a hard drive that uses a very particular motor scheme for this to work. The platter rotation shows the hour and the head’s track position counts off the minutes from 0 to 59. Two buttons can speed up either rotation for the purpose of setting the clock. You can see it all in the video below.
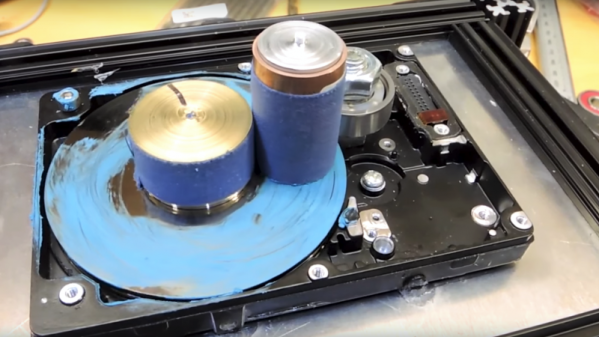
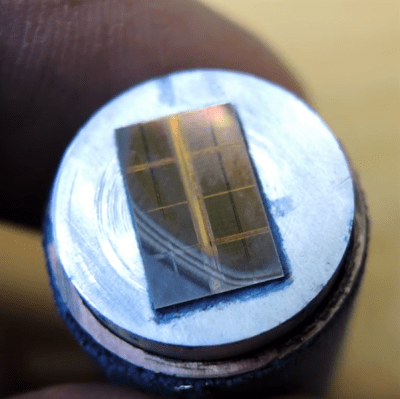
For those not into the anatomy and physiology of semiconductors, getting a look at the inside of the chip can reveal valuable information needed to reverse engineer a device, or it can just scratch the itch of curiosity. Lapping (the gentle grinding away of material) is one way to see the layers that make up the silicon die that lies beneath the epoxy. Hard drives designed to spin at 7200 rpm or more hardly seem a suitable spinning surface for a gentle lapping, but [electronupdate] just wanted the platter for its ultra-smooth, ultra-flat surface.
He removed the heads and replaced the original motor with a gear motor and controller to spin the platter at less than 5 rpm. A small holder for the decapped die was fashioned, and pinched between the platter hub and an idler. It gently rotates the die against the abrasive-covered platter as it slowly revolves. But the die wasn’t abrading evenly. He tried a number of different fixtures for the die, but never got to the degree of precision needed to see through the die layer by layer. We wonder if the weight of the die fixture is deflecting the platter a bit?
Failure is a great way to learn, if you can actually figure out where you went wrong. We look to the Hackaday community for some insight. Check out the video below and sound off in the comments if you’ve got any ideas.
Hard drive storage has gone through the roof in recent years. Rotating hard drives that can hold 16 terabytes of data are essentially available today, although pricey, and 12 terabyte drives are commonplace. For those who remember when a single terabyte was a lot of storage, the idea that you can now pick up a drive of that size for under $40 is amazing. Bear in mind, we are talking terabytes.
In 1994, that was an unimaginable amount of storage. Just a scant 24 years ago, though, you could get 90 gigabytes — 0.09 terabytes — if you didn’t mind buying an IBM mainframe and a RAMAC disk storage unit. You can see a promotional video digitized by Archive.org, below. Just keep in mind that IBM has a long history of calling disk drives DASD — an acronym for Direct Access Storage Device. You pronounce that “dazz-dee”, as you’ll hear in the video.
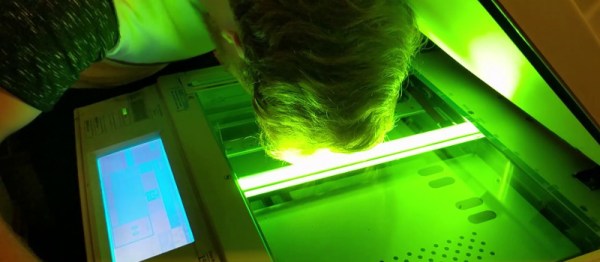
You’ll all remember my grand adventure in acquiring a photocopier. Well, it’s been a rollercoaster, I tell ya. While I still haven’t found a modification worthy enough to attempt, I have become increasingly frustrated. From time to time, I like to invite my friends and family over for dinner, and conversation naturally turns to things like the art on the walls, the fish in the aquarium, or perhaps the photocopier in the living room. Now, I dearly love to share my passions with others, so it’s pretty darned disappointing when I go to fire off a few copies only to have the machine fail to boot! It was time to tackle this problem once and for all.
When powered up, the photocopier would sit at a “Please Wait…” screen for a very long time, before eventually coughing up an error code — SC990 — and an instruction to call for service. A bunch of other messages would flash up as well; Address Book Data Error, Hard Drive Data Error, and so on. In the end I realized they all centered around data storage.
Pictured: the author, in his happy place, at peace with the copier.
Now, I’d already tried diving into the service menu once before, and selected the option to format the hard drive. That had led to the problem disappearing for a short period, but now it was back. No amount of mashing away at the keypad would work this time. The format commands simply returned “Failed” every time. What to do next? You guessed it, it was time for a teardown!
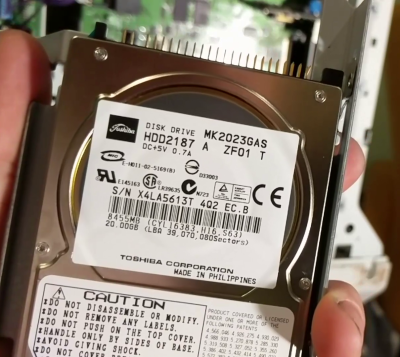
Thankfully, photocopiers are designed for easy servicing — someone’s paying for all those service calls. A few screws and large panels were simply popping off with ease; completely the opposite of working on cars. Spotting the hard drive was easy, it looked like some sort of laptop IDE unit. With only SATA laptops around the house to salvage parts from, I wasn’t able to come up with something to swap in.
A bit of research (and reading the label) taught me that the drive was a Toshiba MK2023GAS/HDD2187. Replacements were available on eBay, but if I waited two weeks I’d probably be wrist deep in some other abandoned equipment. It had to be sorted on the night. In the words of [AvE], if you can’t fix it… well, you know how it goes. I yanked the drive and, lo and behold – the copier booted straight up! Just to be sure I wasn’t hallucinating, I churned out a few copies, and other than the continued jamming on all-black pages, everything was fine. Literally all it took to get the copier to boot was to remove the ailing drive. Suffice to say, I was kind of dumbfounded.
The hard drive a.k.a. the villain of the piece.
I’m happy to chalk up the win, but I have to draw issue with Ricoh’s design here. The copier is clearly capable of operating perfectly well without a hard drive. It will give up its document server and address book abilities, but it will still make copies and print without a problem.
Yet, when the copier’s drive fails, the unit fails completely and refuses to work. This necessitates a service call for the average user to get anything at all happening again — causing much lost work and productivity. A better design in my eyes would have the copier notify users of the lost functionality due to the failed drive and the need to call service, but let them copy! Any IT administrator will know the value of a bodged work around that keeps the company limping along for the day versus having a room of forty agitated workers with nothing to do. It’s a shame Ricoh chose to have the photocopier shut down completely rather than valiantly fight on.
Feel free to chime in with your own stories of minor failures that caused total shutdowns in the comments. Video below the break.
We’re suckers for any project that’s nicely packaged, but an added bonus is when most of the components can be sourced cheaply and locally. Such is the case for this little laser light show, housed in electrical boxes from the local home center and built with stuff you probably have in your junk bin.
When we first came across [replayreb]’s write-up and saw that he used hard drives in its construction, we assumed he used head galvanometers to drive the mirrors. As it turns out, he used that approach in an earlier project, but this time around, the hard drive only donated its platters for use as low mass, first surface mirrors. And rather than driving the mirrors with galvos, he chose plain old brushed DC motors. These have the significant advantage of being cheap and a perfect fit for 3/4″ EMT set-screw connectors, designed to connect thin-wall conduit, also known as electromechanical tubing, to electrical boxes and panels. The motors are mounted to the back and side of the box so their axes are 90° from each other, and the mirrors are constrained by small cable ties and set at 45°. The motors are driven directly by the left and right channels of a small audio amp, wiggling enough to create a decent light show from the laser module.
We especially like the fact that these boxes are cheap enough that you can build three with different color lasers. In that case, an obvious next step would be bandpass filters to split the signal into bass, midrange, and treble for that retro-modern light organ effect. Or maybe figuring out what audio signals you’d need to make this box into a laser sky display would be a good idea too.
‘Boy, I wish the Raspberry Pi had a SATA port’. This is the plea that echoes through the Internet, and for once, the Internet is not wrong. A SATA port — or any connector to a big, dumb spinny disk — would be a great addition to the Raspberry Pi ecosystem.
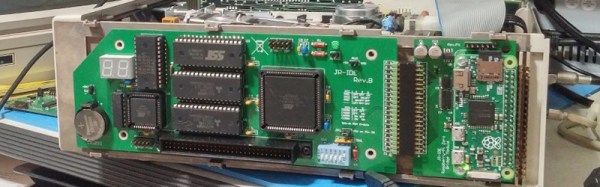
[AlanH]’s entry to the Hackaday Prize is the exact opposite of what everyone wants. The NetPi-IDE is a Parallel ATA IDE disk emulator that turns an inexpensive Raspi Zero into a big, dumb, unspinny hard drive. Drop this machine in your Windows 98 Starcraft battlestation, and you have a hard drive that you can ssh into.
As with any build involving a lot of data, bandwidth is important. The highest bandwidth interface on the Pi’s GPIO ports is the SPI interface. [AlanH] is hanging a Lattice MachXO2 FPGA off the SPI port and using that to emulate a disk. In the future, he’s going to move to the much more open Lattice iCE40HX, compatable with the Open Source IceStorm synthesis chain.
The feature set for this project includes proper IDE disk emulation with sizes ranging from 10 Megabytes to 8 Gigabytes tested so far. If you need anything bigger, you don’t need an IDE drive. A DOS redirector allows mounting any arbitrary directory to a DOS drive letter, a virtual network interface turns this project into The Cloud™, and a serial console is mapped to unused IDE registers, allowing any host system to login to the Pi without any external cables.
While it’s not what everyone wants in a Pi, this is an exceptionally cool project. PATA drives are getting old, and the systems supporting them are too. If you want to keep those retrocomputers running, we have to start planning now, and there’s no better way to do that than with cheap hardware and Open Source toolchains.
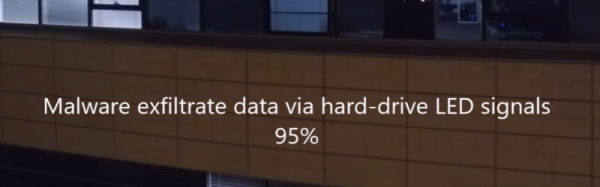
Researchers in the past have exfiltrated information through air gaps by blinking all sorts of lights from LEDs in keyboards to the main display itself. However, all of these methods all have one problem in common: they are extremely noticeable. If you worked in a high-security lab and your computer screen started to blink at a rapid pace, you might be a little concerned. But fret not, a group of researchers has found a new light to blink (PDF warning). Conveniently, this light blinks “randomly” even without the help of a virus: it’s the hard drive activity indication light.
All jokes aside, this is a massive improvement over previous methods in more ways than one. Since the hard drive light can be activated without kernel access, this exploit can be enacted without root access. Moreover, the group’s experiments show that “sensitive data can be successfully leaked from air-gapped computers via the HDD LED at a maximum bit rate of 4000 bit/s (bits per second), depending on the type of receiver and its distance from the transmitter.” Notably, this speed is “10 times faster than the existing optical covert channels for air-gapped computers.”
We weren’t born last night, and this is not the first time we’ve seen information transmission over air gaps. From cooling fans to practical uses, we’ve seen air gaps overcome. However, there are also plenty of “air gaps” that contain more copper than air, and require correspondingly less effort.
 For those not into the anatomy and physiology of semiconductors, getting a look at the inside of the chip can reveal valuable information needed to reverse engineer a device, or it can just scratch the itch of curiosity. Lapping (the gentle grinding away of material) is one way to see the layers that make up the silicon die that lies beneath the epoxy. Hard drives designed to spin at 7200 rpm or more hardly seem a suitable spinning surface for a gentle lapping, but [electronupdate] just wanted the platter for its ultra-smooth, ultra-flat surface.