Fire Up The 3D Printer And Build Yourself A Spiderbot

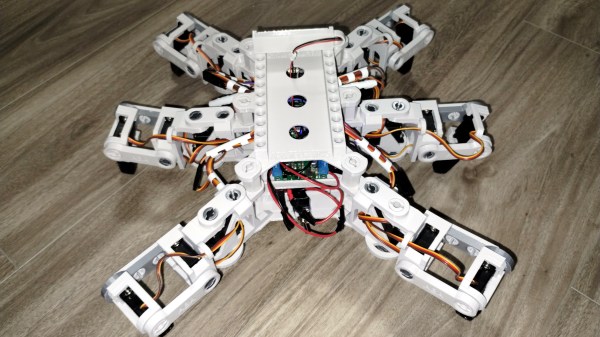
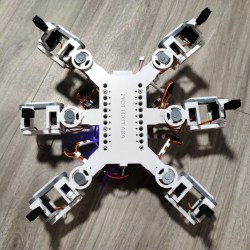
Robots are cool, so check out [Atlin Anderson]’s Spiderbot (video, embedded below) which can be made with 3D printed parts, hobby servos, and ESP32-CAM module for control and a first-person view. Looking for a new project? All of the design details are shared online if you’d like to make a hexapod of your own.

We like the effort [Atlin] put into minimizing hardware fasteners in the design of the 3D-printed parts, and aiming for a modular concept that leaves things open for expansion or modification. There’s plenty of room in the chassis for more hardware, with a convenient peg system for snap-fitting assemblies.

Control is done wirelessly via a mobile phone with an app created using the MIT App Inventor, a fantastic tool that is still going strong as a capable and accessible way to make an Android app.

As for the ESP32-CAM module that drives it all, it is a great piece of hardware with capabilities that are leveraged very nicely here. We’ve seen other projects make good use of it as well, from this 1/64 scale micro RC car to an oddball tripod camera robot.

Continue reading “Fire Up The 3D Printer And Build Yourself A Spiderbot”

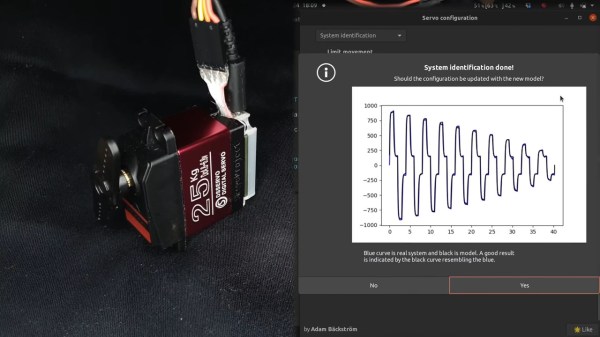
The modified servo being calibrated on the left half of the screen, with some graphs of its operation being shown on the right half.

Servo Surgery Teaches Us DIY Encoder Implants

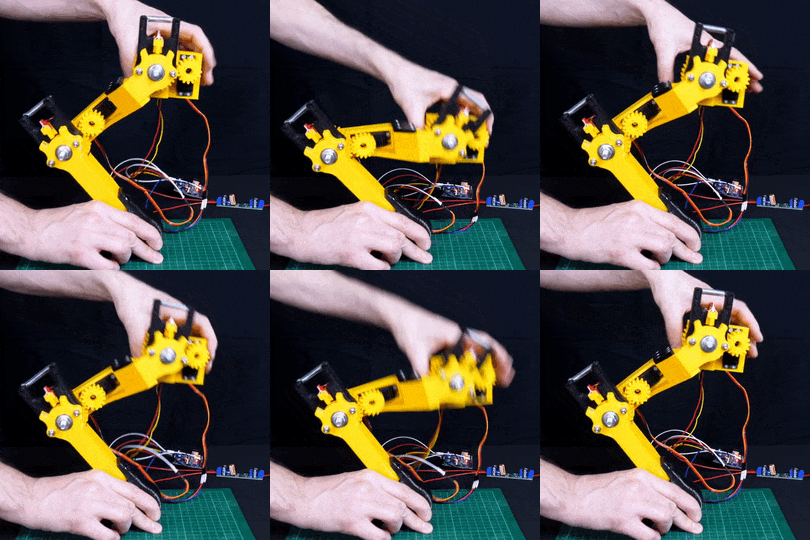
Today, we shall talk about how [Adam Bäckström] took a DS3225 servo and rebuilt it to improve its accuracy, then built a high-precision robot arm with those modified servos to show just how much of an improvement he’s got – up to 36 times better positional accuracy. If this brings a déjà vu feeling, that’s because we’ve covered his servo modifications before, but now, there’s more. In a year’s time since the last video came out, [Adam] has taken it to the next level, showing us how the modification is made, and how we ourselves can do it, in a newly released video embedded below.

After ordering replacement controller PCBs designed by [Adam] (assembled by your PCBA service of choice), you disassemble the servo, carefully setting the gearbox aside for now. Gutting the stock control board is the obvious next step, but from there, you don’t just drop the new PCB in – there’s more to getting a perfect servo than this, you have to add extra sensing, too. First, you have to print a spacer and a cover for the control board, as well as a new base for the motor. You also have to print (or perhaps, laser-cut) two flat encoder disks, one black and one white, the white one being eccentric. It only escalates from here!

Continue reading “Servo Surgery Teaches Us DIY Encoder Implants”

The Adorable Robot Spot, Now In Affordable Form

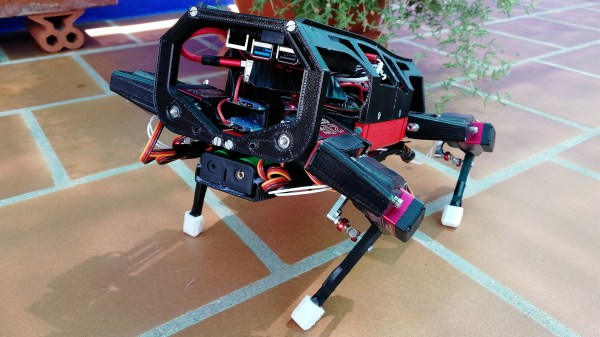
If you’ve been following the Boston Dynamics project Spot, you’ve seen its capabilities and how we’re starting to see it being used in public more since its official release last year. But in a true display of how hobbyist electronics have been evolving and catching up with the big companies over the past few years, [Miguel Ayuso Parrilla] shows us his own take on the walking robot with CHOP, one of the finalists in this year’s Hackaday Prize.

CHOP is a DIY quadruped robot that works much in the same way as Spot, although in a smaller form-factor and, perhaps most impressive of all, a bill of materials that can be all acquired for under $500. The entire project is open source, meaning that anyone can built their own version of it with off-the-shelf parts and some 3D printing. If you can’t get the hardware however, you can still play with the PyBullet simulation of the mechanics that were used during the debugging process.

Running the show are two main components, a Raspberry Pi 4B and an Arduino Mega. While the Mega interfaces with the servo controllers and provides filtering for sensors like the inertial measurement unit, the Pi takes all that data in and uses a series of Python scripts in order to determine the gait of the robot and which way the servos should move through an inverse kinematics model. To control the direction in which the body of the robot should accelerate, a Bluetooth remote controller sends commands to the Raspberry Pi.

We’re excited to see home-grown projects rise to this level of complexity, which would be mostly unheard of a few years ago in the maker scene, and only presented by large tech companies with tons of money to spend on research and development. There are other quadruped robots to inspire yourself on than Spot though, like this one with a spherical design and fold-out legs. Check this one in action after the break.

Continue reading “The Adorable Robot Spot, Now In Affordable Form”

ExoMy Is A Miniature European Mars Rover With A Friendly Face

Over the past few weeks, a new season of Mars fever kicked off with launches of three interplanetary missions. And since there’s a sizable overlap between fans of spaceflight and those of electronics and 3D printing, the European Space Agency released the ExoMy rover for those who want to experience a little bit of Mars from home.

ExoMy’s smiling face and cartoonish proportions are an adaptation of ESA’s Rosalind Franklin (formerly the ExoMars) rover which, if 2020 hadn’t turned out to be 2020, would have been on its way to Mars as well. While Rosalind Franklin must wait for the next Mars launch window, we can launch ExoMy missions to our homes now. Like the real ESA rover, ExoMy has a triple bogie suspension design distinctly different from the rocker-bogie design used by NASA JPL’s rover family. Steering all six wheels rather than just four, ExoMy has maneuvering chops visible in a short Instagram video clip (also embedded after the break).

ExoMy’s quoted price of admission is in the range of 250-500€. Perusing instructions posted on GitHub, we see an electronics nervous system built around a Raspberry Pi. Its published software stack is configured for human remote control, but as it is already running ROS (Robot Operating System), it should be an easy on-ramp for ExoMars builders with the ambition of adding autonomy.

ExoMy joins the ranks of open source rover designs available to hackers with 3D printing, electronics, and software skills. We recently covered a much larger rover project modeled after Curiosity. Two years ago NASA JPL released an open source rover of their own targeting educators, inspiring this writer’s own Sawppy rover project, which is in turn just one of many projects tagged “Rover” on Hackaday.io. Hackers love rovers!


Compliant Quadruped Legs Using Servos

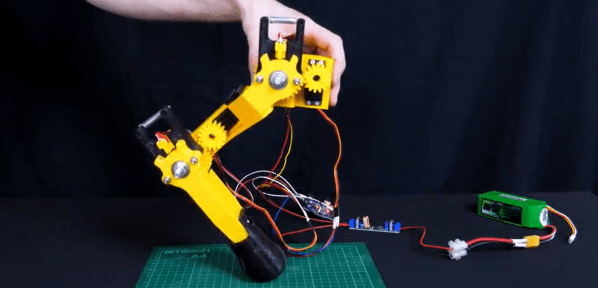
Walking robots that move smoothly are tricky to build and usually involve some sort of compliant leg mechanism — a robot limb that can rebound like natural physiology for much better movement than what a stiff machine can accomplish. In his everlasting quest to build a real working robot dog, [James Bruton] is working on an affordable and accessible Mini Robot Dog, starting with the compliant leg mechanism.

The 3D printed leg mechanism has two joints (hip and knee), with an RC servo to drive each. To make the joints compliant, both are spring-loaded to absorb external forces, and the deflection is sensed by a hall effect sensor with moving magnets on each side. Using the inputs from the hall effect sensor, the servo can follow the deflection and return to its original position smoothly after the force dissipates. This is a simple technique but it shows a lot of promise. See the video after the break.

A project can sometimes develop a life of its own, or in the case of [James]’s OpenDog, spawn experimentally evolving offspring. This is number four, and it’s designed  to be a platform for learning how to make a quadruped walk properly, and to be simple and cheap enough for others to build. We’re looking forward to seeing how it turns out.

If you missed it, also check out this robot’s weird sibling, self-balancing Sonic.

Continue reading “Compliant Quadruped Legs Using Servos”

New Part Day: Lynxmotion Smart Servos

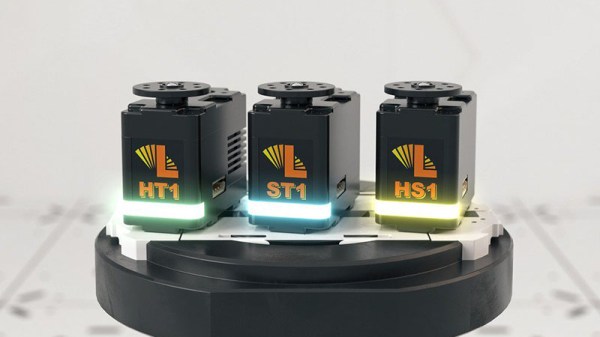
Anyone who shops for robotics kits would have come across a few designed by Lynxmotion. They’ve been helping people build robots since 1995, from robot arm kits to hexapod chassis and everything in between. We would expect these people know their motors, so when they launched their own line of servo motors called Lynxmotion Smart Servos (LSS), it is worth spending a bit of time to look over what they offer.

While these new devices have a PWM mode compatible with classic remote control servos, unleashing their full power requires bidirectional communication over a serial bus. We’ve previously given an overview of three serial bus servos already on the market for comparison. A quick look at the $68-$100 price tags listed on Lynxmotion’s parent company RobotShop made it clear they do not intend to compete on price, so what interesting features do these new kids on the block have?

Digging into product documentation found some great details. Acceleration and deceleration rates are adjustable, which can help with smoother robot movement. There’s also an adjustable level of “stiffness” that adds some “give” (compliance) so a robot won’t have to be as stiff as… well, a robot!

Mechanically, the most interesting internal component is the magnetic position sensor. They are far more precise than potentiometers, but more importantly, they allow positioning anywhere within full 360 degrees. Many other serial bus servos are constrained to positions within an arc less than 360 degrees leaving a blind spot.

An interesting quirk of the LSS offerings is that the serial communication protocol uses human-readable text characters, so sending a number 255 means transmitting a three byte string ‘2’, ‘5’, and ‘5’ instead of single byte 0xFF. This would make debugging our custom robot code far easier, at the cost of reduced bandwidth efficiency and loss of checksum for detecting communication errors. It’s a trade-off that some robot builders would be happy to make, but others might not.

Externally, these servos have bountiful mounting options including some we didn’t know to ask for. Historically Lynxmotion kits have used a wide variety of servo mounting brackets, so they are motivated to make mechanical integration easy. The most novel offering is the ability to bolt external gears to the servo body. A set of 1:3 gears allow for gearing the servo up or down, or you can use a set of 1:1 gears for a compact gripper.

As you’d expect of servos in this price range, they all have metal gears, but they also have the ability to power the motor directly from a battery pack (a 3 cell lithium polymer is recommended). There are additional features, like an RGB LED for visual feedback, which we didn’t cover here so dig into the documentation for more. We look forward to seeing how these interesting little actuators perform in future robotics projects.
Wrangling RC Servos Becoming A Hassle? Try Serial Bus Servos!

When we need actuators for a project, a servo from the remote-control hobby world is a popular solution. Though as the number of servos go up, keeping their wires neat and managing their control signals become a challenge. Once we start running more servos than we have fingers and toes, it’s worth considering the serial bus variety. Today we’ll go over what they are and examine three products on the market.

Continue reading “Wrangling RC Servos Becoming A Hassle? Try Serial Bus Servos!”