Review: Hands On With The Swarm Satellite Network Eval Kit

If you have devices out in the field, you probably want to connect with them. There was a time when that was hard to do, requiring telephone wires or specialized radio gear. Now cellular data is prevalent, but even cellular isn’t everywhere. If you have the cash, you can pay a number of satellite companies to carry your data, but that’s generally pricey and has its own challenges.

The age of satellite constellations is changing that. Of course everyone by now has heard of Starlink which is offering satellite internet via numerous satellites that are much smaller than traditional telecom satellites. But they’re not the only came in town.

A company called Swarm has put up a constellation of 1/4U cube satellites in low orbits. They offer a ground station that uses an omni antenna and a subscription access program for small amounts of data. They sent us a unit to review, and while I haven’t used the system in a real project yet, the kit was pretty impressive.

About Swarm

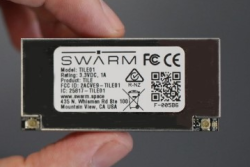
Swarm tile device
The Swarm Tile is made to mount on a PCB

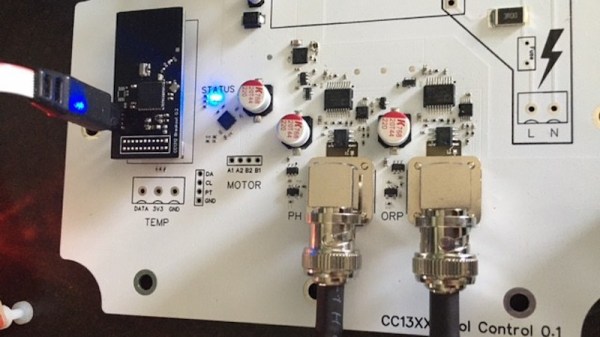
The Swarm “tile” is a tiny radio that can talk bi-directionally with small satellites in low Earth orbit. The little unit is made to mount on a PCB, can control its power consumption, and talks to your system via a standard 3.3V UART connection. It does, however, require a small antenna and maybe even a smaller antenna for its GPS module. Small, in this case, is about a mid-size handy talkie antenna. There is a half-wave antenna that doesn’t need a ground plane and a shorter antenna that does need a ground plane.

Continue reading “Review: Hands On With The Swarm Satellite Network Eval Kit”

Samsung Shuttering Original SmartThings Hubs

Samsung is causing much angst among its SmartThings customers by shutting down support for its original SmartThings home automation hub as of the end of June. These are network-connected home automation routers providing Zigbee and Z-Wave connectivity to your sensors and actuators. It’s not entirely unreasonable for manufacturers to replace aging hardware with new models. But in this case the original hubs, otherwise fully functional and up to the task, have intentionally been bricked.

Users were offered a chance to upgrade to a newer version of the hub at a discount. But the hardware isn’t being made by Samsung anymore, after they redirected their SmartThings group to focus entirely on software. With this new dedication to software, you’d be forgiven for thinking the team implemented a seamless transition plan for its loyal user base — customers who supported and built up a thriving community since the young Colorado-based SmartThings company bootstrapped itself by a successful Kickstarter campaign in 2012. Instead, Samsung seems to leave many of those users in the lurch.

There is no upgrade path for switching to a new hub, meaning that the user has to manually reconnect each sensor in the house which often involves a cryptic sequence of button presses and flashing lights (the modern equivalent of setting the time on your VCR). Soon after you re-pair all your devices, you will discover that the level of software customization and tools that you’ve relied upon for home automation has, or is about to, disappear. They’ve replaced the original SmartThings app with a new in-house app, which by all accounts significantly dumbs down the features and isn’t being well-received by the community. Another very popular tool called Groovy IDE, which allowed users to add support for third-party devices and complex automation tasks, is about to be discontinued, as well.

Continue reading “Samsung Shuttering Original SmartThings Hubs”

Messaging On Signal Via The ESP32

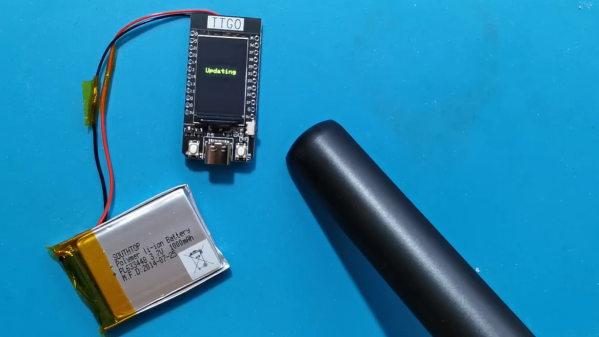
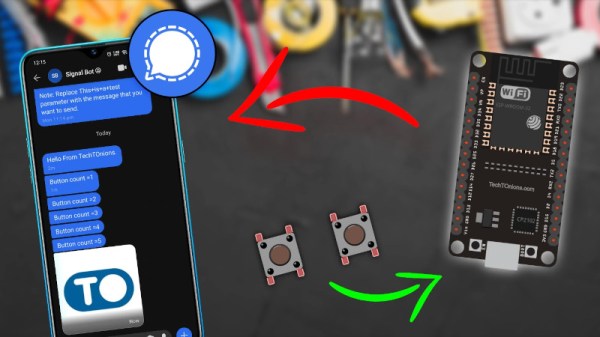
Signal is a popular encrypted messaging app, typically used on smartphones. The cross-platform service can now be used via the ESP32, however, thanks to the work of [Dharmik] and [Tirth].

The demonstration is simple, using an ESP32 microcontroller fitted with two push buttons. When one button is pushed, it increments a counter and sends a Signal message noting the current count. The other button sends an image as a Signal message.

The project relies on a Signal bot to deliver an API key that enables the project to work. Messages are sent by making HTTP requests with this key to the CallMeBot.com server. With the API key as authentication, users can only send messages to their own number, keeping the system safe from spammers.

While the demonstration is basic, it merely serves to illustrate how the project works. The aim was to allow home automation and other Internet of Things systems to send Signal messages, and through this method, it’s now possible. The highly security conscious likely won’t want to rely on a random third party server, but for those tinkering around, it may not be such a big deal.

The Internet of Things has a long history with self-messaging projects; we featured the Twittering Toaster back in 2008! Video after the break.

Continue reading “Messaging On Signal Via The ESP32”

Replacing An ESP8266 Clone With The Real Thing

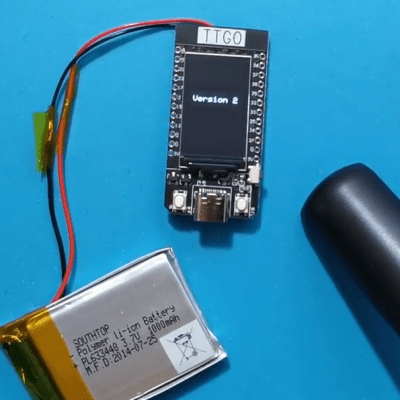
The first time [konbaasiang] ordered some ceiling LED lights from Tuya, he was pleased to find they contained an ESP-12F that could easily be flashed with a different firmware. So when he ordered 30 more of them at a cost of nearly $900 USD, you can understand his frustration to find that the popular WiFi-enabled microcontroller had been swapped out for a pin-compatible clone that Tuya developed called the WB3L.

Some people would have just chalked this one up to bad luck and used the Tuya-supplied software to control their new lights, but not [konbaasiang]. Since the new chip was outwardly identical to the ESP8266, he decided to take the nuclear option and replace them with the genuine article. With a comfortable spot to work from and a nice microscope, he started on his desoldering journey.

Now it would have been nice if he could have just dropped in a real ESP-12F and called it a day, but naturally, it ended up being a bit more complex than that. The WB3L apparently doesn’t need external pull up and pull down resistors, but [konbaasiang] needed them for the swap to work. He could have come up with some kind of custom adapter PCB, but to keep things simple he decided to run a pair of through hole resistors across the top of the ESP-12F for GPIO 1/2, and use a gingerly placed SMD resistor to hold down GPIO 15.

[konbaasiang] reports that all 30 of the lights survived the transplant and are now running his own  homebrew firmware. While this story had a happy ending, it’s still a cautionary tale. With a growing trend towards replacing the venerable ESP8266 with cheaper and less hacker-friendly silicon, buying IoT hardware with the intent to replace its firmware is likely to get riskier in the near future.

Hackaday Links Column Banner

Hackaday Links: April 11, 2021

Bad news, Martian helicopter fans: Ingenuity, the autonomous helicopter that Perseverance birthed onto the Martian surface a few days ago, will not be taking the first powered, controlled flight on another planet today as planned. We’re working on a full story so we’ll leave the gory details for that, but the short version is that while the helicopter was undergoing a full-speed rotor test, a watchdog timer monitoring the transition between pre-flight and flight modes in the controller tripped. The Ingenuity operations team is going over the full telemetry and will reschedule the rotor test; as a result, the first flight will occur no earlier than Wednesday, April 14. We’ll be sure to keep you posted.

Anyone who has ever been near a refinery or even a sewage treatment plant will have no doubt spotted flares of waste gas being burned off. It can be pretty spectacular, like an Olympic torch, but it also always struck us as spectacularly wasteful. Aside from the emissions, it always seemed like you could at least try to harness some of the energy in the waste gasses. But apparently the numbers just never work out in favor of tapping this source of energy, or at least that was the case until the proper buzzword concentration in the effluent was reached. With the soaring value of Bitcoin, and the fact that the network now consumes something like 80-TWh a year, building portable mining rigs into shipping containers that can be plugged into gas flaring stacks at refineries is now being looked at seriously. While we like the idea of not wasting a resource, we have our doubts about this; if it’s not profitable to tap into the waste gas stream to produce electricity now, what does tapping it to directly mine Bitcoin really add to the equation?

What would you do if you discovered that your new clothes dryer was responsible for a gigabyte or more of traffic on your internet connection every day? We suppose in this IoT world, such things are to be expected, but a gig a day seems overly chatty for a dryer. The user who reported this over on the r/smarthome subreddit blocked the dryer at the router, which was probably about the only realistic option short of taking a Dremel to the WiFi section of the dryer’s control board. The owner is in contact with manufacturer LG to see if this perhaps represents an error condition; we’d actually love to see a Wireshark dump of the data to see what the garrulous appliance is on about.

As often happens in our wanderings of the interwebz to find the very freshest of hacks for you, we fell down yet another rabbit hole that we thought we’d share. It’s not exactly a secret that there’s a large number of “Star Trek” fans in this community, and that for some of us, the way the various manifestations of the series brought the science and technology of space travel to life kick-started our hardware hacking lives. So when we found this article about a company building replica Tricorders from the original series, we followed along with great interest. What we found fascinating was not so much the potential to buy an exact replica of the TOS Tricorder — although that’s pretty cool — but the deep dive into how they captured data from one of the few remaining screen-used props, as well as how the Tricorder came to be.

And finally, what do you do if you have 3,281 drones lying around? Obviously, you create a light show to advertise the launch of a luxury car brand in China. At least that’s what Genesis, the luxury brand of carmaker Hyundai, did last week. The display, which looks like it consisted mostly of the brand’s logo whizzing about over a cityscape, is pretty impressive, and apparently set the world record for such things, beating out the previous attempt of 3,051 UAVs. Of course, all the coverage we can find on these displays concentrates on the eye-candy and the blaring horns of the soundtrack and gives short shrift to the technical aspects, which would really be interesting to dive into. How are these drones networked? How do they deal with latency? Are they just creating a volumetric display with the drones and turning lights on and off, or are they actually moving drones around to animate the displays? If anyone knows how these things work, we’d love to learn more, and perhaps even do a feature article.

Orphaned IoT Sleep Tracker Resurrected As An Air Quality Monitor

If you have a Hello Sense sleep tracking device lying around somewhere in your drawer of discards, it can be brought back to life in a new avatar. Just follow [Alexander Gee]’s instructions to resurrect the Hello Sense as an IoT air quality data-logger.

In 2014, startup “Hello” introduced the Sense, an IoT sleep tracking device with a host of embedded sensors, all wrapped up in a slick, injection molded spherical enclosure. The device was quite nice, and by 2015, they had managed to raise $21M in funding. But their business model didn’t seem sustainable, and in 2017, Hello shut shop. Leaving all the Sense devices orphaned, sitting dormant in beautifully designed enclosures with no home to dial back to.

The original Sense included six sensors: illumination, humidity, temperature, sound, dust / particulate matter on the main device, and motion sensing via a separate Bluetooth dongle called the Pill. [Alexander] was interested in air quality measurements, so only needed to get data from the humidity/temperature and dust sensors. Thankfully for [Alexander], a detailed Hello Sense Teardown by [Lindsay Williams] was useful in getting started.

The hardware consisted of four separate PCB’s — power conditioning, LED ring, processor, and sensor board. This ensured that everything could be fit inside the orb shaped enclosure. Getting rid of the LED ring and processor board made space for a new NodeMCU ESP8266 brain which could be hooked up to the sensors. Connecting the NodeMCU to the I2C interface of the humidity/temperature sensor required some bodge wire artistry. Interfacing the PM sensor was a bit more easier since it already had a dedicated cable connected to the original processor board which could be reconnected to the new processor board. The NodeMCU board runs a simple Arduino sketch, available on his Git repo, to gather data and push it online.

For the online data display dashboard, [Alexander] found a nice solution by [Nilhcem] for home monitoring using MQTT, InfluxDB, and Grafana. It could be deployed via a docker compose file and have it up and running quickly. Unfortunately, such projects don’t usually succeed without causing some heartburn, so [Alexander] has got you covered with a bunch of troubleshooting tips and suggestions should you get entangled.

If you have an old Sense device lying around, then this would be a good way to put it some use. But If you’d rather build an air-quality monitor from scratch, then try “Building a Full-Fat Air-Quality Monitor” or “An Air-quality Monitor That Leverages the Cloud“.

Open Source Electric Vehicle Charging

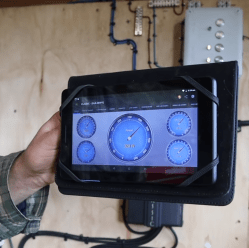
Electric vehicles are becoming more and more common on the road, but when they’re parked in the driveway or garage there are still some kinks to work out when getting them charged up. Sure, there are plenty of charging stations on the market, but they all have different features, capabilities, and even ports, so to really make sure that full control is maintained over charging a car’s batteries it might be necessary to reach into the parts bin and pull out a trusty Arduino.

This project comes to us from [Sebastian] who needed this level of control over charging his Leaf, and who also has the skills to implement it from the large high voltage switching contactors to the software running its network connectivity and web app. This charging station has every available feature, too. It can tell the car to charge at different rates, and can restrict it to charging at different times (if energy is cheaper at night, for example). It is able to monitor the car’s charge state and other information over the communications bus to the vehicle, and even has a front-end web app for monitoring and controlling the device.

The project is based around an Arduino Nano 33 IoT with all of the code available on the project’s GitHub page. While we would advise using extreme caution when dealing with mains voltage and when interfacing with a high-ticket item like an EV, at first blush the build looks like it has crossed all its Ts and might even make a good prototype for a production unit in the future. If you don’t need all of the features that this charging station has, though, you can always hack the car itself to add some more advanced charging features.

Continue reading “Open Source Electric Vehicle Charging”