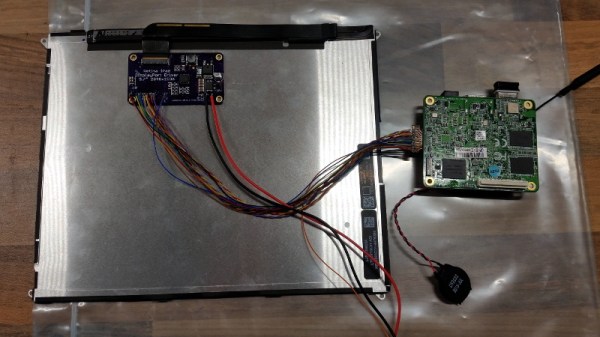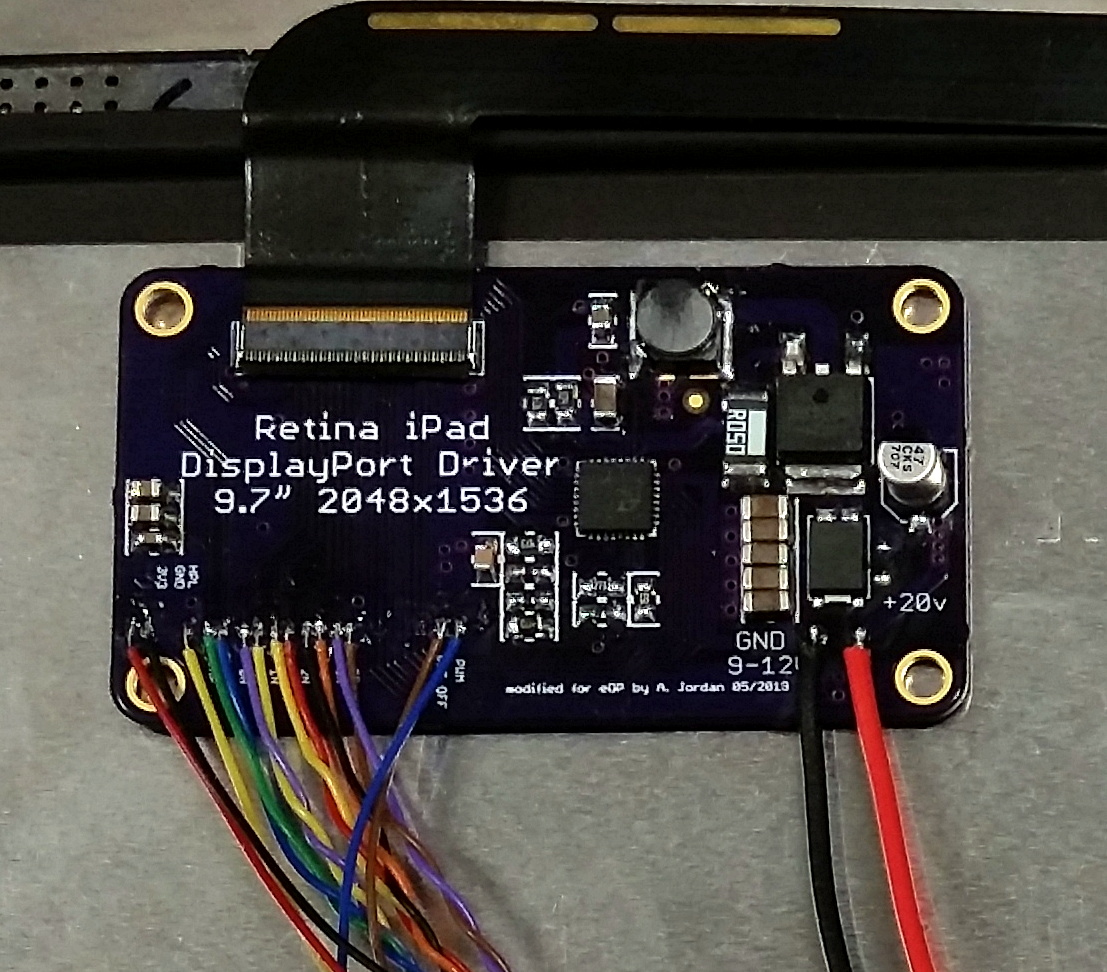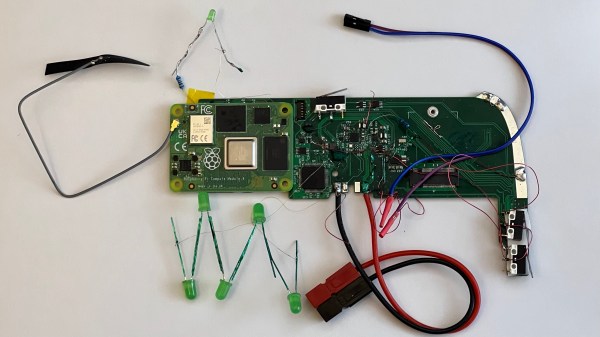
There’s no shortage of nicely built tablets out there, but unfortunately many of them are powered by what are by now severely outdated motherboards. Since manufacturers releasing replacement motherboards for their old hardware doesn’t look like its likely to be common practice anytime soon, the community will have to take things into their own hands. This is where [Evan]’s project comes in — designing a Raspberry Pi CM4-powered motherboard for the original iPad. It aims to have support for everything you’d expect: display, touchscreen, audio, WiFi, Bluetooth, and even the dock port. Plus it gives you way more computing power to make use of it all.
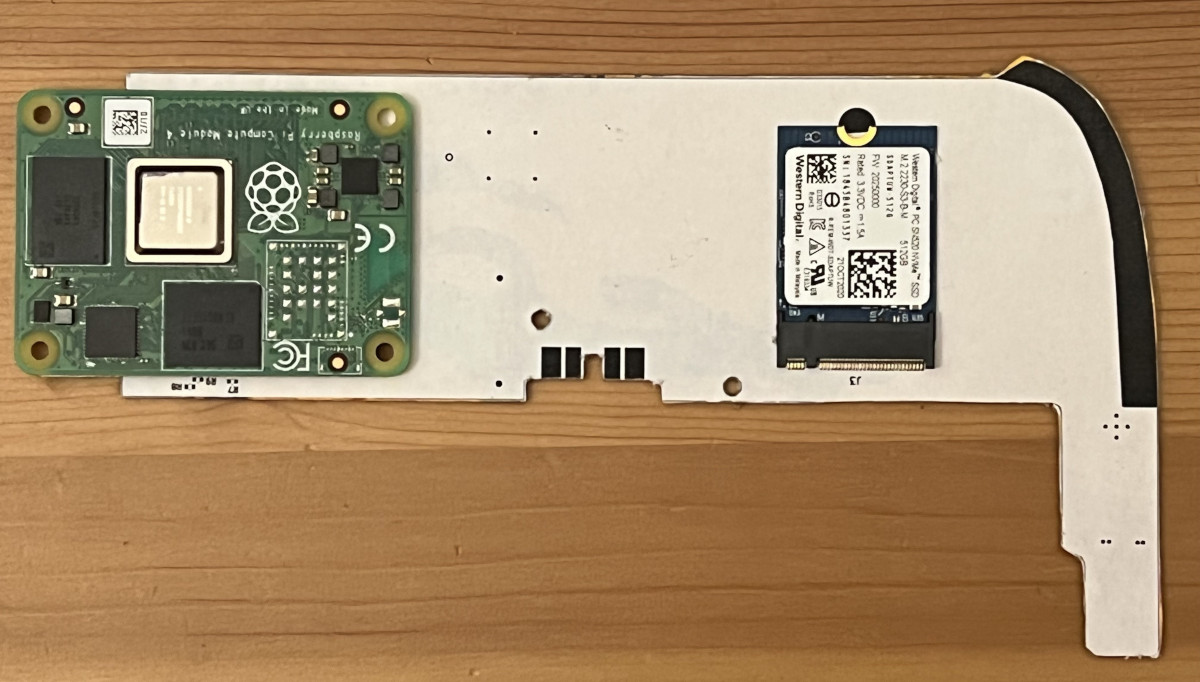
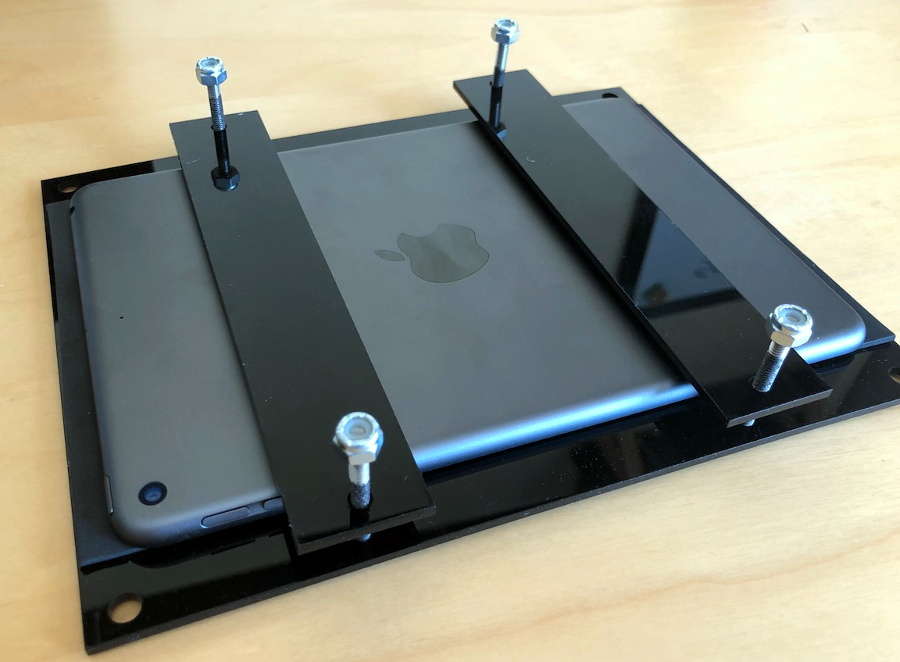
The original iPad got a lot of things right, a factor definitely contributing to its success back when it was released. [Evan]’s high-effort retrofit works with the iPad’s plentiful good parts, like its solid shell, tailored lithium-ion battery, eye-friendly LCD, and reliable capacitive touchscreen. You’d have to fit the new motherboard inside the space available after these parts all come together, and [Evan] has shaped his PCBs to do exactly that – with room for CM4, and the numerous ICs he’s added so as to leave no function un-implemented.
This project has been underway for over a year, and currently, there’s fourteen information-dense worklogs telling this retrofit’s story. Reverse-engineering the capacitive touchscreen and the LCD, making breakouts for all the custom connectors, integrating a custom audio codec, debugging device tree problems, unconventional ways to access QFN pins left unconnected on accident, and the extensive power management design journey. [Evan] has a lot to teach for anyone looking to bring their old tablet up to date!
The hardware files are open-source, paving the way for others to reuse parts for their own retrofits, and we absolutely would like to see more rebuilds like this one. This project is part of the Hack it Back round of the 2022 Hackaday Prize, and looks like a perfect fit to us. If you were looking for an excuse to start a similar project, now is the time.