A Macro Keyboard In A Micro Package

Remember back in the early-to-mid 2000s when pretty much every cheap USB keyboard you could find started including an abundance of media keys in its layout? Nowadays, especially if you have a customized or reduced-sized mechanical keyboard, those are nowhere to be seen. Whenever our modern selves need those extra keys, we have to turn to external peripherals, and [Gary’s] Knobo is one that looks like it could’ve come straight out of a fancy retail package.

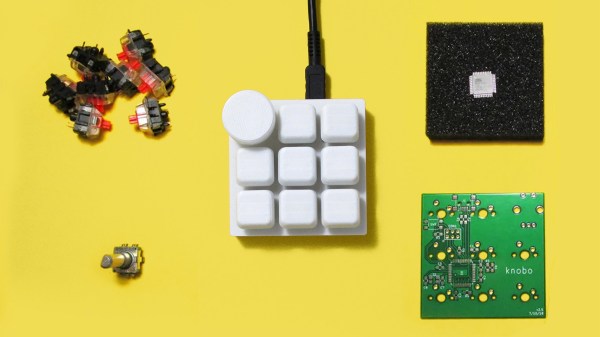
The Knobo is a small macro keypad with 8 mechanical Cherry-style keys and a clickable rotary encoder knob as its main feature. Each key and knob gesture can be customized to any macro, and with five gestures possible with the knob, that gives you a total of thirteen inputs. On top of that, the build and presentation look so sleek and clean we’d swear this was a product straight off of Teenage Engineering’s money-printing machine.

The actions you can do with those inputs range from simple media controls with a volume knob all the way to shortcuts to make a Photoshop artist’s life easier. Right now you can only reprogram the Knobo’s Arduino-based firmware with an In-Circuit Serial Programmer to change what the inputs do, but [Gary] is currently working on configuration software so that users without any programming knowledge will be able to customize it too.

Knobs are just one of those things that everyone wants to use to control their computers, much like giant red buttons. Alternative input devices can range from accessibility-designed to just downright playful. Whatever the inspiration is for them, it’s always nice to see the creativity of these projects.

Continue reading “A Macro Keyboard In A Micro Package”

Cloning Knobs For Vintage Testing Equipment

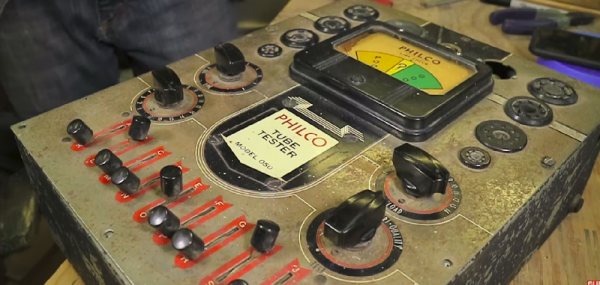
Knobs! Shiny candy-colored knobs! The last stand of skeuomorphism is smart light switches! Everyone loves knobs, but when you’re dealing with vintage equipment with a missing knob, the odds of replacing it are slim to none. That’s what happened to [Wesley Treat] when he picked up a vintage Philco tube tester. The tester looked great, but a single knob for a rotary switch was missing. What to do? Clone some knobs! You only need some resin and a little bit of silicone.

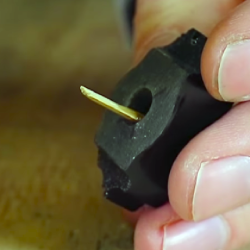
The process of copying little bits of plastic or bakelite is fairly standard and well-tread territory. Go to Michaels or Hobby Lobby, grab some silicone and resin, make a box, put your parts down, cover them in silicone, remove the parts, then put resin in. For simple parts, and parts with flat bottoms like knobs, this works great. However, there’s something weird about the knob on this old Philco tube tester. Firstly, it doesn’t fit a standard 1/4″ shaft — it’s a bit bigger. There’s also no set screw. Instead, this knob has a stamped spring aligning it with the flat part of the D-shaft in this rotary switch. This means a copy of this knob wouldn’t be useful to anyone else, and that no other knob would work with this tube tester.

However, a bit of clever engineering would make a copy of this knob fit the existing switch. Once the resin was cured, [Wesley] drilled out the hole, then sanded a dowel down to fit into the flat of the D-shaft. It took a little kergiggering, but the knob eventually fit onto one of the rotary switches. Not bad for a few bucks in silicone and resin.

You can check out the entire build process below.

Continue reading “Cloning Knobs For Vintage Testing Equipment”

Indexing Chuck Not Required

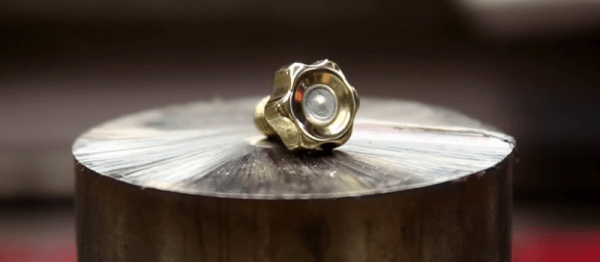
Becoming accomplished with a lathe is a powerful skillset, but it’s only half of the journey. Being clever comes later, and it’s the second part of the course. Patience is in there somewhere too, but let’s focus on being clever. [TimNummy] wants a knobbed bolt with critical parameters, so he makes his own. After the break, there is a sixty-second summary of the linked video.

Making stock hardware is a beginner’s tasks, so custom hardware requires ingenuity or expensive machinery. Adding finger notches to a bolthead is arbitrary with an indexing chuck, but one isn’t available. Instead, hex stock becomes a jig, and the flat sides are utilized to hold the workpiece at six intermittent angles. We can’t argue with the results which look like a part that would cost a pretty penny.

Using material found in the workshop is what being clever is all about. Hex brass stock comes with tight tolerances on the sides and angles so why not take advantage of that?

[TimNummy] can be seen on HaD for his Jeep dome light hack and an over-engineered mailbox flag. Did you miss [Quinn Dunki]’s piece on bootstrapping precision machine tools? Go check that out!

Continue reading “Indexing Chuck Not Required”

Making A Shifter Knob From Old Skateboards

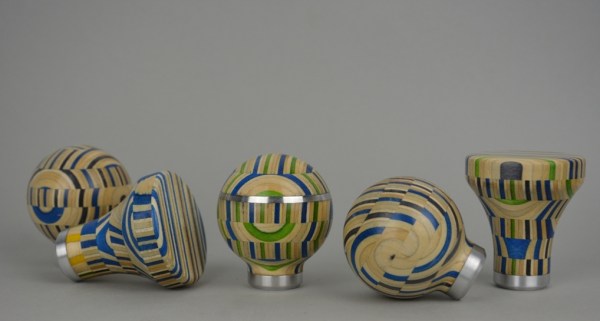
Do you have a car? Does that car have a manual transmission? Do you want to beautify your shifter knob, while simultaneously gaining mad street cred, yo? Well, you’re in luck, because all of that can be done for the low, low price of a couple old skateboard decks, a lathe, and a lot of glue.

This project, from [basiltab] illustrates how you can use old skateboard decks to create really cool looking custom shifter knobs. The process starts with cutting the decks up into uniform strips, which are then glued and clamped to form small planks. Sections of the decks were alternated, to create a visually interesting pattern. The planks are then sanded so that they’re smooth and flat, and then glued up in a jig to form blocks with a threaded aluminum insert in the center. Optionally, aluminum can be used for some of the layers to add a little flair (2-part epoxy was used in place of glue for the aluminum).

After the glue has dried, the blocks can then be turned on a lathe to create the desired shape of the knob. As you can see, the results are pretty darn nifty. And, they certainly have a little more artistic credibility than the giant acrylic shifter knobs you normally find at your local auto parts store. Don’t worry, if you thought this article was about shift registers, we’ve got you covered there too.

Simple Machining Process Repairs Broken Control Knob

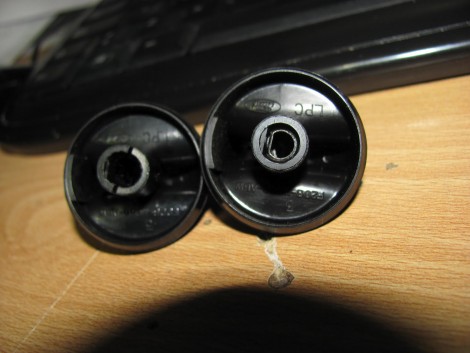
[Francisco] is helping his mother with a repair to the headlight knob on her Ford Ranger. Above you can see the broken knob on the left, and what it is supposed to look like on the right (taken from [Francisco’s] own vehicle for reference). We’ve encountered split shafts on plastic knobs before and decided it was not something that could be fixed. But he didn’t give up so easily. He mentions that you can purchase a replacement for a few bucks, but he has the means to repair the knob by machining a metal bushing.

The idea is that you mill a metal ring whose inner diameter matches what the outer diameter of the plastic shaft should be. By inserting the broken knob in the ring, the plastic is held tightly together as if it had never broken. In the video after the break [Francisco] uses a metal pencil body from his junk box and a mini-lathe to cut the bushing to length, and mill the inner diameter to his specifications.

He talks about the difficulty of getting replacement parts in Chile, where he lives. But we think this kind of thrift is a great example for all hackers. If you’ve got the tools why not use them? And if you don’t have them, here’s a great excuse to procure them!

Continue reading “Simple Machining Process Repairs Broken Control Knob”

SenseSurface: Custom Inputs On Your Lcd Screen


[Lindsay Williams] has come up a novel way of constructing custom physical inputs for your programs. SenseSurface is a viable alternative to building a new interface for each application. Simply place the dials, buttons, and sliders on your screen wherever you want them.

A sensor board, placed behind the display, picks up the signals from the inputs. The only limitation to the number of inputs available is the size of your screen. Inputs are held on magnetically, and have a low friction backing to avoid scratching or gouging your screen.

Continue reading “SenseSurface: Custom Inputs On Your Lcd Screen”