A Tiny LED Matrix Is Better With Friends

When we last heard from [lixielabs] he was building Nixie tube replacements out of etched acrylic and LEDs. Well he’s moved forward a few decades to bring us the Pixie, a chainable, addressable backpack for tiny LED matrix displays.
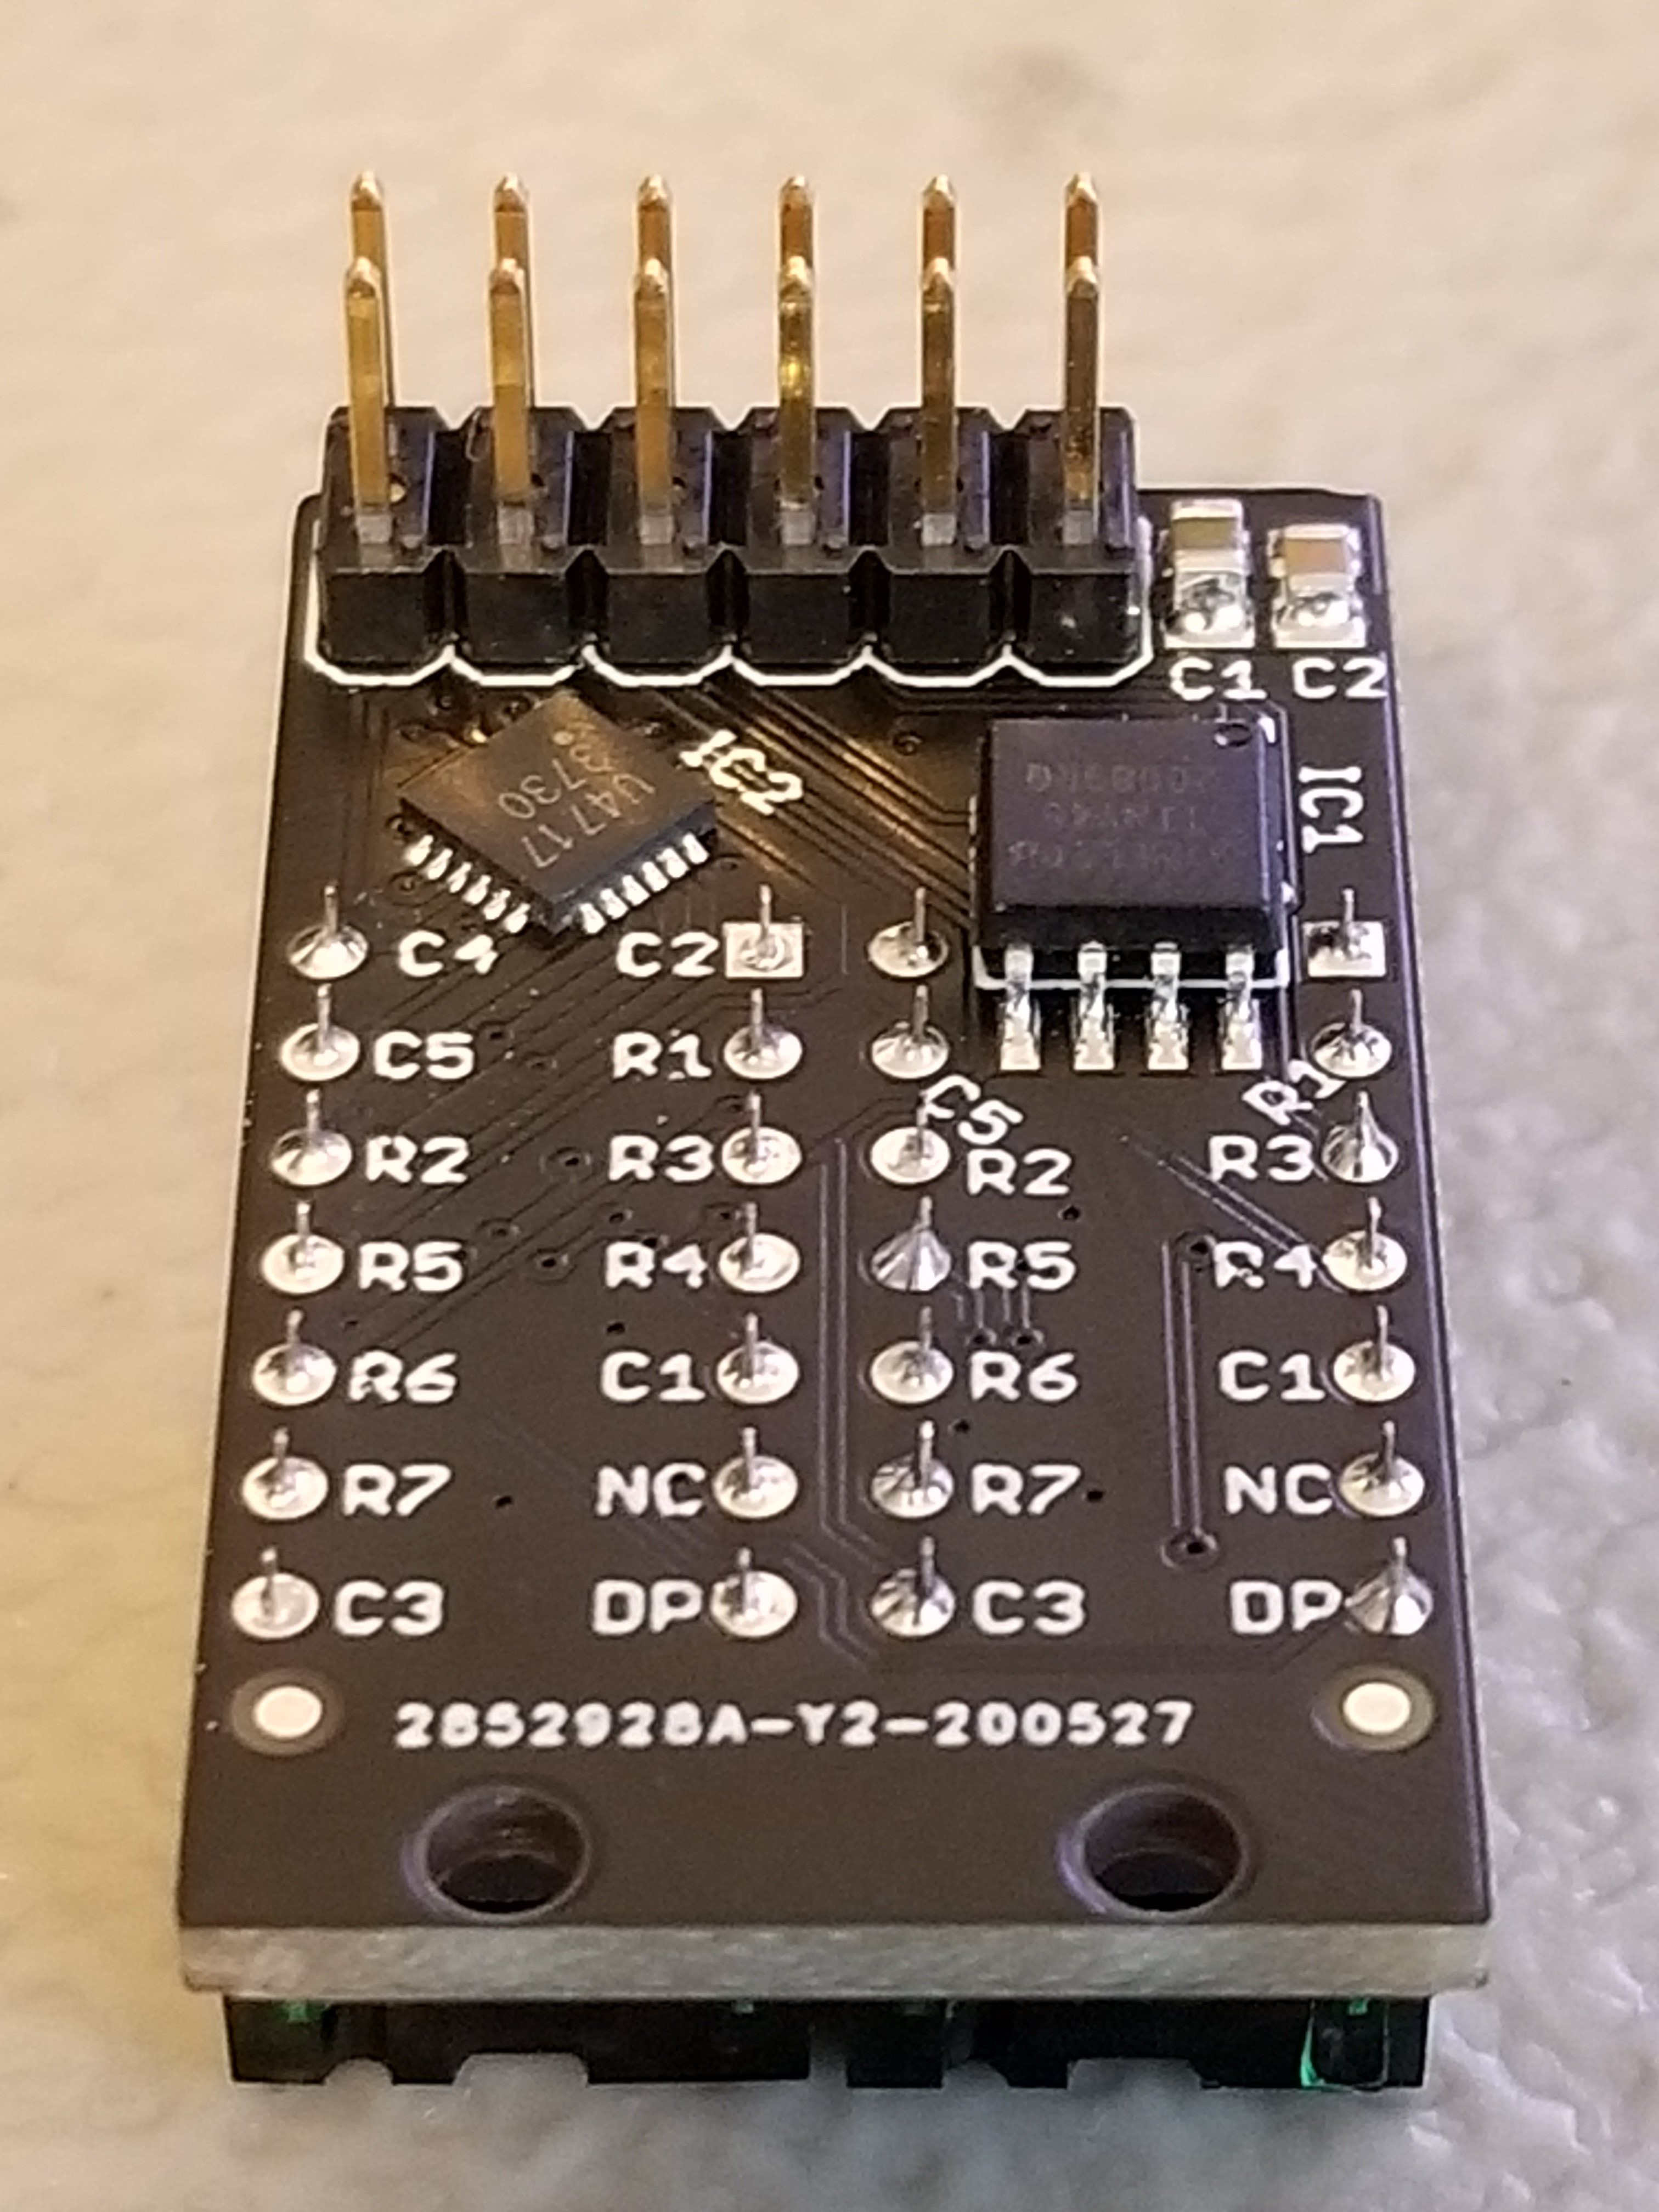
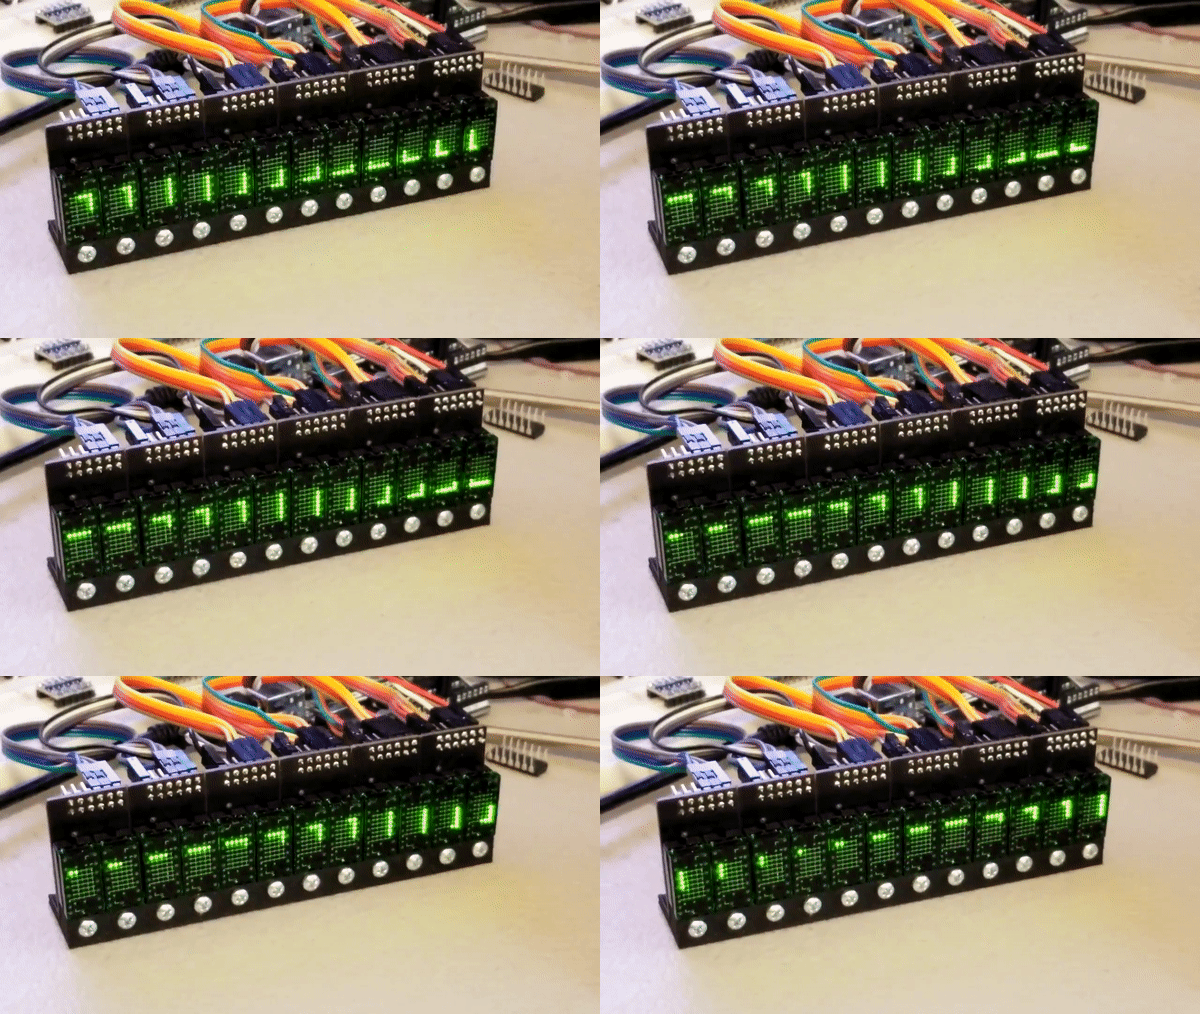
Each Pixie module is designed to host two gorgeous little Lite-On LTP-305G/HR 5×7 LED dot matrix displays, which we suspect have been impulse purchases in many a shopping cart. Along with the displays there is a small matrix controller and an ATTINY45 to expose a friendly electrical interface. Each module is designed to be mounted edge to edge and daisy chained out to 12 or more (with two displays each) for a flexible display any size you need. But to address the entire array only two control pins are required (data and clock).

[lixielabs] has done the legwork to make using those pins as easy as possible. He is careful to point out the importance of a good SDK and provides handy Arduino libraries for common microcontrollers and a reference implementation for the Raspberry Pi that should be easy to crib from to support new platforms. To go with that library support is superb documentation in the form of a datasheet (complete with dimensions and schematic!) and well stocked GitHub repo with examples and more.

To get a sense of their graphical capabilities, check out a video of 6 Pixie’s acting as a VU meter after the break. The Pixie looks like what you get when a hacker gets frustrated at reinventing LED dot matrix control for every project and decided to solve it once and for all. The design is clean, well documented, and extremely functional. We’re excited to see what comes next! Continue reading “A Tiny LED Matrix Is Better With Friends”
Status Display Lets Them Know You Can’t Play

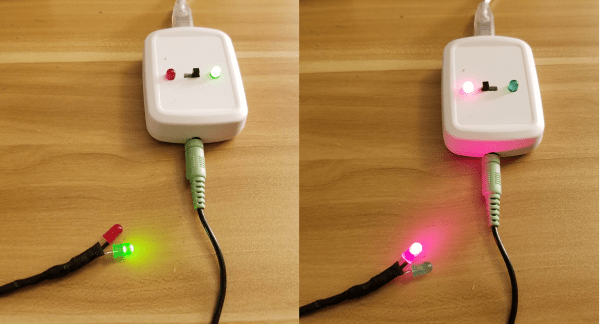
All this ongoing forced togetherness is great, but sometimes you just need to be able to pretend you’re alone so you can get some work done. So, how do you keep family members out of your home office? Our own [Bob Baddeley]’s free/busy indicator is about as simple as it gets.

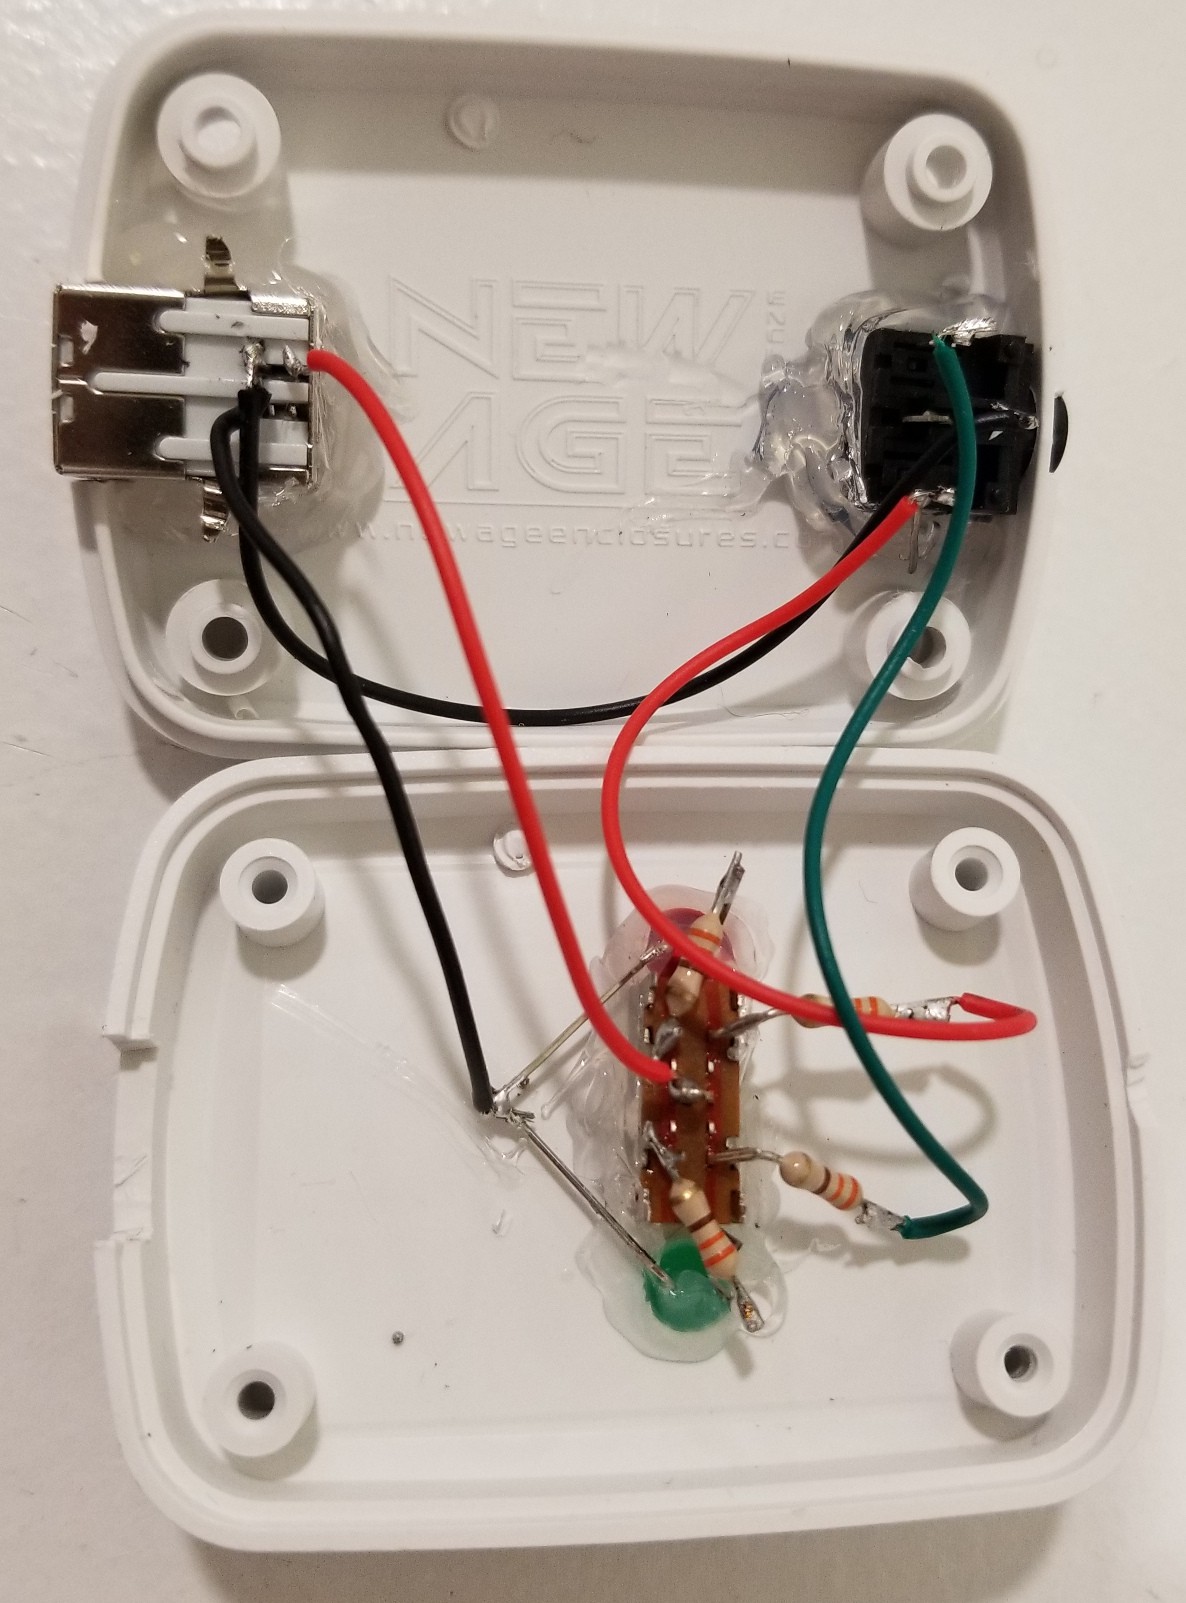
The best part is that the status can been seen on both sides of the door so you don’t forget to keep it updated. Or maybe it’s the super-low part count. There’s no BLE, LoRa, or Wi-Fi, just two sets of red and green LEDs, a three-way switch, and a power source. Well, and current-limiting resistors of course.

[Bob] already had all the components on hand, including the nifty enclosure, which is another great thing about this build. Like [Bob] says, you could house the control side of this circuit in just about anything you’ve got lying around.

Young children might abuse this one, but this status indicator that lets the family request your presence with the push of a button.

Edge-Mounted LEDs Make This Spherical POV Look Fantastic

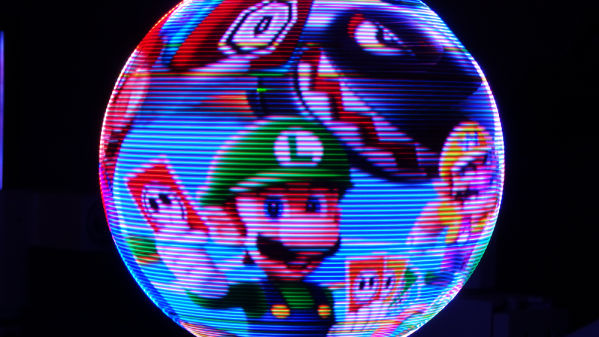
For as many of them as we’ve seen, we still love a good persistence of vision display project. There’s something fascinating about the combination of movement and light creating the illusion of solid surfaces, and there’s always fun to be had in electromechanical aspects of a POV build. This high-resolution spherical POV display pushes all those buttons, and more.

Called “Flicker” for obvious reasons by its creator [Dan Foisy], this POV display started with a pretty clear set of goals in terms of resolution and image quality, plus the need to support animated images, all in a spherical form factor. These goals dictated the final form of the display — a PCB disc spinning vertically. The shaft has the usual slip rings for power distribution and encoders for position feedback. The PCB, though, is where the interesting stuff is.

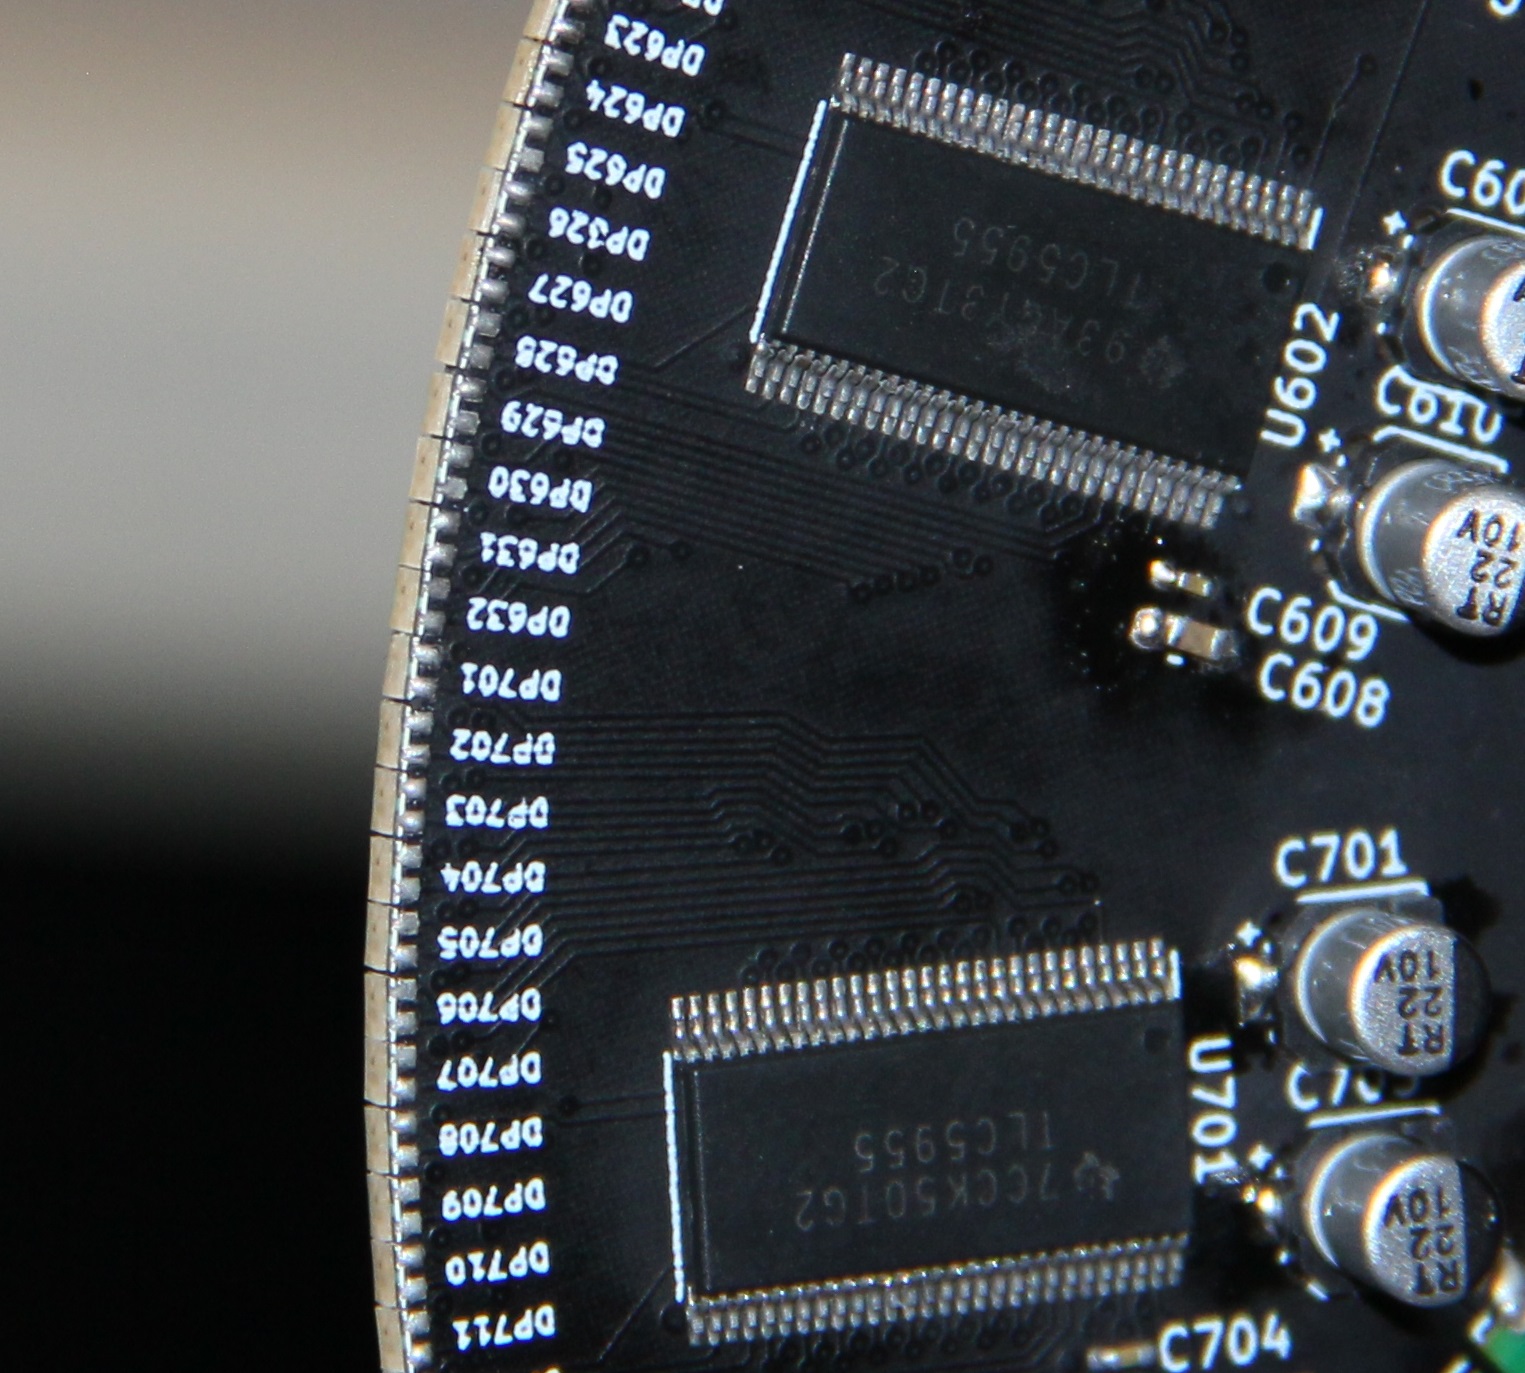
[Dan] chose to use an FPGA to slice and dice the images, which are fed from a Raspberry Pi’s HDMI port, to the LED drivers. And the LEDs themselves are pretty slick — he found parts with 1.6 mm lead spacing, making them a perfect fit for mounting on the rim of the PCB rather than on either side. A KiCAD script automated the process of laying out the 256 LEDs and their supporting components as evenly as possible, to avoid imbalance issues.

The video below shows Flicker in action — there are a few problem pixels, but on the whole, the display is pretty stunning. We’ve seen a few other spherical POV displays before, but none that look as good as this one does.

Continue reading “Edge-Mounted LEDs Make This Spherical POV Look Fantastic”

Little Red Night Light Is Just Right

Don’t you hate getting up in the middle of the night to use the bathroom? The worst part is not being able to see what you’re doing, but if you turn on a light, you’ll lose your night vision. Nightlights are supposed to be the best solution, but are usually too bright for 3 AM excursions and can end up leaking light into the bedroom. What the bathroom needs is a purpose-built nightlight that uses red light so you don’t lose your night vision.

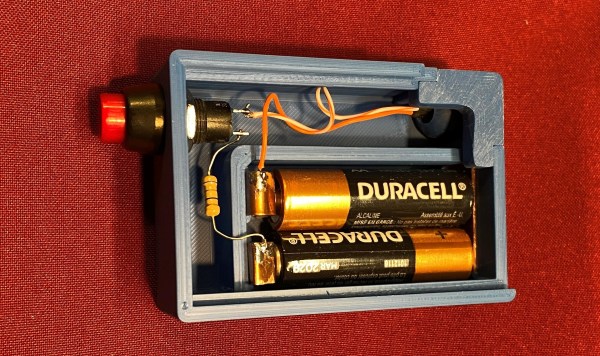
This simple, wall-mounted night light is just the thing. All it takes is two AA batteries, a resistor, a red LED, and an SPST push button. [Vchaney] even made their own battery contacts. The genius part of this build is in the adjustable LED, which is fitted into a ball that moves around in a socket so you can aim it wherever you need to see. All the files are available if you want to print one for yourself.

Those who sit might prefer to shine the light on the toilet paper roll. Here’s a smart roll holder that doubles as a night light, albeit a terribly bright one.

More LEDs Means Faster Print Times For 3D Printer, But There’s A Catch

[Jan Mrázek] is no stranger at all to home-grown improvements with his Elegoo Mars SLA 3D printer, and there is a lot going on in his experimental multi-LED upgrade which even involved casting his own lens array. In the end it did speed up his prints by a factor of three to four, though he cooked an LCD to failure in the process. Still, it was a fun project done during a COVID-19 lockdown; as usual there is a lot to learn from [Jan]’s experiences but the mod is not something he necessarily recommends people do for themselves.

[Jan] started by wondering whether better print quality and performance could be obtained by improving the printer’s UV light source. The stock printer uses a single large UV LED nestled into a reflector, but [Jan] decided to try making a more precise source of UV, aiming to make the UV rays as parallel as possible.

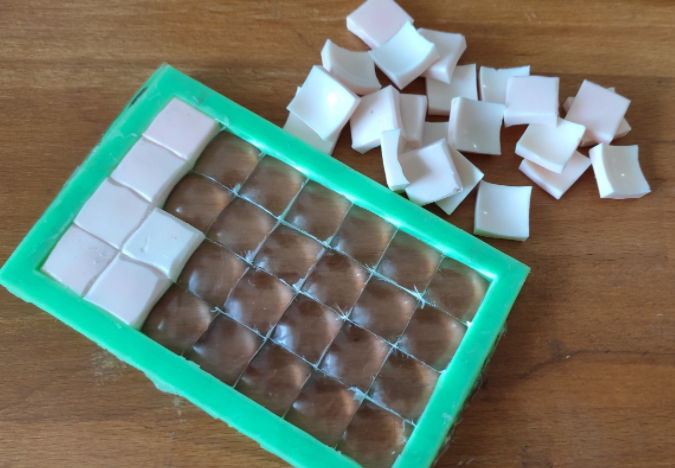
Custom LED array molded in clear epoxy.

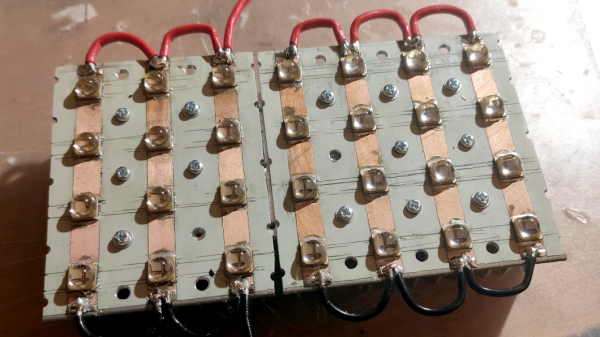
To do this, he took a two-pronged approach. One was to replace the single large UV LED with a 4×7 array of emitters plus heat sink and fans. The other was to make a matching array of custom lenses to get the UV rays as parallel as possible.

Casting one’s own lens array out of clear epoxy was a lot of work and had mixed results, but again, it was a lockdown project and the usual “is-this-really-worth-it” rules were relaxed. In short, casting a single custom lens out of clear epoxy worked shockingly well, but when [Jan] scaled it up to casting a whole 4×7 array of them, results were mixed. Mold deformation and artifacts caused by the areas between individual lenses robbed the end result of much of its promise.

More success was had with the array of UV emitters, which enabled faster curing thanks to higher power, but the heat needs to be managed. The stock emitter of the printer is about 30 W, and [Jan] was running his new array at 240 W. This meant a blazing fast one second exposure time per layer, but the heat generated by the new lighting was higher than anticipated. After only ten hours the LCD failed, probably at least in part due to the heat. [Jan] halved the power of the array down to 120 W and added an extra fan, which appears to have done the trick. Exposure time is two to three seconds per layer, and it’s up to 150 hours of printing without problems.

Again, it’s not a process [Jan] necessarily recommends to others (and he definitely recommends buying lenses if at all possible instead of casting them) but as usual there is a lot to learn from his frank sharing of results, both good and bad. We’ve seen 3D-printed lenses as well as adding WiFi connectivity to one of these hobbyist printers, and it’s great to see the spirit of hacking alive and well when it comes to these devices.

“Artificial Sun” Lighting Via Old Satellite Dishes

Real sunlight is a beautiful thing, but due to the vagaries of Earth’s orbit and local weather systems, it’s not available all the time. [Matt] decided this wasn’t good enough, and set about building a rig to replicate the sun’s rays as closely as possible.

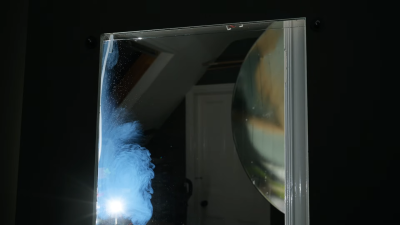
Rayleigh scattering is emulated by passing the light through a glass chamber filled with soapy water – taking advantage of the Tyndall effect.

The great distance between the Sun and the Earth means that the sun’s rays are essentially parallel from our local vantage point. Replicating this, and the soothing nature of a blue sky, were [Matt]’s primary goals with the project. To achieve this, an old satellite dish was pressed into service as a parabolic reflector, coated with mirror-finish vinyl strips. A 500W white LED with a good color rendering index was fitted at the focal point, outfitted with a water cooling system to shed heat. With a point source at its focal point, the parabolic reflector bounces the light such that it the rays are parallel, giving the sense that the light source is coming from an effectivelyl infinite distance away. To then achieve the blue sky effect, the light was then passed through a glass chamber filled with soapy water, which scatters the light using the Tyndall effect. This mimics the Rayleigh scattering in Earth’s atmosphere.

The final result is amazing, with [Matt] shooting footage that appears to be filmed in genuine daylight – despite being shot at night or on rainy days. He also features a cutdown build that can be achieved in a far cheaper and compact form, using Fresnel lenses and blue film. We’ve featured [Matt]’s daylight experiments before, though we’re amazed at the new level reached. Video after the break.

Continue reading ““Artificial Sun” Lighting Via Old Satellite Dishes”

Visualizing Magnetic Memory With Core 64

For the vast majority of us, computer memory is a somewhat abstract idea. Whether you’re declaring a variable in Python or setting a register in Verilog, the data goes — somewhere — and the rest really isn’t your problem. You may have deliberately chosen the exact address to write to, but its not like you can glance at a stick of RAM and see the data. And you almost certainly can’t rewrite it by hand. (If you can do either of those things, let us know.)

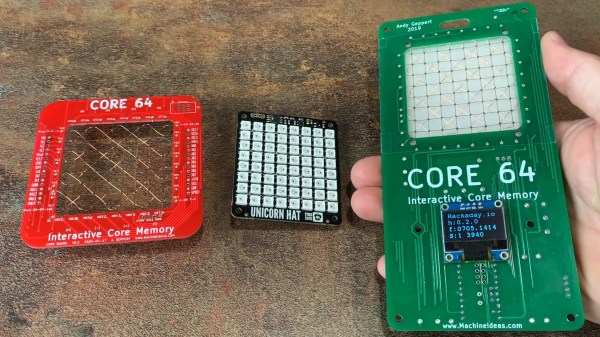
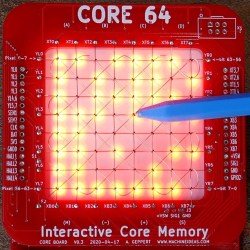
These limitations must have bothered [Andy Geppert], because he set out to bring computer memory into the tangible (or at least, visible) world with his interactive memory badge Core 64. [Andy] has gone through a few different iterations, but essentially Core 64 is an 8×8 grid of woven core memory, which stores each bit via magnetic polarization, with a field of LEDs behind it that allow you to visualize what’s stored. The real beauty of this setup is that it it can be used to display 64 pixel graphics. Better yet — a bit can be rewritten by introducing a magnetic field at the wire junction. In other words, throw a magnet on a stick into the mix and you have yourself a tiny drawing tablet!

This isn’t the first time we’ve seen cool experiments with core memory, and not even the first time we’ve seen [Andy] use it to make something awesome, but it really illuminates how the technology works. Being able to not only see memory being written but to manually write to it makes it all so much realer, somehow.

Continue reading “Visualizing Magnetic Memory With Core 64”