LED Shirt Does It With Tulle

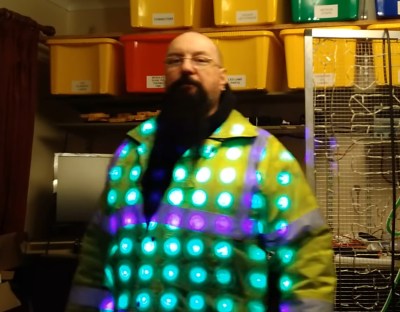
Given that we are living in what most of humanity would now call “the future”, we really ought to start acting like it. We’re doing okay on the electric cars, but sartorially we’ve got some ground to make up. Helping with this effort is [Amy Goodchild], who put together a fancy LED shirt for all occasions.

The basis of the shirt is an ESP8266 running the FastLED library, hooked up to strings of WS2812B LEDs. It’s a great combination for doing quick and simple colorful animations without a lot of fuss. The LED strips are then fastened to the shirt by sewing them on, with heatshrink added to the strips to give the thread something to attach to. Tulle fabric is used as a diffuser, hiding the strips when they’re off and providing a more pleasant glowing effect. Everything is controlled from a small box, fitted with an arcade button and 7-segment display.

It’s a fun piece that’s readily achievable for the novice maker, and a great way to learn about LEDs and sewing. We’ve seen other similar builds before, such as this glowing LED skirt. Video after the break.

Continue reading “LED Shirt Does It With Tulle”

Lighting Up A Tiny Train Needs Tiny Tools

A tiny toy train that [voidnill] illuminated with a small LED strip fragment demonstrates several challenges that come with both modifying existing products, and working with small things in general. One is that it is hard in general to work around existing design choices and materials when modifying something. The second is that problems are magnified with everything is so small.

[voidnill]’s plentiful photos illustrate everything from drilling out small rivets and tapping the holes for screws to installing a tiny switch, LED strip, and button cells as a power supply. When things are so small, some of the usual solutions don’t apply. For example, cyanoacrylate glue may seem like a good idea for mounting small plastic parts, but CA glue easily wicks into components like the tiny power switch and gums up the insides, rendering it useless.

[voidnill] uses lots of careful cutting and patience to get everything done, and demonstrates the importance of quality tools. The LED strip fragment is driven by three small button cells, and while tape does a serviceable job as a battery holder, [voidnill] believes a 3D printed custom frame for the cells would really do the trick.

The kind of work that goes into making or modifying small things really puts into perspective the amount of effort behind projects like this coffee table with an N-gauge model railway inside it.

Latest FlexLED Milestone Refines The POV Display

With his FlexLED project, [Carl Bugeja] is trying to perfect a simple and affordable persistence of vision (POV) display capable of generating “holographic” characters in mid-air. Traditionally POV systems spin LEDs rapidly to create the desired illusion, but that means motors, slip rings, and noise. As the name implies, the goal with this project is to do away with all that and replace it with a self-actuating flexible PCB.

The device is able to quickly move the LEDs back and forth quietly and efficiently thanks to a permanent magnet and magnetic coils integrated into the flexible PCB. With no motors or gears, the whole unit is smaller and less complex than other POV displays. As an added bonus, there’s no danger to the operator or the device should a curious user stick their finger into it.

The last time we took a look at this project, [Carl] had entered an earlier single-LED version into the 2019 Hackaday Prize. Competition was tough last year, and unfortunately FlexLED didn’t get selected as a Finalist. But we’re still extremely interested in seeing the project develop, and we imagine so are you.

The recently completed second version of the display features an improved coil design, eight RGB LEDs and a 3D printed base with integrated magnet. With more LEDs onboard, a single display is able to show multiple characters and even rudimentary animations. A large array of these flapping elements promises to be quite a sight.

But before you get too excited, [Carl] does have some bad news. For one, the cost of building them in small quantities is high, which is always tough for a single hacker trying to iterate a design. Worse, some of the LEDs seem to have died on this prototype already. He says it likely has something to do with the stress of flexing back and forth so quickly, which is obviously a bit troubling. He’s looking to get some feedback from the community, and is hoping to address these issues in the next version.

For an interesting look into his flexible PCB actuator projects, check out the interview [Carl] did with us at the 2018 Hackaday Superconference.

Continue reading “Latest FlexLED Milestone Refines The POV Display”

We Ruined Status LEDs; Here’s Why That Needs To Change

Ah, the humble status LED. Just about every piece of home electronics, every circuit module, and anything else that draws current seems to have one. In the days of yore, a humble indicator gave a subtle glow from behind a panel, and this was fine. Then the 1990s happened, and everything got much much worse.

It’s Not The Technology, It’s How You Use It

With great brightness, comes great responsibility.

The 1990s brought us much good: Nirvana, Linux, and of course the blue LED. Much like “Teen Spirit”, the latter quickly fell into overuse: the technology rapidly became the sigil of all that was new and great, much to the ocular pain of the buying public.

This decision ranks up there for stupidity with other such questionable choices as hiring a rental car at the airport, or invading Russia in the winter. A status LED, most would agree, is there to indicate status. It need only deliver enough light to be seen when observed by a querying eye. What it need not do is glow with the intensity of a dying star, or illuminate an entire room for that matter. But, in the desperate attempts of product designers to appear on the cutting edge, the new, brighter LED triumphed over all in these applications. Continue reading “We Ruined Status LEDs; Here’s Why That Needs To Change”

How Many LEDs Can You Drive?

Driving more than a handful of LEDs from a microcontroller is often a feat that takes tedious wiring, tricking the processor, or a lot of extra external hardware. Charlieplexing is perhaps the most notorious of these methods, and checks two of those three boxes. This library for the Teensy 4.0 checks all three, but it can also drive a truly staggering 32,000 LEDs at one time.

The TriantaduoWS2811 library is able to drive 32 channels of LEDs from a Teensy 4.0 using only three pins and minimal processor resources. It uses the FlexIO and DMA subsystems of the i.MX RT1062, the particular ARM processor on the Teensy, to drive four external shift registers. Together, the system is able to achieve 30 frames per second on with 1,000 LEDs per channel, for a total of 32,000 LEDs. Whoah.

[Ward] aka [wramsdell] wondered what one would do with all of the horsepower of a Teensy microcontroller when he first saw its specifications, and was able to build this project to take advantage of its features. What’s surprising, though, is that it doesn’t use nearly everything the processor is capable of, so you can do other tasks at the same time as driving that giant LED display.

Have LED Bulbs Reached Their Final (and Cheapest) Form?

[electronupdate] has done a lot of LED light bulb teardowns over the years, witnessing a drive towards ever-cheaper and ever-simpler implementations, and suspects that LED light bulb design has finally reached its ultimate goal. This teardown of a recent dollar store example shows that cost-cutting has managed to shave even more off what was already looking like a market saturated with bottom-dollar design.

The electrical components inside this glowing model of cost-cutting consists of one PCB (previously-seen dollar store LED bulb examples had two), eleven LEDs, one bridge rectifier, two resistors, and a controller IC. A wirewound resistor apparently also serves as a fuse, just in case.

Inside the unmarked controller IC. The design is as cheap as it is clever in its cost-cutting.

That’s not all. [electronupdate] goes beyond a simple teardown and has decapped the controller IC to see what lurks inside, and the result is shown here. This controller is responsible for driving the LEDs from the ~100 Volts DC that the bridge rectifier and large electrolytic cap present to it, and it’s both cheap and clever in its own way.

The top half is a big transistor for chopping the voltage and the bottom half is the simple control logic; operation is fast enough that no flicker is perceived in the LEDs, and no output smoothing cap is needed. The result, of course, is fewer components and lower cost.

Some of you may recall that back in the early days of LED lighting, bulbs that could last 100,000 hours were a hot promise. That didn’t happen for a variety of reasons and the march towards being an everyday consumable where cost was paramount continued. [electronupdate] feels they have probably reached that ultimate goal, at least until something else changes. They work, they’re cheap, and just about everything else has been successfully pried up and tossed out the door.

HackIt: Why Aren’t We Hacking On The LED Printer?

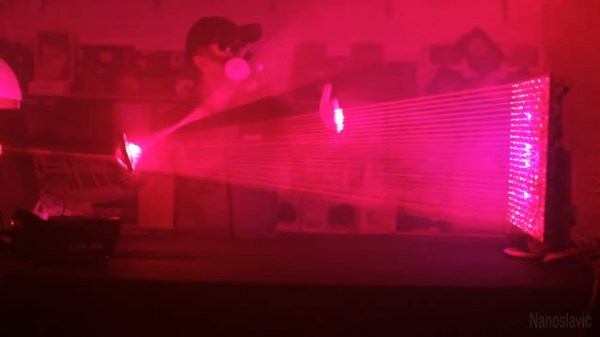
Strings of LEDs are a staple of the type of project we see here at Hackaday, with addressable devices such as the WS2812 in particular having changed beyond recognition what is possible on a reasonable budget. They’ve appeared in all kinds of projects, but are perhaps most memorable when used in imaging projects such as screen-like arrays or persistence-of-vision systems. There’s another addressable LED product that we haven’t seen here, which is quite a surprise considering that it can be found with relative ease in junk piles and has been on the market for decades. We’re talking about the LED printer, and the addressable LED product in question is a very high density array of LEDs the width of a page, designed to place an image of the page to be printed on the toner transfer drum.

Continue reading “HackIt: Why Aren’t We Hacking On The LED Printer?”