There might seem like a wide gulf between the rapid prototyping of a project and learning a completely new electronics platform, but with the right set of tools, these two tasks can go hand-in-hand. That was at least the goal with this particular build, which seeks to use a no-soldering method of assembling electronics projects and keeping code to a minimum, while still maintaining a platform that is useful for a wide variety of projects.
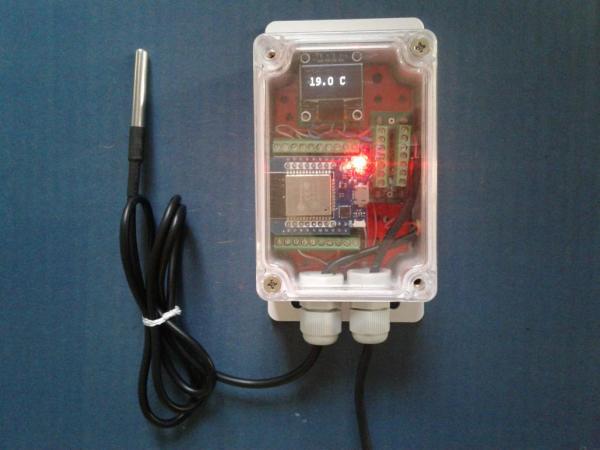
As a demonstration, this specific project is a simple Wi-Fi connected temperature monitoring station. Based around an ESP32 and using a DS18B20 digital temperature sensor, the components all attach to a back plate installed in a waterproof enclosure and are wired together with screw-type terminal breakout boards to avoid the need for soldering. The software suite is similarly easy to set up, revolving around the use of Tasmota and ESPHome, which means no direct programming — although there will need to be some configuration of these tools.
With the included small display, this build makes a very capable, simple, and quick temperature monitor. But this isn’t so much a build about monitoring temperature but about building and prototyping quickly without the need for specialized tools and programming. There is something to be said for having access to a suite of rapid prototyping tools for projects as well, though.