Over-molding Wires With Hot Glue And 3D Printed Molds

We’ve said it before and we’ll say it again: water always finds a way in. That’s particularly problematic for things like wire splices in damp environments, something that no amount of electrical tape is going to help. Heat shrink tubing might be your friend here, but for an electrically isolated and mechanically supported repair, you may want to give over-molding with a hot glue gun a try.

The inspiration for [Print Practical]’s foray into over-molding came from a video that’s making the rounds showing a commercially available tool for protecting spliced wires in the automotive repair trade. It consists of a machined aluminum mold that the spliced wires fit into and a more-or-less stock hot glue gun, which fills the mold with melted plastic. [Print Practical] thought it just might be possible to 3D print custom molds at home and do it himself.

His first attempt didn’t go so well. As it turns out, hot glue likes to stick to things — who knew? — including the PETG mold he designed. Trying to pry apart the mold after injection was a chore, and even once he got inside it was clear the glue much preferred to stay in the mold. Round two went much better — same wire, same mold, but now with a thin layer of vegetable oil to act as a release agent. That worked like a charm, with the over-mold standing up to a saltwater bath with no signs of leaking. [Print Practical] also repaired an iPhone cable that has seen better days, providing much-needed mechanical support for a badly frayed section.

This looks like a fantastic idea to file away for the future, and one that’s worth experimenting with. Other filament types might make a mold better able to stand up to the hot glue, and materials other than the ethylene-vinyl acetate copolymer found in most hot glue sticks might be explored. TPU over-molds, anyone? Or perhaps you can use a printer as an injector rather than the glue gun.

Continue reading “Over-molding Wires With Hot Glue And 3D Printed Molds”

Nuke Your Own Uranium Glass Castings In The Microwave

Fair warning: if you’re going to try to mold uranium glass in a microwave kiln, you might want to not later use the oven for preparing food. Just a thought.

A little spicy…

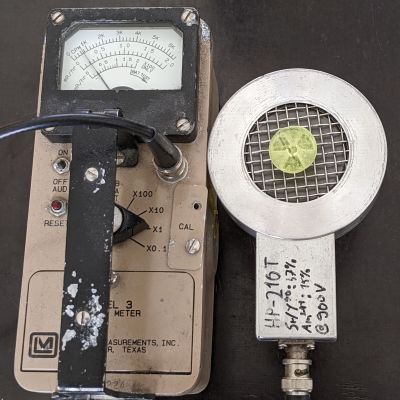
Granted, uranium glass isn’t as dangerous as it might sound. Especially considering its creepy green glow, which almost seems to be somehow self-powered. The uranium glass used by [gigabecquerel] for this project is only about 1% U3O8, and isn’t really that radioactive. But radioactive or not, melting glass inside a microwave can be problematic, and appropriate precautions should be taken. This would include making the raw material for the project, called frit, which was accomplished by smacking a few bits of uranium glass with a hammer. We’d recommend a respirator and some good ventilation for this step.

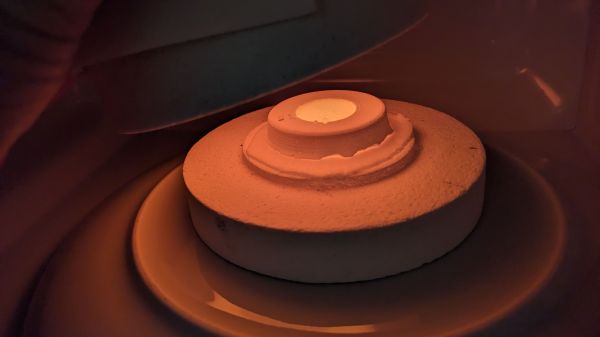
The powdered uranium glass then goes into a graphite-coated plaster mold, which was made from a silicone mold, which in turn came from a 3D print. The charged mold then goes into a microwave kiln, which is essentially an insulating chamber that contains a silicon carbide crucible inside a standard microwave oven. Although it seems like [gigabecquerel] used a commercially available kiln, we recently saw a DIY metal-melting microwave forge that would probably do the trick.

The actual casting process is pretty simple — it’s really just ten minutes in the microwave on high until the frit gets hot enough to liquefy and flow into the mold. The results were pretty good; the glass medallion picked up the detail in the mold, but also the crack that developed in the plaster. [gigabecquerel] thinks that a mold milled from solid graphite would work better, but he doesn’t have the facilities for that. If anyone tries this out, we’d love to hear about it.

More Detail On That Fantastic Lego OLED Brick

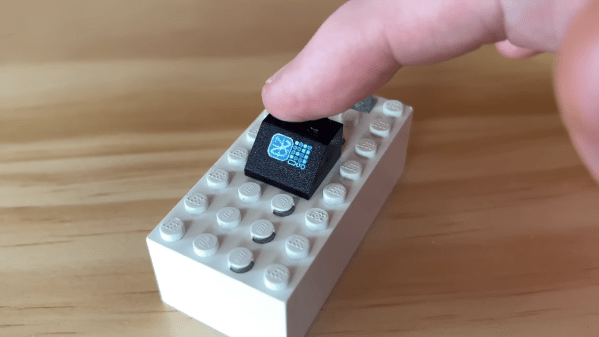
It’s always great when we get a chance to follow up on a previous project with more information, or further developments. So we’re happy that [“Ancient” James Brown] just dropped a new video showing the assembly of his Lego brick with a tiny OLED screen inside it. The readers are too, apparently — we got at least half a dozen tips on this one.

We’ve got to admit that this one’s a real treat, with a host of interesting skills on display. Our previous coverage on these bedazzled bricks was disappointingly thin on details, and now the original tweets even seem to have disappeared entirely. In case you didn’t catch the original post, [James] found a way to embed a microcontroller and a remarkably small OLED screen into a Lego-compatible brick — technically a “slope 45 2×2, #3039” — that does a great job of standing in for a tiny computer monitor.

Continue reading “More Detail On That Fantastic Lego OLED Brick”

Casting Parts In Urethane: Tips From A Master

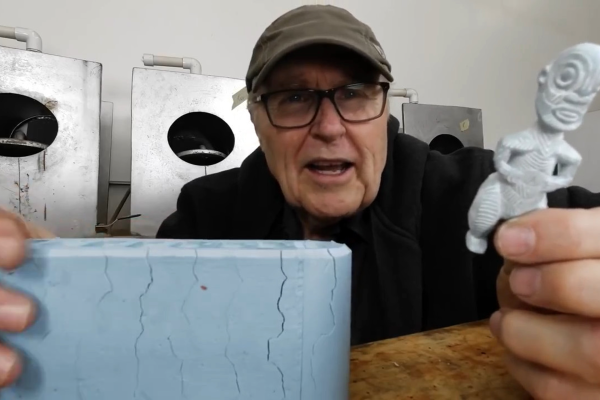
When you want a couple copies of a thing, you can 3D print ’em. When you want a ton of them, you might consider making a mold. If those are the shoes you’re in, you should check out this video from [Robert Tolone] (embedded below). Or heck, just check out all of his videos.

Even just in this single video from a couple years back, there are a ton of tips that’ll help you when you’re trying to pour resin of just the right color into a silicone mold. Mostly, these boil down to testing everything out in small quantities before pouring it in bulk, because a lot changes along the way. And that’s where [Robert]’s experience shines through — he knows all of the trouble spots that you need to test for.

For instance? Color matching. Resin dyes are incredibly concentrated, so getting the right amount is tricky. Mixing the color at a high concentration first and then sub-diluting it slowly allows for more control. But even then, the dried product is significantly lighter than the mixture, so some experimentation is necessary. [Robert] sneaks up on just the right color of seafoam green and then pours some test batches. And then he pours it in the exact shape of the mold just to be sure.

That’s just one of the tips in this video, which is just the tip of the mold-casting iceberg. Pour yourself a coffee, settle down, and you’ll learn something for sure. If you’re into more technical parts and CNC machining, we still love the Guerilla Guide after all these years.

Much thank to [Zane] for tipping us off to this treasure trove.

Continue reading “Casting Parts In Urethane: Tips From A Master”

Epoxy lenses

The Ins And Outs Of Casting Lenses From Epoxy

If you need a lens for a project, chances are pretty good that you pick up a catalog or look up an optics vendor online and just order something. Practical, no doubt, but pretty unsporting, especially when it’s possible to cast custom lenses at home using silicone molds and epoxy resins.

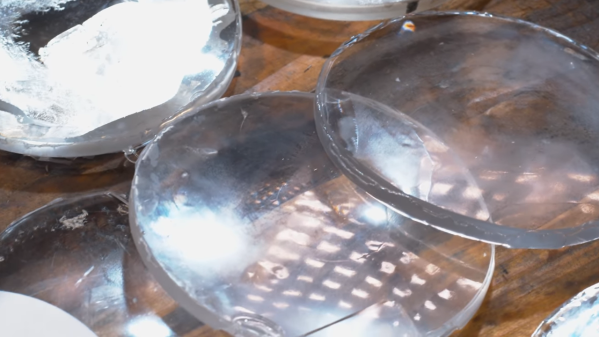
Possible, but not exactly easy, as [Zachary Tong] relates. His journey into custom DIY optics began while looking for ways to make copies of existing mirrors using carbon fiber and resin, using the technique of replication molding. While playing with that, he realized that an inexpensive glass or plastic lens could stand in for the precision-machined metal mandrel which is usually used in this technique. Pretty soon he was using silicone rubber to make two-piece, high-quality molds of lenses, good enough to try a few casting shots with epoxy resin. [Zach] ran into a few problems along the way, like proper resin selection, temperature control, mold release agent compatibility, and even dealing with shrinkage in both the mold material and the resin. But he’s had some pretty good results, which he shares in the video below.

[Zach] is clear that this isn’t really a tutorial, but rather a summary of the highs and lows he experienced while he was working on these casting methods. It’s not his first time casting lenses, of course, and we doubt it’ll be his last — something tells us he won’t be able to resist trying this all-liquid lens casting method in his lab.

Continue reading “The Ins And Outs Of Casting Lenses From Epoxy”

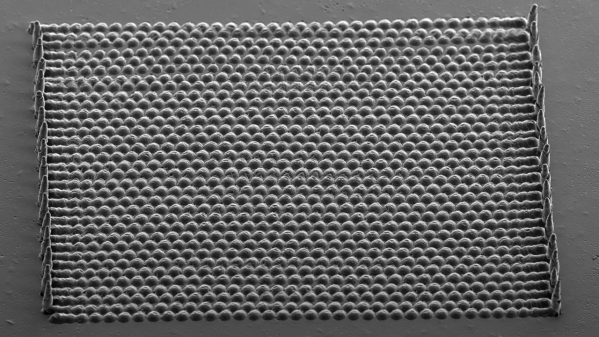
Scanning electron micrograph of a microfabricated lens array

Getting A Fly’s-Eye View With Microfabricated Lens Arrays

Atomic force microscopy, laser ablation, and etching with a witches brew of toxic chemicals: sounds like [Zachary Tong] has been playing in the lab again, and this time he found a way to fabricate arrays of microscopic lenses as a result.

Like many of the best projects, [Zach]’s journey into micro-fabrication started with a happy accident. It happened while he was working on metal-activated chemical etching (MACE), which uses a noble metal catalyst to selectively carve high-aspect-ratio features in silicon. After blasting at a silver-coated silicon wafer with a laser, he noticed the ablation pits were very smooth and uniform after etching. This led him to several hypotheses about what was going on, all of which he was able to test.

The experiments themselves are pretty interesting, but what’s really cool is that [Zach] realized the smooth hemispherical pits in the silicon could act as a mold for an array of microscopic convex lenses. He was able to deposit a small amount of clear silicone resin into the mold by spin-coating, and (eventually) transfer the microlens array to a glass slide. The lenses are impressively small — hundreds of them over only a couple hundred square microns — and pretty well-formed. There’s always room for improvement, of course, but for an initial attempt based on a serendipitous finding, we’d call it a win. As for what good these lenses are, your guess is as good as ours. But novel processes like these tend to find a way to be useful, and the fact that this is coming out of a home lab doesn’t change that fact.

We find this kind of micro-fabrication fascinating. Whether it’s making OLED displays, micro-machining glass with plasma, or even rolling your own semiconductors, we can’t get enough of this stuff.

Continue reading “Getting A Fly’s-Eye View With Microfabricated Lens Arrays”

Solid Tips For Casting Colored Silicone Tires

For people who work with wheeled robots or RC vehicles, sooner or later one gets interested in making custom tires instead of dealing with whatever is available off the shelf. [concreted0g]’s preferred method is to design and 3D print wheel hubs, then cast some custom silicone tires to fit over them. Of course, the devil is in the details and this process can be a bit messy, so he’s shared useful tips on how to get reliable results with simple materials.

The casting material is cheap silicone caulking from a hardware store, and color can be added with a small amount of cheap acrylic paint. A few drops of glycerin added to the silicone thins it out slightly and helps it flow into a mold better. Mix well (the paint will also serve as a visual indicator of how well it is mixed), then scoop the mixture into the mold while trying to avoid creating air pockets. If your mold is in two pieces, assemble the mold and remove any overflow, then let it sit undisturbed for at least several hours while it cures.

Mounting the resulting tire to a wheel hub can be done with a thin film of super glue, which seems to work perfectly well for small tires and is easy to apply.

The rules are going to be a bit different for big objects. We know that silicone caulking can have difficulty fully curing when it’s applied thickly, especially when sealed into a mold with little to no airflow. In such cases, adding cornstarch (in about a 5:1 ratio of silicone to cornstarch by volume) is all that it takes to cure even thick wads of goop in less than an hour. Stirring cornstarch in tends to introduce more air bubbles into the mixture, but for larger pieces that can be an acceptable tradeoff. Cheap silicone caulking is versatile stuff, one just needs to know what to expect, and take a few steps to deal with the messiness.

Need something tougher? Maybe check out using slices of automotive silicone hose for robot wheels to get something that works just as well, but is a lot more durable.