Portable Printer Is A Top Notch High School Project

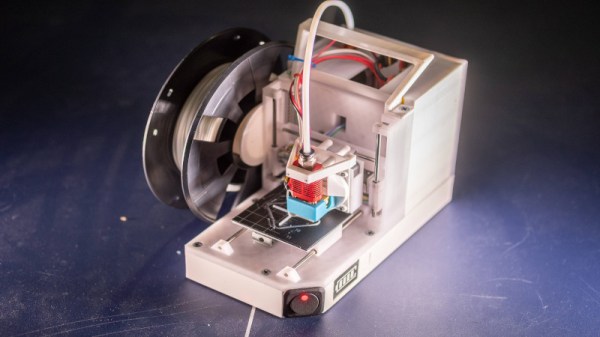
When we think 3D printers, we most commonly think of the fused-deposition modelling type that squirts molten plastic out of a hot nozzle. Typically, these are tabletop units designed to be set up and used in a workshop environment. [BingoFishy] dared to think outside the box however, and whipped up a compact, portable 3D printer for working out on the road.

The printer is almost entirely self-contained, running an OctoPrint controller with built-in hotspot which allows print files to be sent to the unit over a smartphone. The motion platform is built out of DVD drive stepper motors and rails, with dual motors used on the Z-axis to ensure there’s enough torque to move smoothly. Power is courtesy of 26650 cells, in a 2S3P configuration, which provides 3 hours of runtime. While this might not sound like much, for a compact printer with a small build volume, it’s a useful period of time to work with.

While such a build will never replace a solid desktop unit with a large build volume, it nevertheless could come in handy for producing small parts out in the field. We can imagine a college robotics team toting one of these to a regional contest, where it could prove invaluable for whipping up some bushings after something breaks unexpectedly. The finish of the project is great, too, though we’ve seen great results from less-polished builds in the past as well. Video after the break.

Continue reading “Portable Printer Is A Top Notch High School Project”

Improving 3D Printed Supports With A Marker

Anyone who’s spent some quality time with a desktop 3D printer is familiar with the concept of supports. If you’re working with a complex model that has overhanging features, printing a “scaffolding” of support material around it is often required. Unfortunately, supports can be a pain to remove and often leave marks on the finished print that need to be addressed.

Looking to improve the situation, [Tumblebeer] has come up with a very unique modification to the traditional approach that we think is certainly worthy of closer examination. It doesn’t remove the need for support material, but it does make it much easier to remove. The method is cheap, relatively simple to implement, and doesn’t require multiple extruders or filament switching as is the case with something like water-soluble supports.

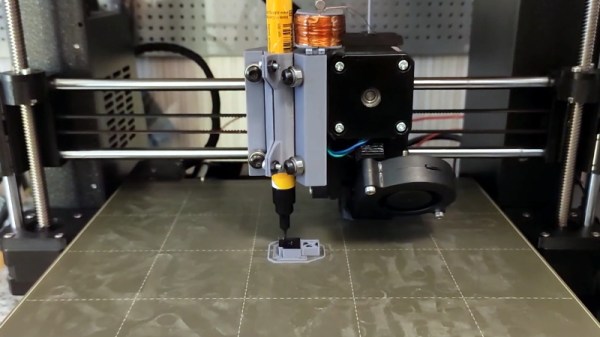
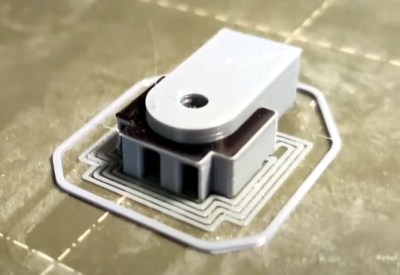
The trick is to use a permanent marker as a release agent between the top of the support and the area of the print it’s actually touching. The coating of marker prevents the two surfaces from fusing, while still providing the physical support necessary to keep the model from sagging or collapsing.

To test this concept, [Tumblebeer] has outfitted a Prusa i3 MK3S with a solenoid actuated marker holder that hangs off the side of the extruder assembly. The coil is driven from the GPIO pins of a Raspberry Pi running OctoPrint, and is engaged by a custom command in the G-code file. It keeps the marker out of the way during normal printing, and lowers it when its time to lay down the interface coating.

[Tumblebeer] says there’s still a bit of hand-coding involved in this method, and that some automated G-code scripts or a custom slicer plugin could streamline the process considerably. We’re very interested in seeing further community development of this concept, as it seems to hold considerable promise. Having a marker strapped to the side of the extruder might seem complex, but it’s nothing compared to switching out filaments on the fly.

Continue reading “Improving 3D Printed Supports With A Marker”

Multiple 3D Printers, And One Pi To Rule Them All

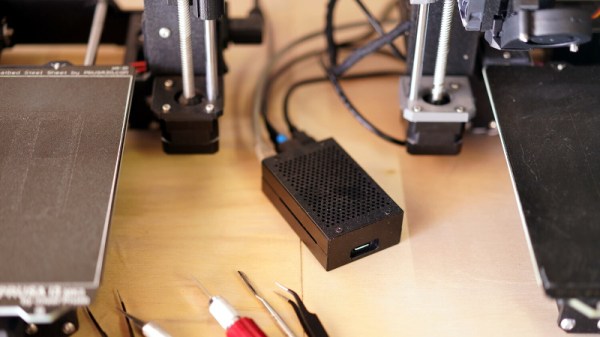
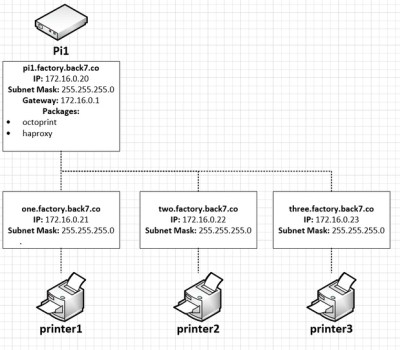
If you’ve got a desktop 3D printer, there’s an excellent chance you’ve heard of OctoPrint. This web front-end, usually running on a Raspberry Pi, allows you to monitor and control the printer over the network from any device that has a browser. But what if you’ve got two printers? Or 20? The logistics of each printer getting its own Pi can get uncomfortable in a hurry, which is why [Jay Doscher] has been working on a way to simplify things.

Leveraging the boosted processing power of the Raspberry Pi 4 and some good old fashioned Linux trickery, [Jay] is now controlling multiple printers from a single device. The trick is to run multiple instances of the OctoPrint backend and assign them to virtual network interfaces so they don’t interfere with each other. This takes some custom systemd unit files to get up and running on Raspbian, which he’s been kind enough to include them in the write-up.

But getting multiple copies of OctoPrint running on the Pi is only half the battle. There still needs to be a way to sort out which printer is which. Under normal circumstances, the printers would be assigned random virtual serial ports when the Pi booted. To prevent any confusion, [Jay] explains how you can use custom udev rules to make sure that each printer gets its own unique device node. Even if you aren’t trying to wrangle multiple 3D printers, this is a useful trick should you find yourself struggling to keep track of your USB gadgets.

If you’re wondering why [Jay] needs to have so many 3D printers going at the same time, we hear they’ve been keeping rather busy running off parts for commissioned copies of his popular projects. Something to consider the next time you’re wondering if there’s a way to make a happy buck out of this little hobby of ours, folks.

Stackable Open Source 3D Printer Enclosure

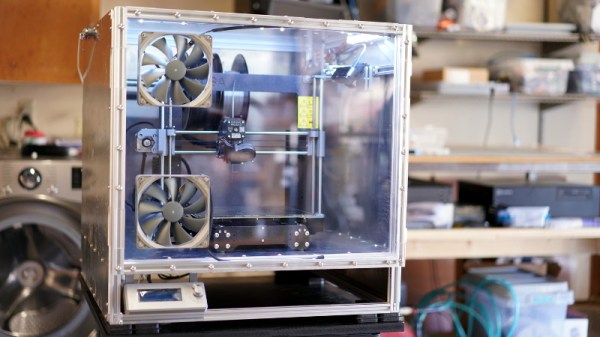
One of the unfortunate realities of desktop FDM 3D printing is that environmental factors such as ambient temperature and humidity can have a big impact on your results. Even with the exact same settings, a part that printed beautifully in the summer can warp right off the bed during the winter months. The solution is a temperature-controlled enclosure, but that can be a daunting project without some guidance. Luckily, [Jay Doscher] has spent the last few months designing a very impressive enclosure that he’s released to the community as open source.

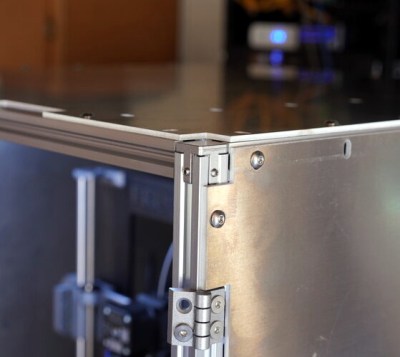
While we’ve seen no shortage of DIY printer enclosures over the years, they tend to be fairly lightweight. But that’s not the case here. Obviously not wanting to leave anything to chance, [Jay] designed this enclosure with 2020 extrusion and aluminum side panels. You could probably sit on the thing with no ill-effects, which is good, since he also designed the enclosure to be stackable should your print farm need to expand vertically.

Of course, there’s more to this enclosure than just an aluminum box. It’s packed with features like an integrated Raspberry Pi for running Octoprint, internal and external environmental monitoring with the Adafruit SHT31-D, and a Logitech Brio 4K video camera to watch the action. While not currently implemented, [Jay] says he’s also working on an internal fire suppression system and a fan controller system which will circulate air inside the enclosure should things get a little too toasty.

The enclosure has been designed around the ever-popular Prusa i3 MK3/S, even going so far as to relocate the printer’s display to the outside so you don’t have to open the door to fiddle with the settings. But adapting it to whatever rig you happen to be running shouldn’t be a problem. Though admittedly, perhaps not as easy as adjusting an enclosure made out of metal shelving.

Continue reading “Stackable Open Source 3D Printer Enclosure”

Robot Vs. Superbug

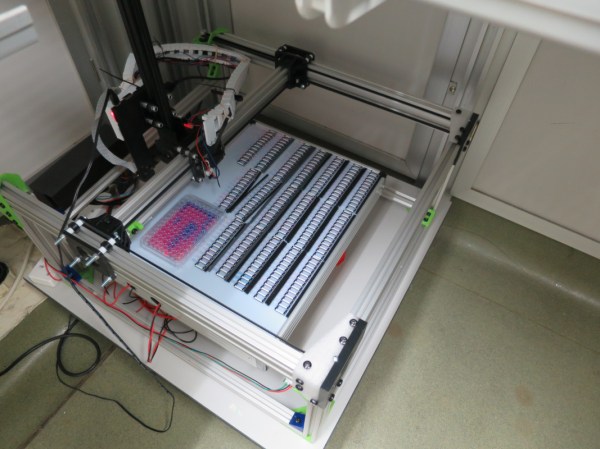
Working in a university or research laboratory on interesting, complicated problems in the sciences has a romanticized, glorified position in our culture. While the end results are certainly worth celebrating, often the process of new scientific discovery is underwhelming, if not outright tedious. That’s especially true in biology and chemistry, where scaling up sample sizes isn’t easy without a lot of human labor. A research group from Reading University was able to modify a 3D printer to take some of that labor out of the equation, though.

This 3D printer was used essentially as a base, with the printing head removed and replaced with a Raspberry Pi camera. The printer X/Y axes move the camera around to all of the different sample stored in the print bed, which allows the computer attached to the printer to do most of the work that a normal human would have had to do. This allows them to scale up massively and cheaply, presumably with less tedious inputs from a large number of graduate students.

While the group hopes that this method will have wide applicability for any research group handling large samples, their specific area of interest involves researching “superbugs” or microbes which have developed antibiotic resistance. Their recently-published paper states that any field which involves bacterial motility, colony growth, microtitre plates or microfluidic devices could benefit from this 3D printer modification.

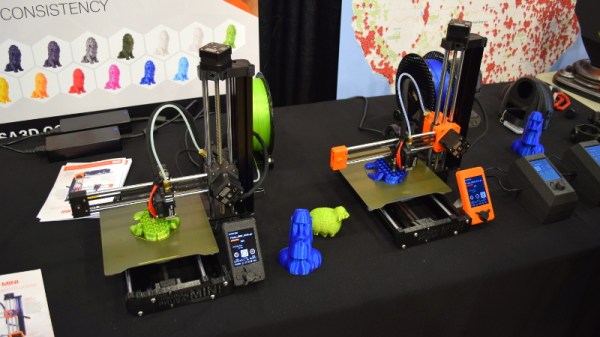
Prusa Unveils New Mini 3D Printer, Shakes Up The Competition

For the last couple of years, consumer desktop 3D printer choices in the under $1,000 USD range have fallen into two broad categories: everything bellow $500 USD, and the latest Prusa i3. There are plenty of respectable printers made by companies such as Monoprice and Creality to choose from on that lower end of the scale. It wasn’t a luxury everyone could justify, but if you had the budget to swing the $749 for Prusa’s i3 kit, the choice became obvious.

Of course, that was before the Prusa Mini. Available as a kit for just $349, it’s far and away the cheapest printer that Prusa Research has ever offered. But this isn’t just some rebranded hardware, and it doesn’t compromise on the ideals that have made the company’s flagship machine the de facto open source FDM printer. For less than half the cost of the i3 MK3S, you’re not only getting most of the larger printer’s best features and Prusa’s renowned customer support, but even capabilities that presumably won’t make it to the i3 line until the MK4 is released.

Josef Průša was on hand to officially unveil his latest printer at the 2019 East Coast Reprap Festival, where I got the chance to get up close and personal with the diminutive machine. While it might be awhile before we can do a full review on the Mini, it’s safe to say that this small printer is going to have a big impact on the entry-level market.

Continue reading “Prusa Unveils New Mini 3D Printer, Shakes Up The Competition”

Old Nixie Display Rides Again As 3D-Printer Filament Meter

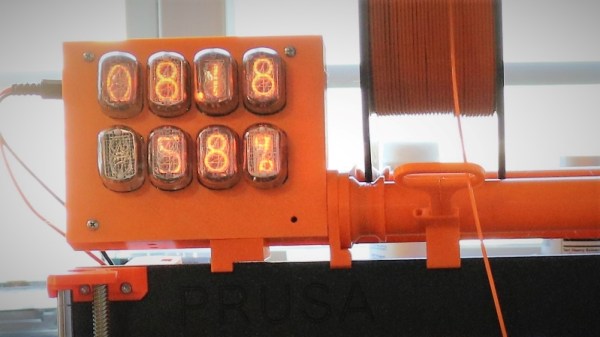
We’re not sure about the name of this Nixie tube filament meter that [Scott M. Baker] built. He calls it a “filadometer”, perhaps a portmanteau of “filament” and “odometer”, in which case it makes sense. It may not flow trippingly from the tongue and we can’t come up with anything better, but whatever moniker you use it’s actually a pretty cool build.

The filadometer started life as something completely different and utterly typical for Nixie tube projects – a temperature and humidity gauge. [Scott] decided to recycle the eight-tube display to keep track of his Prusa, and in doing so he reveals a pretty remarkable degree of forethought in his design process. The original Nixie display has all the usual trappings – the driver chips, the shift registers, and the high voltage power supply. What stands out is the modularity of his design: the tube sockets and drivers live on a backplane PCB, with a Raspberry Pi and a separate HV supply board plugging into it. The original display had a Model B Pi, so there was plenty of room for a new Zero W. A new printed case and a little programming to capture the filament use from Octoprint is all it took to put this nifty little build back in action. The video below shows the details.

We’re always excited to see new videos from [Scott] because we learn so much from looking over his virtual shoulder. If you haven’t checked out his stuff, take a look at his homage to the 8″ floppy or his dual-port memory hack for retro gaming.

Continue reading “Old Nixie Display Rides Again As 3D-Printer Filament Meter”