Hacking Together A Serial Backpack

A serial backpack is really nothing more than a screen and some microcontroller glue to drive it. And a hammer is nothing more than a hardened weight on the end of a stick. But when you’re presented with a nail, or a device that outputs serial diagnostic data, there’s nothing like having the right tool on hand.

1383501485329153153[ogdento] built his own serial backpack using parts on hand and a port of some great old code. Cutting up a Nokia 1100 graphic display and pulling a PIC out of the parts drawer got him the hardware that he needed, and he found a good start for his code in [Peter Andersen]’s plain-old character LCD library, combined with a Nokia 1100 graphic LCD library by [spiralbrain]. [ogdento] added control for the backlight, mashed the two softwares together, and voilà!

A simple screen with a serial port is a great device to have on hand, and it makes a great project. We’ve seen them around here before, of course. And while you could just order one online, why not make your own? Who knows what kind of crazy customizations you might dream up along the way.

Light Dimmer Shows How To Steal Power From AC Line

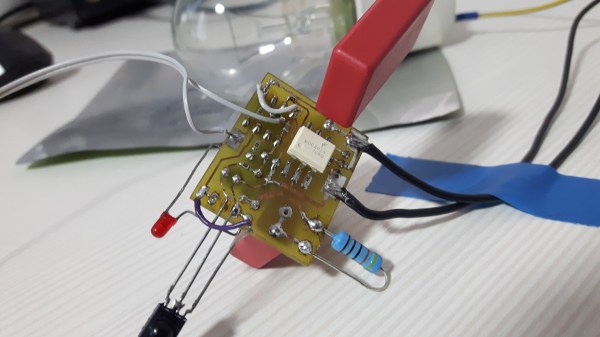
We see a lot of traffic on the tips line with projects that cover old ground but do so in an instructive way, giving us insight into the basics of electronics. Sure, commercial versions of this IR-controlled light dimmer have been available for decades. But seeing how one works might just help you design your Next Big Thing.

Like many electronic controls, the previous version of this hack required a connection to a neutral in addition to the hot. This version of the circuit relies on passing a small current through the light bulb the dimmer controls to avoid that extra connection. This design limits application to resistive loads like incandescent bulbs. But it’s still a cool circuit, and [Muris] goes into great detail explaining how it works.

We think the neatest bit is the power supply that actually shorts itself out to turn on the load. A PIC controls a triac connected across the supply by monitoring power line zero-crossing. The PIC controls dimming by delaying the time the triac fires, which trims the peaks off of the AC waveform. The PIC is powered by a large capacitor while the triac is conducting, preventing it from resetting until the circuit can start stealing power again. Pretty clever stuff, and a nice PCB design to boot.

Given the pace of technological and cultural change, it might be that [Muris]’ dimmer is already largely obsolete since it won’t work with CFLs or LEDs. But we can see other applications for non-switched mode transformerless power supplies. And then again, we reported on [Muris]’s original dimmer back in 2009, so the basic design has staying power.

Christmas Lights Done The Hard Way

It’s that time of the year again when you gotta start worrying if you’ve been naughty enough to not receive any gifts. Hopefully, Blinky Lights will appease St. Nick. Grab a strip of RGB LEDs, hook them up to an Arduino and a Power supply, slap on some code, and Bob’s your Uncle. But if you want to retain your hacker cred, you best do it the hard way. Which is what [roddersblog] did while building his Christmas Starburst LED Stars this year — and bonus points for being early to the party.

christmas-lights-the-hard-wayFor starters, he got panels (as in PCB panels) of WS2812 boards from eBay. The advantage is it lets you choose your own pitch and strand length. The flip side is, you need to de-panel each board, mount it in a jig, and then solder three lengths of hook up wire to each LED. He planned for an eight sided star with ten LED’s each. And he built three of them. So the wiring was, substantial, to say the least. And he had to deal with silicone sealant that refused to cure and harden. But nothing that some grit and determination couldn’t fix.
For control, he choose the PIC16F1509 microcontroller. This family has a feature that PIC calls the “Configurable Logic Cell” and this Application Note describes how to use CLC to interface the PIC to a WS2811. He noticed processing delays due to C code overheads that caused him some grief. After some experimentation, he re-wrote the entire program in assembly which produced satisfactory results. You can check out his code on the GitHub repository.

Also well worth a look, he’s got a few tricks up his sleeve to improve the quality of his home-brew PCB’s. He’s built his own UV exposure unit with timer, which is an interesting project in itself. The layout is designed in Eagle, with a flood fill to minimize the amount of copper required to be etched away. He takes a laser print of the layout, applies vegetable oil to the paper to make it more translucent to UV, and doubles up the prints to get a nice contrast.

Once the sensitized board has been exposed in the UV unit, he uses a weak but fresh and warm solution of Sodium Hydroxide as a developer to remove the unexposed UV photo-resist. To etch the board, he uses standard Feric Chloride solution, which is kept warm using an aquarium heater, while an aquarium air-pump is used to agitate the solution. He also describes how he fabricates double sided boards using the same technique. The end result is quite satisfying – check out the video after the break.

Continue reading “Christmas Lights Done The Hard Way”

Bitbanging VGA Fits In Under 1 KB

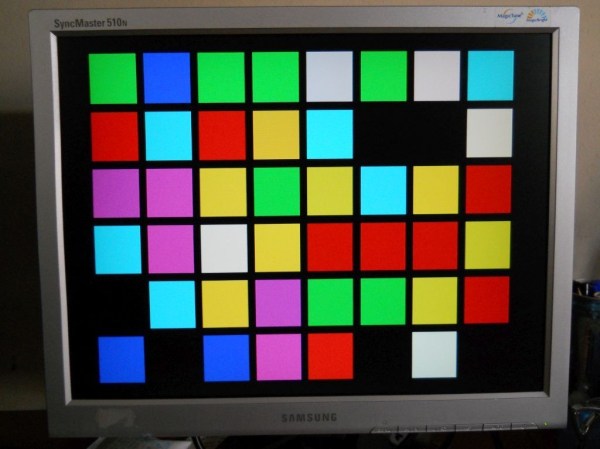
Don’t throw those old VGA monitors away, turn them into works of art with [danjovic] and VGA Blinking Lights. This circuit uses a PIC16F688 to generate VGA video. Not just a random spray of monochrome dots either. VGA Blinking Lights puts up an ever-changing display of 48 colored squares.

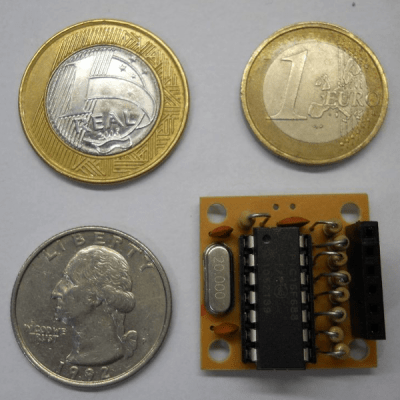
blink-thumbOriginally created for the square inch contest, VGA Blinking Lights could hide behind a quarter. [Danjovic] dusted his project off and entered it in The 1 kB Challenge. The code is written in PIC assembly. The final hex used to generate the squares clocks in at 471 words. Since the PIC uses a 14 bit word, that’s just over 824 bytes. Plenty of space for feature creep!

Video is generated with a twist on the R2R DAC. [Danjovic] tweaked the resistor values a bit to obtain the correct voltage levels for the VGA standard. The color of the squares themselves are random, generated using a Galois Linear Feedback Shift Register (LFSR).

With only a handful of components, and a BOM cost under $5, this would be a fun evening project for any hardware hacker.

1kb-thumb

If you have a cool project in mind, there is still plenty of time to enter the 1 kB Challenge! Deadline is January 5, so check it out and fire up your assemblers!

Arduino With A… PIC?

Before the Arduino took over the hobby market (well, at least the 8-bit segment of it), most hackers used PIC processors. They were cheap, easy to program, had a good toolchain, and were at the heart of the Basic Stamp, which was the gateway drug for many microcontroller developers.

[AXR AMR] has been working with the Pinguino, an Arduino processor based on a PIC (granted, an 18F PIC, although you can also use a 32-bit device, too). He shows you how to build a compatible circuit on a breadboard with about a dozen parts. The PIC has built-in USB. Once you flash the right bootloader, you don’t need anything other than a USB cable to program. You can see a video of this below.

You will need a programmer to get the initial bootloader, but there’s plenty of cheap options for that. The IDE is available for Windows, Linux, and the Mac. Of course, you might wonder why you would use a PIC device instead of the more traditional Arduino devices. The answer is: it depends. Every chip has its own set of plusses and minuses from power consumption to I/O devices, to availability and price. These chips might suit you, and they might not. That’s your call.  Of course, the difference between Microchip and Atmel has gotten less lately, too.

We’ve covered Pinguino before with a dedicated board. If you never played with a Basic Stamp, you might enjoy learning more about it. If you’re looking for more power than a PIC 18F can handle, you might consider the Fubarino, a PIC32 board you can use with the Arduino IDE.

Continue reading “Arduino With A… PIC?”

MP3 Player And Handheld GPS Is An Odd Combo Work Of Art

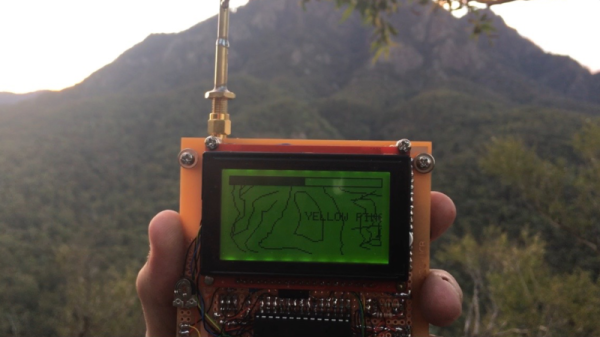
We think [Brek Martin] set out to build a handheld GPS and ended up adding an mp3 Player to it. Regardless, it’s beautifully constructed. Hand built circuit boards and even a custom antenna adorn this impressive build.

The core of the build is a 16 bit microcontroller a dsPIC33FJ128GP802 from Microchip. It’s a humble chip to be doing so much. It uses a UBlox NEO-6M positioning module for the location and a custom built QFH antenna built after calculations done with an online calculator for the GPS half. The audio half is based around a VLSI VS1003b decoder chip.

The whole build is done with protoboard. Where the built in traces didn’t suffice enamel and wire wrap wire were carefully routed and soldered in place. There’s a 48pin LQFP package chip soldered dead bug style that’s impressive to behold.  You can see some good pictures in this small gallery below.

Continue reading “MP3 Player And Handheld GPS Is An Odd Combo Work Of Art”

Rita’s Dolls Probably Live Better Than You Do

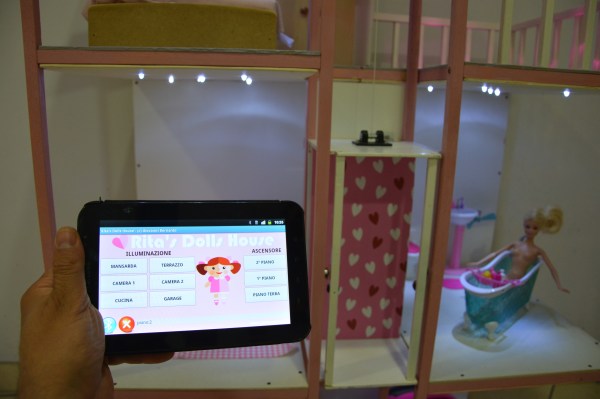
If it wasn’t for the weird Dutch-Norwegian techno you’d presumably have to listen to forever, [Gianni B.]’s doll house for his daughter, [Rita] makes living in a Barbie World seem like a worthwhile endeavor. True to modern form, it’s got LED lighting. It’s got IoT. It’s got an app and an elevator. It even has a tiny, working, miniature television.

It all started with a Christmas wish. [Rita] could no longer stand to bear the thought of her Barbie dolls living a homeless lifestyle on her floor, begging passing toys for enough monopoly money to buy a sock to sleep under. However, when [Gianni] visited the usual suspects to purchase a dollhouse he found them disappointing and expensive.

So, going with the traditional collaborating-with-Santa ruse, he and his family had the pleasure of collaborating on a dollhouse development project. Each room is lit by four ultra bright LEDs. There is an elevator that’s controlled by an H-bridge module, modified to have electronic braking. [Rita] doesn’t own a Dr. Barbie yet, so safety is paramount.

The brain of the home automation is a PIC micro with a Bluetooth module. He wrote some code for it, available here. He also went an extra step and used MIT’s scratch to make an app interface for the dollhouse. You can see it work in the video after the break. The last little hack was the TV. An old arduino, an SD Card shield, and a tiny 2.4 inch TFT combine to make what’s essentially a tiny digital picture frame.

His daughter’s are overjoyed with the elevation of their doll’s economic class and a proud father even got to show it off at a Maker Faire. Very nice!

Continue reading “Rita’s Dolls Probably Live Better Than You Do”