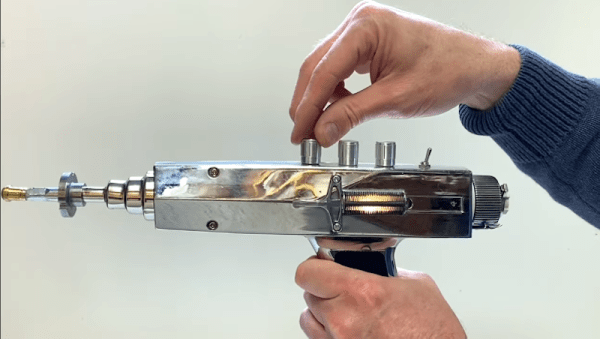
When we first saw [lonesoulsurfer’s] ray gun, we thought it looked oddly familiar. Sure, it looks like a vintage ray gun you might see in a dozen 1950-era movies or TV shows. But still, there was something oddly familiar about it. Turns out, the core piece of it is an old-fashioned timing light used when doing a car tune-up.
This is no unobtrusive Star Trek phaser. It looks substantial and has a cool sound generator that not only gives it something to do but also sports cool control knobs out the top of the gun. The design files for the sound circuit are in a Google drive folder if you want to recreate the build.
The Hackaday comments section has become infamous for a recurring theme that goes something like “I don’t know why they used an Arduino, they could have done it with a 555 timer!” If you’ve ever thought the same way, then this post is for you!
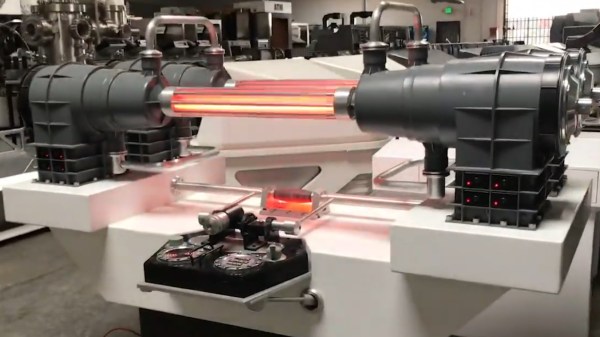
What is The Most Important Device In The Universe, then? It’s the Modern Props #195-290-1, a movie prop originally built in the 1970’s. It’s a product of the creative mind of [John Zabrucky] who founded Modern Props in 1977 to serve Sci-Fi television and movie productions that wanted to invent the future with their props. Known for their high quality and impeccable craftsmanship, Modern Props’ products were in demand until the day they closed the doors so that [John] could retire.
This particular piece is called The Most Important Device In The Universe due to its ubiquity in modern productions that we’ve all heard of: several Star Trek franchises, The Last Starfighter, Knight Rider, Airplane II, Austin Powers, and countless others. The next time you sit down to watch a Sci-Fi show, see if you can spot it! Be sure to check the video below the break to see several examples.
Nobody is sure what The Most Important Device does, aside from the fact that it has red lights that go back and forth. What we do know, thanks to a comment by the man who installed the electronics, [Gene Turnbow], is how it’s powered. [Gene] explained that 45w NPN power transistors drive the neon tubes through step up transformers. The transistors themselves are connected to a 74C4514 demultiplexer, which is itself driven by a 7493 binary counter. What’s the 7493 driven by? You guessed it: the venerable 555 Timer. And so it is that the 555 timer runs The Most Important Device In The Universe.
We did think that [Gene]’s final comment was rather indicative of how much things have changed since the prop was originally built. After explaining the device, he says “These days we would just use an Arduino to do the same job.” Indeed.
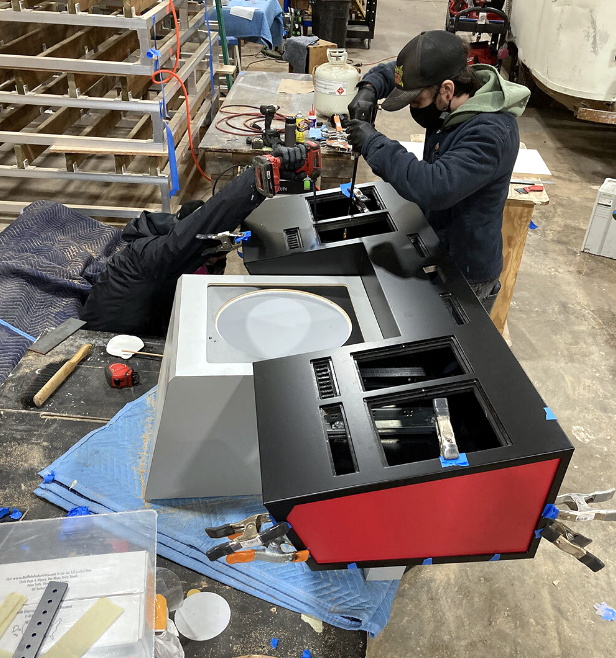
Many a young geek wished they could get a chance to sit at the helm of the USS Enterprise, wildly tapping on unlabeled technicolor buttons with the self-assured confidence of a proper Starfleet officer. For most of us it was a dream unrealized, but right now somebody in the Seattle, Washington area is getting to do exactly that in their media room. We won’t deny being jealous, but at least our collective egos can take some comfort in the knowledge that they had to outsource the construction of their replica helm to the fine folks at [Blackmouth Design].
There’s not a lot of technical details to be had, but considering the page for this project is only meant to show off the company’s design and fabrication skills, we can’t blame them too much. If we were in the business of selling these things, we’d probably keep some of the juicer details under wraps too.
But we do know there’s “Arduino technology” under the hood that fires up different light and sound effects depending on which of the vintage rocker switches has been flipped. The red momentary buttons lined up on the right side of the coffee table sized panel are tied into the home media center to do things like turn off the lights and lower the projector screen. Check out the video below for a brief demo.
In a post on Reddit, one of the engineers behind the project explains that the top surface of the helm is 3/16″ powder coated aluminum, with the plywood that makes up the base laminated in the classic Original Series color scheme of red, grey, and black. The artwork for the astrogator was created from scratch, backlit with LEDs, and placed behind a 1/4″ acrylic panel for protection. We imagine the fact that it’s parallel to the ground means it’s supposed to be a space to place your drinks or popcorn, though if it was in our house, nobody would be bringing food or drink anywhere near it.
In all honesty, while Hackaday is decidedly more about building than buying, we can’t fault anyone for forking over their hard earned cash for craftsmanship of this caliber. After all, we’ve had our eyes on that officially licensed tricorder replica for quite some time now.
Bad news, Martian helicopter fans: Ingenuity, the autonomous helicopter that Perseverance birthed onto the Martian surface a few days ago, will not be taking the first powered, controlled flight on another planet today as planned. We’re working on a full story so we’ll leave the gory details for that, but the short version is that while the helicopter was undergoing a full-speed rotor test, a watchdog timer monitoring the transition between pre-flight and flight modes in the controller tripped. The Ingenuity operations team is going over the full telemetry and will reschedule the rotor test; as a result, the first flight will occur no earlier than Wednesday, April 14. We’ll be sure to keep you posted.
Anyone who has ever been near a refinery or even a sewage treatment plant will have no doubt spotted flares of waste gas being burned off. It can be pretty spectacular, like an Olympic torch, but it also always struck us as spectacularly wasteful. Aside from the emissions, it always seemed like you could at least try to harness some of the energy in the waste gasses. But apparently the numbers just never work out in favor of tapping this source of energy, or at least that was the case until the proper buzzword concentration in the effluent was reached. With the soaring value of Bitcoin, and the fact that the network now consumes something like 80-TWh a year, building portable mining rigs into shipping containers that can be plugged into gas flaring stacks at refineries is now being looked at seriously. While we like the idea of not wasting a resource, we have our doubts about this; if it’s not profitable to tap into the waste gas stream to produce electricity now, what does tapping it to directly mine Bitcoin really add to the equation?
What would you do if you discovered that your new clothes dryer was responsible for a gigabyte or more of traffic on your internet connection every day? We suppose in this IoT world, such things are to be expected, but a gig a day seems overly chatty for a dryer. The user who reported this over on the r/smarthome subreddit blocked the dryer at the router, which was probably about the only realistic option short of taking a Dremel to the WiFi section of the dryer’s control board. The owner is in contact with manufacturer LG to see if this perhaps represents an error condition; we’d actually love to see a Wireshark dump of the data to see what the garrulous appliance is on about.
As often happens in our wanderings of the interwebz to find the very freshest of hacks for you, we fell down yet another rabbit hole that we thought we’d share. It’s not exactly a secret that there’s a large number of “Star Trek” fans in this community, and that for some of us, the way the various manifestations of the series brought the science and technology of space travel to life kick-started our hardware hacking lives. So when we found this article about a company building replica Tricorders from the original series, we followed along with great interest. What we found fascinating was not so much the potential to buy an exact replica of the TOS Tricorder — although that’s pretty cool — but the deep dive into how they captured data from one of the few remaining screen-used props, as well as how the Tricorder came to be.
And finally, what do you do if you have 3,281 drones lying around? Obviously, you create a light show to advertise the launch of a luxury car brand in China. At least that’s what Genesis, the luxury brand of carmaker Hyundai, did last week. The display, which looks like it consisted mostly of the brand’s logo whizzing about over a cityscape, is pretty impressive, and apparently set the world record for such things, beating out the previous attempt of 3,051 UAVs. Of course, all the coverage we can find on these displays concentrates on the eye-candy and the blaring horns of the soundtrack and gives short shrift to the technical aspects, which would really be interesting to dive into. How are these drones networked? How do they deal with latency? Are they just creating a volumetric display with the drones and turning lights on and off, or are they actually moving drones around to animate the displays? If anyone knows how these things work, we’d love to learn more, and perhaps even do a feature article.
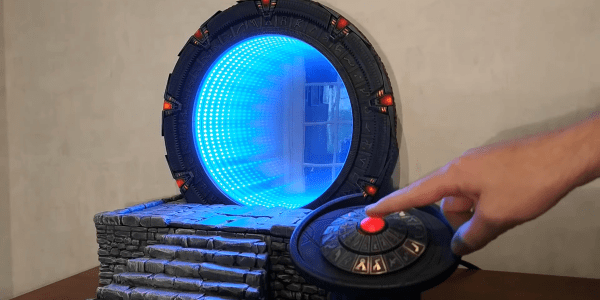
The Stargate Universe franchise has spawned numerous movies, serials, books, comics and games since 1994, and has been a favorite among science fiction fans. Prop makers and hackers often try building their own Stargate replica – the Einstein–Rosen bridge portal that allows almost instantaneous travel between two distant locations. Building an authentic looking prop requires a lot of attention to detail, and [Kristian]’s The Stargate Project is an amazingly well built rendition of the portal.
[Kristian]’s Stargate is mostly 3D printed and features a symbol ring, with chevrons that lock and light up when engaged. When the correct address has been dialled in, the wormhole is established, via an infinity mirror effect that uses 122 RGB LEDs. The Dial Home Device (DHD) is a replica of the original pedestal shaped computer, with two concentric sets of 19 buttons and a central activation button.
The Stargate ring is assembled from multiple 3D printed in sections, and measures 390 mm across. The seven Chevrons move along 3D printed rack-and-pinion gears, driven by geared micro-motors. The symbol ring is driven by a separate NEMA14 stepper motor. A Raspberry Pi with three piggy backed motor hats controls the various motors and LEDs. A USB sound card and a powered speaker provide audio effects while dialling. Once a worm hole is established, random audio snippets are played. The wormhole is maintained for 38 minutes, after which the Stargate powers down.
The Dial Home Device is built around a custom, circular PCB which holds the keypad buttons, LEDs and an ATmega 32u4 micro-controller which connects to the Raspberry Pi via USB. The 39 LEDs are APA102C’s so they only need two GPIO pins. For the keyboard, four banks of nine buttons and another bank of three are connected via a resistive ladder to the analog GPIO’s. This allows all 39 buttons to be connected via five analog inputs and was probably done to simplify PCB track layout. The back lit button key caps were printed in two parts. The translucent bases are covered with the opaque symbol caps.
Making a prop like this look like the real deal requires a lot of effort in painting the various parts, and this shows in [Kristian]’s final result, right down to the stone platform on which the Stargate sits. The one improvement we would like to see is a wireless DHD, just like it’s supposed to be. Doing so shouldn’t be too difficult, and losing the USB tether between the Stargate and its DHD would be a great upgrade to this amazing project. Check out the videos after the break, and there are many more on [Kristian]’s project page.
If they were magically transported ahead in time, the moviegoers of the past would likely not know what to make of our modern CGI-driven epics, with physically impossible feats performed in landscapes that never existed. But for as computationally complex as movies have become, it’s the rare film that doesn’t still need at least some old-school movie magic, like hand props, physical models, and other practical effects.
To make their vision come to life, especially in science fiction films, filmmakers turn to artists who specialize in practical effects. We’ve all seen their work, which in many cases involves turning ordinary household objects into yet-to-be-invented technology, or creating scale models of spaceships and alien landscapes. But to really sell these effects, adding a dash of electronics can really make the difference.
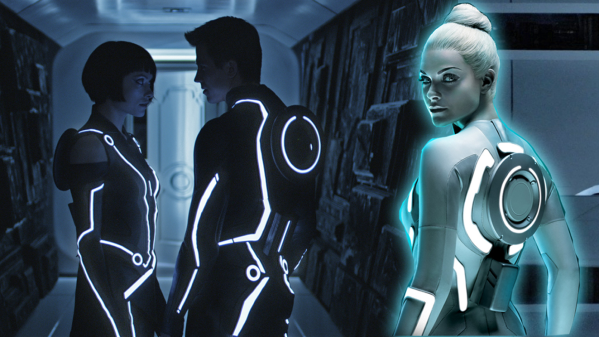
Enter Alan McFarland, an electronics designer and engineer for the film industry. With a background in cinematography, electronics, and embedded systems, he has been able to produce effects in movies we’ve all seen. He designed electroluminescent wearables for Tron: Legacy, built the lighting system for the miniature Fhloston Paradise in The Fifth Element, and worked on the Borg costumes for Star Trek: First Contact. He has tons of experience making the imaginary look real, and he’ll join us on the Hack Chat to discuss the tricks he keeps in his practical effects toolkit to make movie magic.
Click that speech bubble to the right, and you’ll be taken directly to the Hack Chat group on Hackaday.io. You don’t have to wait until Wednesday; join whenever you want and you can see what the community is talking about.
With the movie Man of War shooting in Cyprus, there was a problem. They needed prop guns that looked realistic and ejected cases when fired, but that were also allowed under the country’s firearm laws. The task fell on [Paradym’s] shoulders, and he set to work producing a prop capable of doing the job.
With the laws in Cyprus, using anything off-the-shelf like an Airsoft pistol was simply not allowed. Instead, he had to start from scratch, creating a design outwardly similar to the Colt 1911 to suit the era of the film. Using green gas canisters for power, the first focus was on getting a realistic semi-automatic firing cycle happening. With that done, the next goal was to get the cases to eject from the weapon on each shot. To achieve this, a lever was used, actuated by the slide moving back after a shot, pushing the “spent” cartridge out of the port.
[Paradym] goes into great deal, covering the design of the 3D printed parts, the machining of springs, as well as the final assembly of the prop. We’ve seen other prop gun builds before, too. Video after the break.