Virtual LCD Using Python

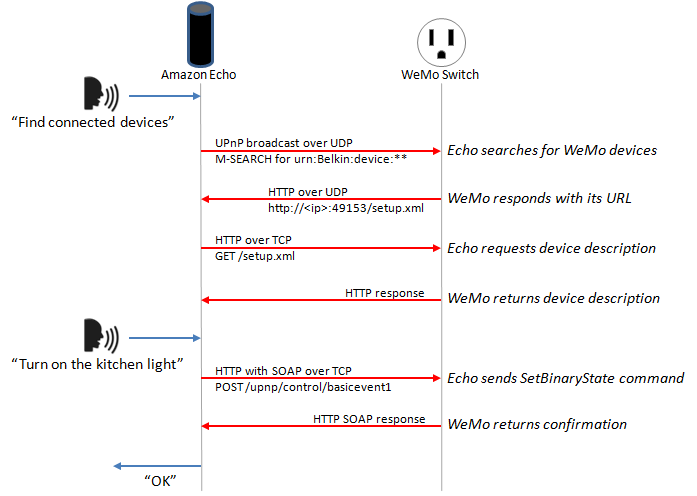
[Prashant Mohta] got hold of a Raspberry Pi, a 16×2 LCD display and got down to writing a simple game in Python. Pretty soon, he realized that it was cumbersome to have the Ras-Pi and LCD connected when all he wanted to do was write the code. So he wrote a simple Python module which renders the LCD on his computer display. A simple, quick, useful hack.

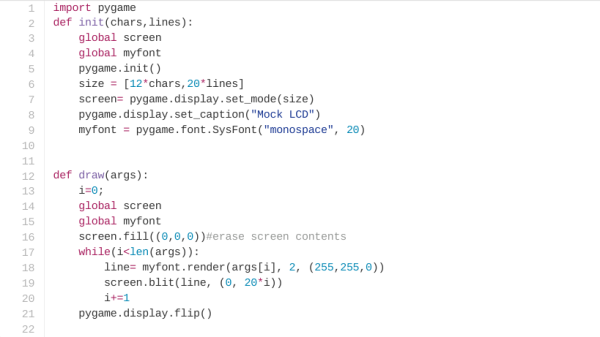
[Prashant]’s code relies on the use of Pygame, a set of Python modules designed for writing games. His code uses just two functions – one to define the LCD (characters and number of lines) while the other draws the characters on the screen by looking up an array. The code is just under 20 lines and available from his Github repo. It will be useful to those who are getting started on Python to help them understand some basics. Python is awesome and writing Python code is pretty simple.

This might draw some flak from the naysayers so if you’re commenting below on the merits, or not, of Python, just keep your comments civil and healthy. In the video below, unrelated to this hack, [Raymond Hettinger] talks about “What makes Python so Awesome”!

Continue reading “Virtual LCD Using Python”

Water Gun

Motion Sensing Water Gun Tweets Photos To Embarrass Enemies

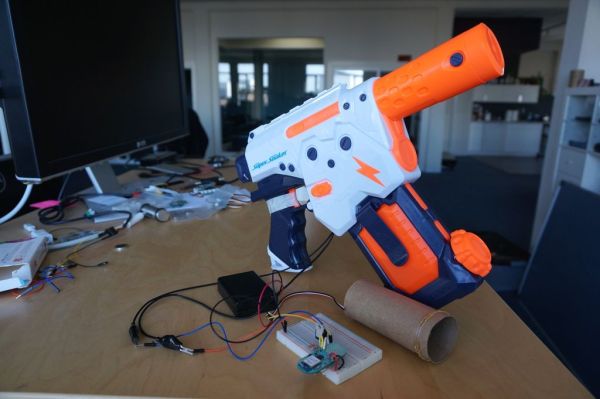
[Ashish] is bringing office warfare to the next level with a motion sensing water gun. Not only does this water gun automatically fire when it detects motion, but it also takes a photo of the victim and publishes it on Twitter.

This hack began with the watergun. [Ashish] used a Super Soaker Thunderstorm motorized water gun. He pulled the case apart and cut one of the battery wires. he then lengthened the exposed ends and ran them out of the gun to his control circuit. He also placed a protection diode to help prevent any reverse EMF from damaging his more sensitive electronics. The new control wires run to a MOSFET on a bread board.

[Ashish] is using a Lightblue Bean board as a microcontroller. The Bean is Arduino compatible and can be programmed via low energy Bluetooth. The Bean uses an external PIR sensor to detect motion in the room. When it senses the motion, it activates the MOSFET which then turns on the water gun.

[Ashish] decided to use Node-RED and Python to link the Bean to a Twitter account. The system runs on a computer and monitor’s the Bean’s serial output. If it detects the proper command, it launches a Python script which takes a photo using a webcam. A second script will upload that photo to a Twitter account. The Node-RED server can also monitor the Twitter account for incoming direct messages. If it detects a message with the correct password, it can use the rest of the message as a command to enable or disable the gun.

USB Switch

Reverse Engineering How A USB Switch Switches

[Daniel] found himself with a need to connect a single USB device to two Linux servers. After searching around, he managed to find an inexpensive USB switch designed to do just that. He noticed that the product description mentioned nothing about Linux support, but he figured it couldn’t be that hard to make it work.

[Daniel] started by plugging the device into a Windows PC for testing. Windows detected the device and installed an HID driver automatically.  The next step was to install the control software on the Windows system. This provided [Daniel] with a tray icon and a “switch” function. Clicking this button disconnected the HID device from the Windows PC and connected the actual USB device on the other side of the USB switch. The second computer would now have access to the HID device instead.

[Daniel] fired up a program called SnoopyPro. This software is used to inspect USB traffic. [Daniel] noticed that a single message repeated itself until he pressed the “switch” button. At that time, a final message was sent and the HID device disconnected.

Now it was time to get cracking on Linux. [Daniel] hooked up the switch to a Linux system and configured a udev rule to ensure that it always showed up as /dev/usbswitch. He then wrote a python script to write the captured data to the usbswitch device. It was that simple. The device switched over as expected. So much for having no Linux support!

The Live Still Life

Here’s a project that brings together artist [Justus Bruns] and engineers [Rishi Bhatnagar] and [Michel Jansen] to collaborate on an interactive work of Art. The Live Still Life is a classic still life, streamed live from India to anywhere in the world. It is the first step towards the creation of an art factory, where hundreds of these works will be made, preserved and streamed.

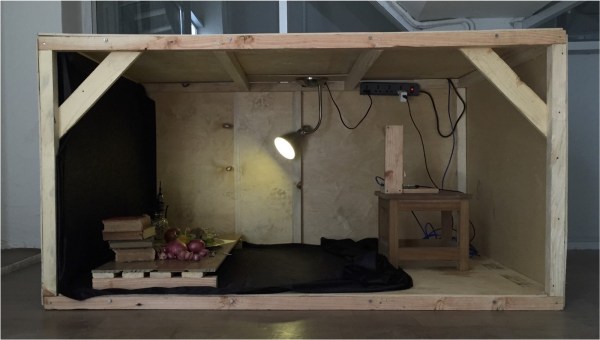
The Live Still Life is a physical composition of fresh fruit and vegetables displayed on a table with flatware, cutlery and other still objects. This is located in a wooden box in Bangalore. Every minute a photo is taken and the image is streamed, live, accessible instantly from anywhere in the world. Les Oiseaux de Merde’s Indian curator is on call to replace the fruit the minute it starts to rot so as to maintain the integrity of the image. In this way, while the image remains the same, the fight against decay is always present. The live stream can be viewed at this link.

The hardware is quite minimal. An internet connected Raspberry Pi model B,  Raspberry Pi camera module, a desk lamp for illumination and a wooden enclosure to house it all including the artwork. Getting the camera to work was just a few lines of code in Python. Live streaming the camera pictures took quite a bit more work than they expected. The server was written using a module called Exprestify written on top of Express JS to facilitate easier RESTful functions. For something that looks straightforward, the team had to overcome several coding challenges, so if you’d like to dig in to the code, some of it is hosted on Github or you can ask [Rishi] since he still needs to clean it up quite a bit.

Hackaday Prize Entry: Python Powered Scientific Instrumentation

A common theme in The Hackaday Prize and Hackaday.io in general is tools to make more tools. There are a lot of people out there trying to make the next Bus Pirate, and simply measuring things is the first step towards automating a house or creating the next great blinkey invention.

In what is probably the most capable measurement system in the running for this year’s Hackaday Prize, [jithin] is working on a Python Powered Scientific Instrumentation Tool. It’s a microcontroller-powered box containing just about every imaginable benchtop electronics tool, from constant current supplies, LCR meters, waveform generators, frequency counters, and a logic analyzer.

This project is stuffed to the gills with just about every electronic tool imaginable; there are programmable gain amplifiers, voltage references, DACs and constant current sources, opamps and comparators, all connected to a bunch of banana jacks. All of these components are tied up in a nifty Python framework, allowing a bunch of measurements to be taken by a single box.

If that’s not enough, [jithin] is also working on wireless extension nodes for this box to get data from multiple acquisition points where wires would be unfeasible. This feature uses a NRF24L01+ radio module; it’s more than enough bandwidth for a lot of sensors, and there’s enough space all the wireless sensors you would ever need.


The 2015 Hackaday Prize is sponsored by:

Eye-Controlled Wheelchair Advances From Talented Teenage Hackers

[Myrijam Stoetzer] and her friend [Paul Foltin], 14 and 15 years old kids from Duisburg, Germany are working on a eye movement controller wheel chair. They were inspired by the Eyewriter Project which we’ve been following for a long time. Eyewriter was built for Tony Quan a.k.a Tempt1 by his friends. In 2003, Tempt1 was diagnosed with the degenerative nerve disorder ALS  and is now fully paralyzed except for his eyes, but has been able to use the EyeWriter to continue his art.

This is their first big leap moving up from Lego Mindstorms. The eye tracker part consists of a safety glass frame, a regular webcam, and IR SMD LEDs. They removed the IR blocking filter from the webcam to make it work in all lighting conditions. The image processing is handled by an Odroid U3 – a compact, low cost ARM Quad Core SBC capable of running Ubuntu, Android, and other Linux OS systems. They initially tried the Raspberry Pi which managed to do just about 3fps, compared to 13~15fps from the Odroid. The code is written in Python and uses OpenCV libraries. They are learning Python on the go. An Arduino is used to control the motor via an H-bridge controller, and also to calibrate the eye tracker. Potentiometers connected to the Arduino’s analog ports allow adjusting the tracker to individual requirements.

The web cam video stream is filtered to obtain the pupil position, and this is compared to four presets for forward, reverse, left and right. The presets can be adjusted using the potentiometers. An enable switch, manually activated at present is used to ensure the wheel chair moves only when commanded. Their plan is to later replace this switch with tongue activation or maybe cheek muscle twitch detection.

First tests were on a small mockup robotic platform. After winning a local competition, they bought a second-hand wheel chair and started all over again. This time, they tried the Raspberry Pi 2 model B, and it was able to work at about 8~9fps. Not as well as the Odroid, but at half the cost, it seemed like a workable solution since their aim is to make it as cheap as possible. They would appreciate receiving any help to improve the performance – maybe improving their code or utilising all the four cores more efficiently. For the bigger wheelchair, they used recycled car windshield wiper motors and some relays to switch them. They also used a 3D printer to print an enclosure for the camera and wheels to help turn the wheelchair. Further details are also available on [Myrijam]’s blog. They documented their build (German, pdf) and have their sights set on the German National Science Fair. The team is working on English translation of the documentation and will release all design files and source code under a CC by NC license soon.

Extracting Lightning Strikes From HD Video

Lightning photography is a fine art. It requires a lot of patience, and until recently required some fancy gear. [Saulius Lukse] has always been fascinated by lightning storms. When he was a kid he used to shoot lightning with his dad’s old Zenit camera — It was rather challenging. Now he’s figured out a way to do it using a GoPro.

He films at 1080@60, which we admit, isn’t the greatest resolution, but we’re sure the next GoPro will be filming 4K60 next. This means you can just set up your GoPro outside during the storm, and let it do it what it does best — film video. Normally, you’d then have to edit the footage and extract each lightning frame. That could be a lot of work.

[Saulius] wrote a Python script using OpenCV instead. Basically, the OpenCV script spots the lightning and saves motion data to a CSV file by detecting fast changes in the image.

graph of lightning

The result? All the lightning frames plucked out from the footage — and it only took an i7 processor about 8 minutes to analyze 15 minutes of HD footage. Not bad.

Now if you feel like this is still cheating, you could build a fancy automatic trigger for your DSLR instead…