How To Repair? The Death Of Schematics

There was a time when, if you were handy with a soldering iron, you could pretty easily open up a radio or TV repair business. You might not get rich, but you could make a good living. And if you had enough business savvy to do sales too, you could do well. These days there aren’t many repair shops and it isn’t any wonder. The price of labor is up and the price of things like TVs drops every day. What’s worse is today’s TV is not only cheaper than last year’s model, but probably also better. Besides that, TVs are full of custom parts you can’t get and jam-packed into smaller and smaller cases.

Case in point, I saw a “black Friday” ad for a 40-inch 1080p flatscreen with a streaming controller for $98. Granted, that’s not huge by today’s standards and I’m sure it isn’t a perfect picture. But for $98? Even a giant high-quality TV these days might cost a bit more than $1,000 and you can get something pretty great for well under $500.

Looking back, a Sears ad showed a great deal on a 19″ color TV in 1980. The price? $399. That doesn’t sound too bad until you realize that today that would be about $1,400. So with a ratio of about 3.5 to 1, a $30/hour service call would be, today, $105. So for an hour’s service call with no parts, I could just buy that 40″ TV. Add even one simple part or another hour and I’m getting close to the big league TVs.

Did you ever wonder how TV repair technicians knew what to do? Well, for one thing, most of the time you didn’t have to. A surprising number of calls would be something simple like a frayed line cord or a dirty tuner. Antenna wires destroyed by critters was common enough. In the tube days, you could pretty easily swap tubes to fix the bulk of actual problems.

Continue reading “How To Repair? The Death Of Schematics”

A home-made wireless game controller

ColecoVision Barn Find Gets Wireless Makeover

Few things are more satisfying than finding an old, forgotten piece of technology somewhere and bringing it back to life. And while it’s great to see a rare sports car or an Apollo Flight Computer being restored, even not-very-successful game consoles from the 1980s can make for some great repair stories. Just look at how [Discreet Mayor] describes his restoration and modification efforts on a ColecoVision that he literally found in a barn.

Given that the ColecoVision was on the market between 1982 and 1985, we can assume that [Discreet Mayor]’s console had been sitting on a shelf for at least three decades, and the machine was definitely showing its age. Several components had failed due to corrosion, including the clock crystal, a 7400 series logic chip and a capacitor in the power supply, but since these are all standard components it was rather straightforward to replace them.

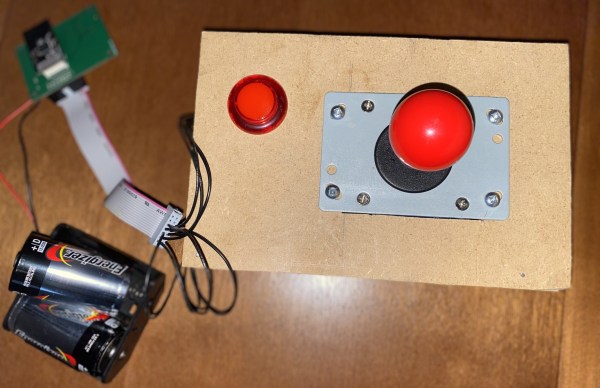
The controllers however were sadly beyond repair. Replacing them with standard joysticks wasn’t really an option because the ColecoVision controllers included a numeric keypad, which was mainly used to select game options. Making something completely new was the way to go, and [Discreet Mayor] decided to go for a wireless system while he was at it. After all, he had already developed a modular wireless IoT system based on the IEEE 802.15.4 standard, which turned out to be a perfect fit for this system.

The splash screen of ColecoVision's Venture[Discreet Mayor] built a simple joystick-plus-fire-button setup on a piece of MDF and equipped it with his IoT transmitter. Instead of adding a replacement numeric keypad he decided to use the joystick to simulate the most commonly-used buttons: “right” for “1”, “down” for “2” and so on. The receiver module uses digital switches to mimic keypresses to the console’s input port. The end result might look a bit hacky, but the console is fully functional again and runs its games just like it did over thirty years ago.

We’ve seen several projects that add wireless controllers to a variety of classic consoles. If you’ve got a ColecoVision that turns out to be beyond salvaging, you can always just build your own from scratch.

A Homebrew AC Upgrade For The Fluke 8840A

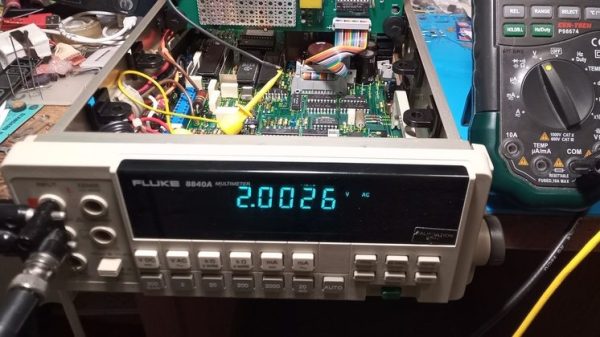
[William Dudley] picked up a Fluke 8840A bench multimeter at an auction, but was sad to find out that it was reading resistances inaccurately. It was also missing the optional board to enable AC measurements. Desiring to use the otherwise lovely meter, he set about repairing and upgrading the device.

Thankfully, the 8840A was from a time when Fluke used to openly publish schematics in its manuals. Thus, combined with taking a look at some photos online, it was straightforward for [William] to recreate the original AC “Option 09” board to enable the desired functionality. As is usually the way, his efforts didn’t work first time, but after some bodge wires were installed, all was well. [William] reports the measurements are “reasonable, maybe even sufficient” with no calibration undertaken.

Repairing the resistance issue was easy. It turned out to be corrosion on the selector switches, revealed when high-resistance measurements were accurate, but low-resistance measurements weren’t. A bit of flick-flacker with some contact cleaner sprayed into the switches got things working again nicely.

It’s nice to see old hardware restored to full functionality, particularly when it’s as attractive and well-built as an old Fluke meter. Bringing back old tools from the dead? You know we wanna hear about it!

Everything You Wanted To See About Restoring A 1956 Radio

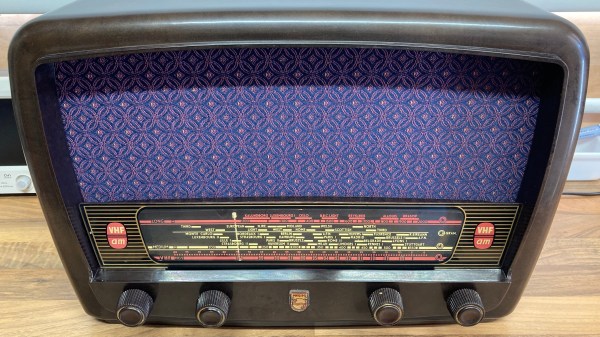
Ever wanted a good, good look at the insides of a 1950s radio, along with fantastic commentary on the internals and the purpose of various components? Then don’t miss [Adam Wilson]’s repair and restoration of a 1956 Philips 353A, a task made easier by a digitized copy of the service manual. [Adam] provides loads of great pictures, as well as tips on what it takes to bring vintage electronics back to life. What’s not to like?

Vintage electronics like this are often chock-full of components that deteriorate with age, so one doesn’t simply apply power to see if it still works as a first step. These devices need to be inspected and serviced before power is ever applied. Even then, powerup should be done with a current-controlled source that can be shut down if anything seems amiss.

Thank goodness for high quality, digitized service manuals.

Devices like these largely predate printed circuit boards, so one can expect to see plenty of point-to-point soldering. Vacuum tubes did much of the hard work, so they are present instead of integrated circuits and transistors. Capacitors in the microfarads were much larger compared to their modern equivalents, and paper/wax capacitors (literally made from rolled-up paper covered in wax) handled capacitances in the nanofarad range instead of the little ceramic disk caps of today.

One thing that helped immensely is the previously-mentioned Philips 353A service manual, which includes not only a chassis and component layout, but even has servicing procedures such as cord replacement for the tuning dial. Back then, a tuning dial was an electromechanical assembly that used a winding of cord to rotate the tuning capacitor, and replacing it was a fiddly process. If only all hardware was documented so well!

The end result looks wonderful and still has great sound. As a final tweak, [Adam] added an external audio input cable as a nod to the modern age. Now, we have in the past seen a small LED screen integrated convincingly into an antique, but in this case [Adam] kept the original look completely intact. You can see it in action, playing some Frank Sinatra in the short video embedded below.
Continue reading “Everything You Wanted To See About Restoring A 1956 Radio”

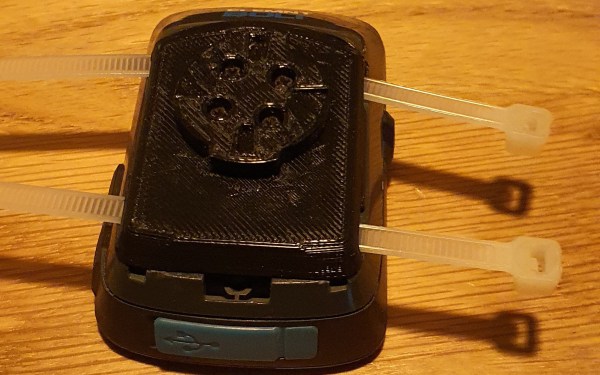
A bike computer sits on a wooden background. The back of the bike computer has a 3D printed attachment with two white translucent zip ties running through the back.

Repairing A Bike GPS With 3D Printing

We love hacks that keep gadgets out of the trash heap, and [Brieuc du Maugouër] has us covered with this 3D printable replacement mount he designed for his bike GPS.

One of the most frustrating ways a gadget can fail is when a small, but critical part of the device fails. [du Maugouër] combined a 3D printed back and four M2x6mm screws to make a robust new mount to replace the broken OEM mount on his handlebar-mounted GPS. Slots for zip tie mounting are included in case the replacement mount breaks before yet another replacement can be printed. Apparently [du Maugouër] agrees with Chief O’Brien that “in a crunch, I wouldn’t like to be caught without a second backup.” [Youtube]

It’s exciting that we’re finally in a time when 3D printed replacement parts are living up to their potential. This would be a lot easier if more manufacturers posted 3D printed design files instead of getting them pulled from 3D file platforms, but makers will find a way regardless of OEM approval.

We’ve covered a lot of bike hacks over the years including DIY Bike Computers and GPS Trackers. Do you have a project that keeps something from becoming trash or might save the world another way? There’s still time to enter the Save the World Wildcard round of the Hackaday Prize (closes October 16th).

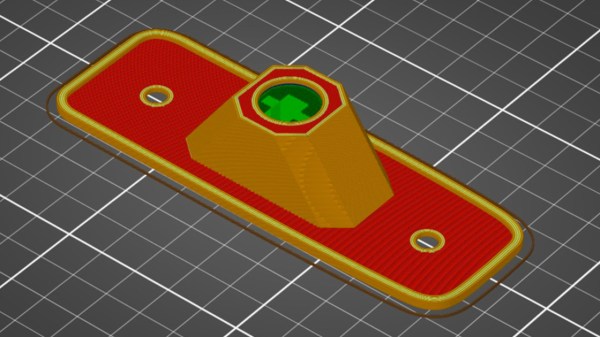
A sliced digital file of a marker light enclosure. Background is a white and grey grid and object itself is a series of print path lines in red, orange, and green.

3D Printing Hard-To-Find Vintage Vehicle Parts

When I was growing up, my dad and I restored classic cars. Combing junkyards for the pieces we needed was a mixture of interesting and frustrating since there was always something you couldn’t find no matter how long you looked. [Emily Velasco] was frustrated by the high price of parts even when she was able to find them, so she decided to print them herself. She wrote an excellent tutorial about designing and 3D printing replica parts if you find yourself in a similar situation.

All four marker lights on [Velasco]’s 1982 Toyota pickup were on their way to plastic dust, and a full set would run her $160. Instead of shelling out a ton of cash for some tiny parts, she set out to replicate the marker lamps with her 3D printer. Using a cheap marker lamp replacement for a more popular model of pickup as a template, she was able to replace her marker lamps at a fraction of the cost of the options she found online. Continue reading “3D Printing Hard-To-Find Vintage Vehicle Parts”

Fixing A 30-year Old Roland Bug

The Roland CM-500 is a digital synthesizer sound module released in 1991 that combines two incredibly powerful engines into one unit. However, in 2005 enthusiasts of the Roland MT-25 (one of the engines that went into the CM-500) noticed a difference between the vibrato rate on the MT-25 and the CM-500, rendering it less useful as now midi files would need to be adjusted before they sounded correct. Now thirty-something years later, there is a fix through the efforts of [Sergey Mikayev] and a fantastic writeup by [Cloudschatze].

They reached out to Roland Japan, who decided that since the device’s lifecycle had ended, no investigation was warranted. That led the community to start comparing the differences between the two systems. One noticeable difference was the change from an Intel 8098 to an 80C198. In theory, the latter is a superset of the former, but there are a few differences. First, the crystal frequency is divided by three rather than two, which means the period of the LFO would change even if the crystal stayed the same. Changing the 12 MHz crystal out for 8 MHz gave the LFO the correct period, but it broke the timings on the MIDI connection. However, this is just setting the serial baud rate divisor, which requires changing a few bytes.

Replace the ROM chip with a socket so you can slot your newly flashed PDIP-28 64kx8 ROM into a quick desoldering. Then swap the crystal, and you’ll have a machine that matches the MT-25 perfectly. The forum post has comparison audio files for your enjoyment. Finally, if you’re curious about other fixes requiring an inspiring amount of effort and dedication, here’s a game installer that was brought back from the dead by a determined hacker.