![]()
Happy Halloween from everyone at Hackaday! To help you enjoy the holiday here are a few festive links:
[Mike Kohn] whipped up a set of motion tracking eyeballs to make his decor extra creepy.
There’s not much to this jet-pack costume but the results are pretty amusing.
The eyes on [Tim Butler’s] skeleton prop don’t follow you around the room, but they do use a PIR sensor to light up the skull.
Speaking of skulls, [Tom] is using some real skulls as decorations. He also added lights where the eyeballs should be, but he is using a photoresistor and comparator to turn on some LEDs.
[Clark] built a Mecha Robot Warrior costume for his son. With all of those LED strips we think he’ll be pretty safe when crossing the street!
And finally, [Jesse] added a lot to his prop in order to produce a Sinister Joker. That’s Joker-as-in-cards and not as in Batman. It’s got an IR distance sensor as a trigger, with a motor to move the wrist, lights for the eyes, and a sound shield to give it a disturbing voice.
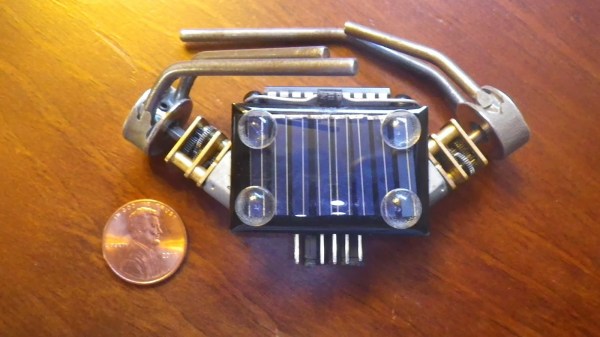
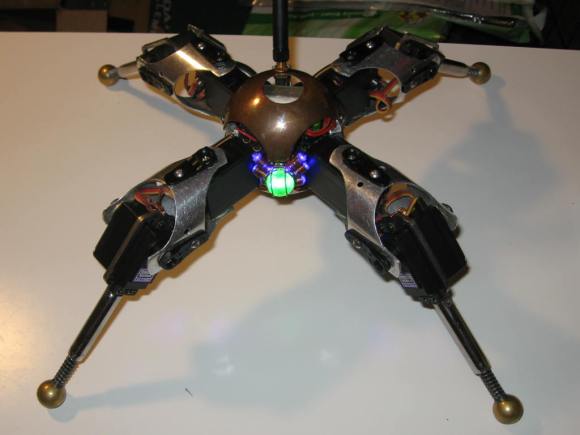 Back at New York MakerFaire 2012, we noticed an amazing little steampunk quadruped robot walking around in the crowd outdoors. The robot was amazingly well executed, and had a unique ability to draw children over with it’s puppy like animations. It turns out this is