Speeding Up Drawing To MCU-Connected Serial Displays

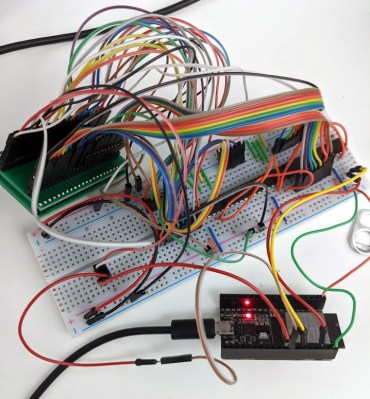
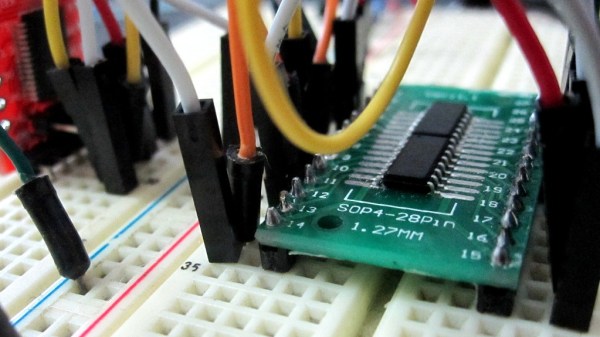
Writing image data to serially connected (SPI/I2C) displays from a microcontroller is easy enough these days, courtesy of standards defined by the MIPI Alliance, yet there are some gotchas in it which may catch someone using it unaware. [Larry Bank] wrote up a good summary of how one can get maximum performance out of such a display link.

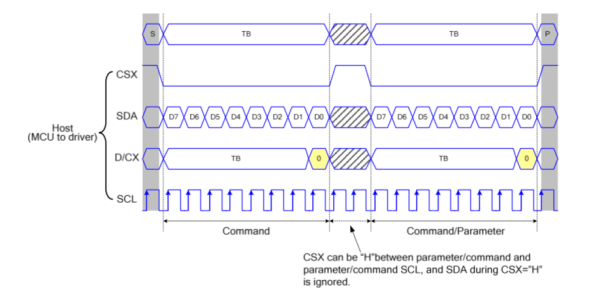
At the core is the distinction between pixel data and command transmissions. The change from command to pixel data mode requires signaling, which takes precious clock cycles away from transferring pixel data between the MCU and display. The common MIPI DCS instruction set allows for a big reduction in needed data transfers by allowing parts of the display to be addressed instead of requiring a full refresh. Yet by not properly segmenting command and data transfers, one ends up unnecessarily slowing down the process.

The result is that one can run something like a Pac-Man emulator on an AVR MCU with a sluggish 320×480 SPI LCD at 60 FPS, as one can see in the video that is embedded after the break. Check the article for another demo video as well.

Continue reading “Speeding Up Drawing To MCU-Connected Serial Displays”

A Raspberry Pi Is A Hardware Hacker’s Swiss Army Knife

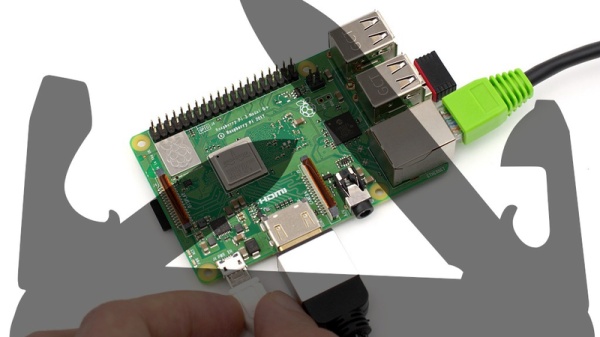
By now most of us have used a Raspberry Pi at some level or another. As a headless server it’s a great tool because of its price point, and as an interface to the outside world the GPIO pins are incredibly easy to access with a simple Python script. For anyone looking for guidance on using this device at a higher level, though, [Arun] recently created a how-to for using some of the Pi’s available communications protocols.

Intended to be a do-everything “poor man’s hardware hacking tool” as [Arun] claims, his instruction manual details all the ways that a Raspberry Pi can communicate with other devices using SPI and I2C, two of the most common methods of interacting with other hardware beyond simple relays. If you need to go deeper, the Pi can also be used as a full JTAG interface or SWD programmer for ARM chips. Naturally, UART serial is baked in. What more do you need?

As either a tool to keep in your toolbox for all the times you need to communicate with various pieces of hardware, or as a primer for understanding more intricate ways of using a Raspberry Pi to communicate with things like sensors or other computers, this is a great write-up. We also have more information about SPI if you’re curious as to how the protocol works.

Thanks to [Adrian] for the tip!

Hackaday Podcast 007: Everything Microcontrollers, Deadly Clock Accuracy, CT X-Rays, Mountains Of E-Waste

Elliot Williams and Mike Szczys look at all that’s happening in hackerdom. This week we dive deep into super-accurate clock chips, SPI and microcontroller trickery, a new (and cheap) part on the microcontroller block, touch-sensitive cloth, and taking a home X-ray to the third dimension. We’re saying our goodbyes to the magnificent A380, looking with skepticism on the V2V tech known as DSRC, and also trying to predict weather with automotive data. And finally, what’s the deal with that growing problem of electronic waste?

Links for all discussed on the show are found below. As always, join in the comments below as we’ll be watching those as we work on next week’s episode!

Take a look at the links below if you want to follow along, and as always, tell us what you think about this episode in the comments!

Direct download (60 MB or so.)

Continue reading “Hackaday Podcast 007: Everything Microcontrollers, Deadly Clock Accuracy, CT X-Rays, Mountains Of E-Waste”

Inefficient NeoPixel Control Solved With Hardware Hackery

Everyone loves NeoPixels. Individually addressable RGB LEDs at a low price. Just attach an Arduino, load the demo code, and enjoy your blinking lights.

But it turns out that demo code isn’t very efficient. [Ben Heck] practically did a spit take when he discovered that the ESP32 sample code for NeoPixels used a uint32 to store each bit of data. This meant 96 bytes of RAM were required for each LED. With 4k of RAM, you can control 42 LEDs. That’s the same amount of RAM that the Apollo Guidance Computer needed to get to the moon!

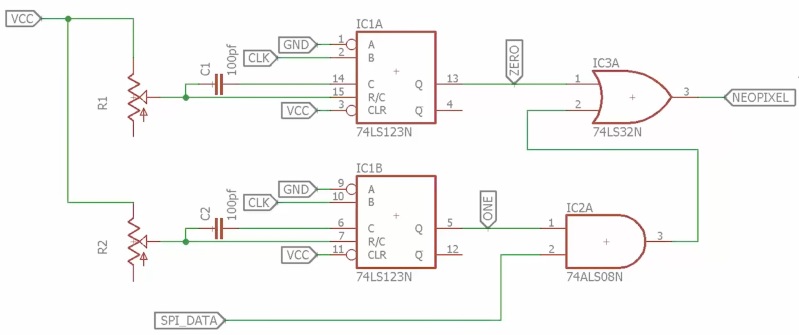
His adventure is based on the thought that you should be able to generate these signals with hardware SPI. First, he takes a look at Adafruit’s DMA-Driven NeoPixel example. While this is far more efficient than the ESP32 demo code, it still requires 3 SPI bits per bit of NeoPixel data. [Ben] eventually provides us with an efficient solution for SPI contro using a couple of 7400 series chips:

Schematic of SPI to NeoPixel circuit using 74HC123

[Ben]’s solution uses some external hardware to reduce software requirements. The 74HC123 dual multi-vibrator is used to generate the two pulse lengths needed for the NeoPixels. The timing for each multi-vibrator is set by an external resistor and capacitor, which are chosen to meet the NeoPixel timing specifications.

The 74HC123s are clocked by the SPI clock signal, and the SPI data is fed into an AND gate with the long pulse. (In NeoPixel terms, a long pulse is a logical 1.) When the SPI data is 1, the long pulse is passed through to the NeoPixels. Otherwise, only the short pulse is passed through.

This solution only requires a 74HC123, an AND gate, and an OR gate. The total cost is well under a dollar. Anyone looking to drive NeoPixels with a resource-constrained microcontroller might want to give this design a try. It also serves as a reminder that some problems are better solved in hardware instead of software.

Continue reading “Inefficient NeoPixel Control Solved With Hardware Hackery”

Being An SPI Slave Can Be Trickier Than It Appears

Interfacing with the outside world is a fairly common microcontroller task. Outside of certain use cases microcontrollers are arguably primarily useful because of how easily they can interface with other devices. If we just wanted to read and write some data we wouldn’t have gotten that Arduino! But some tasks are more common than others; for instance we’re used to being on the master side of the interface equation, not the slave side. (That’s the job for the TI engineer who designed the temperature sensor, right?) As [Pat] discovered when mocking out a missing SPI GPIO extender, sometimes playing the other role can contain unexpected difficulties.

The simple case for a SPI slave is exactly that: simple. SPI can be wonderful in its apparent simplicity. Unlike I2C there are no weird addressing schemes, read/write bits, stop and start clock conditions. You toggle a clock line and a bit of data comes out, as long as you have the right polarity schemes of course. As a slave device the basic algorithm is of commensurate complexity. Setup an interrupt on the clock pin, wait for your chip select to be asserted, and on each clock edge shift out the next bit of the current word. Check out [Pat]’s eminently readable code to see how simple it can be.

But that last little bit is where the complexity lies. When you’re the master it’s like being the apex predator, the king of the jungle, the head program manager. You dictate the tempo and everyone on the bus dances to the beat of your clock edge. Sure the datasheet for that SRAM says it can’t run faster than 8 MHz but do you really believe it? Not until you try driving that clock a little quicker to see if there’s not a speedier transfer to be had! When you’re the slave you have to have a bit ready every clock edge. Period. Missing even a single bit due to, say, an errant print statement will trash the rest of transaction in ways which are hard to detect and recover from. And your slave code needs to be able to detect those problems in order to reset for the next transaction. Getting stuck waiting to send the 8th bit of a transaction that has ended won’t do.

Check out [Pat]’s very friendly post for a nice refresher on SPI and their discoveries working through the problems of building a SPI slave. There are some helpful tips about how to keep things responsive in a device performing other tasks.

Arduino And Pi Share Boardspace

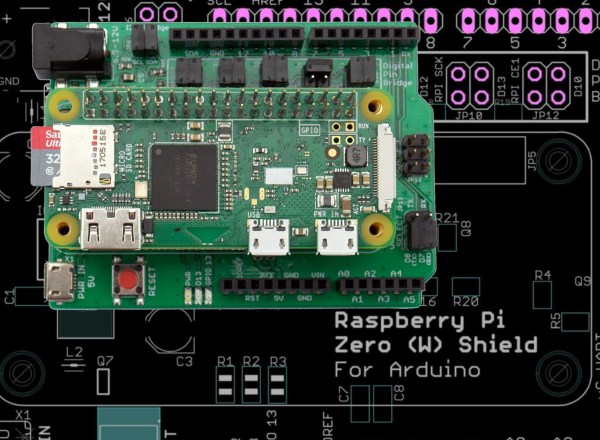
A Raspberry Pi Zero (W) and Arduino are very different animals, the prior has processing power and connectivity while the latter has some analog to digital converters (ADCs) and nearly real-time reactions. You can connect them to one another with a USB cable and for many projects that will happily wed the two. Beyond that, we can interface this odd couple entirely through serial, SPI, I2C, and logic-level signaling. How? Through a device by [cburgess] that is being called an Arduino shield that supports a Pi0 (W). Maybe it is a cape which interfaces with Arduino. The distinction may be moot since each board has a familiar footprint and both of them are found here.

Depending on how they are set up and programmed, one can take control over the other, or they could happily do their own thing and just exchange a little information. This board is like a marriage counselor between a Raspberry Pi and an Arduino. It provides the level-shifting so they don’t blow each other up and libraries so they can speak nicely to one another. If you want to dig a bit deeper into this one, design files and code examples are on available.

Perhaps we’ll report on this board at the heart of a pinball machine retrofit, a vintage vending machine restoration, or maybe a working prop replica from the retro bar in Back to the Future II.

From SPIDriver To I2CDriver

Communicating with microcontrollers and other embedded systems requires a communications standard. SPI is a great one, and is commonly used, but it’s not the only one available. There’s also I2C which has some advantages and disadvantages compared to SPI. The problem with both standards, however, is that modern computers don’t come with either built-in. To solve that problem and allow easier access to debugging in SPI, [James Bowman] built the SPIDriver a few months ago, and is now back by popular demand with a similar device for I2C, the I2CDriver.

Much like the SPIDriver, the I2C driver is a debugging tool that can be used at your computer with a USB interface. Working with I2C is often a hassle, with many things going on all at once that need to sync up just right in order to work at all, and this device allows the user to set up I2C devices in a fraction of the time. To start, it has a screen built in that shows information about the current device, like the signal lines and a graphical decoding of the current traffic. It also shows an address space map, and has programmable pullup resistors built in, and can send data about the I2C traffic back to its host PC for analysis.

The I2CDriver is also completely open source, from the hardware to the software, meaning you could build one from scratch if you have the will and the parts, or make changes to the code on your own to suit your specific needs. If you’re stuck using SPI still, though, you can still find the original SPIDriver tool to help you with your debugging needs with that protocol as well.