Motorized Lens Controller Techs Up Your Webcam

If you’re familiar with the DSLR camera market, you’d know that modern lenses are works of technological art. Crammed full of motors and delicate electronic assemblies, they’re bursting with features such as autofocus, optical stabilization and zoom. [Saulius Lukse] has been experimenting with motorized lenses for webcam applications, and has built a controller to make working with them a snap.

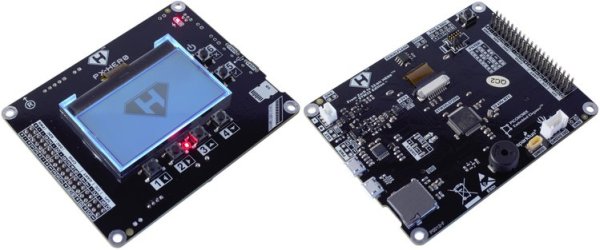
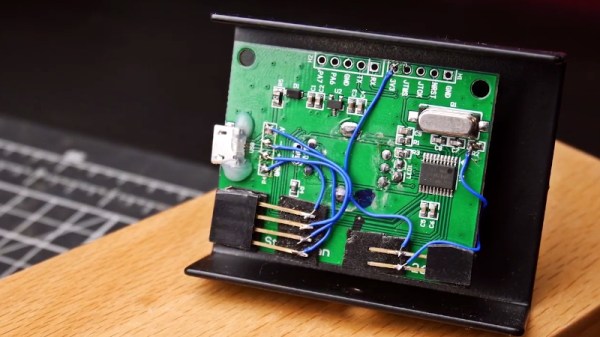
The controller is capable of controlling up to 3 stepper motors, as well as a voice coil, which should be enough for the vast majority of lenses out there. Microstepping is supported, which is key for optical systems in which tiny adjustments can make a big difference. The controller speaks USB and I2C, and is now based on an STM32 chip, having been upgraded from an earlier version which used the venerable ATmega328. The board is designed to be as compact as possible, to enable it to neatly fit inside camera and lens assemblies.

The board has been used to successfully control an 18x zoom lens, among others. Combining such a lens with a webcam and a good pan and tilt mechanism would create a highly capable surveillance package, or an excellent vision system for a robot.

It’s not the first time we’ve seen work from [Kurokesu] in these parts – they’ve done work on pedestrian detection before, too.

MIDI Grid Can Glow Up With The Best Of Them

Traditional musical instruments have a variety of interfaces, some simple, some complex. The piano is a fairly intuitive machine with a key for every note and a couple of pedals you can ignore if you like. The saxophone is a little more complex, with its many interoperable keys used to produce varying pitches. However, modern electronic instruments are not constrained by physicalities, and there has been an explosion in such devices that simply present a MIDI interface and a big pile of glowing addressable buttons. [Gediminas]’s MIDI Grid build is a great example of the type.

The build relies on an STM32 to do the heavy lifting, talking to an 8×8 array of buttons, each with addressable RGB LEDs. These are combined with silicone pads for a wonderfully tactile feel. There are then a further 17 buttons on the side for various purposes, along with two rotary encoders – useful for implementing smooth fades and intoxicating filter sweeps. Unusually for this type of instrument, in addition to USB there’s also a hardware serial MIDI interface. Finally, a Nokia 5110 LCD is implemented to display relevant data.

There are precious few details on the case, but it appears to be made from lasercut wood pieces, with a nice stain giving it a rich color. Buttons also have printed labels for a more professional look.

The build has functionality most similar to Novation’s Launchpad line. [Gediminas] currently has it working primarily with Ableton Live, however there is scope for further work to integrate the device with other DAWs or MIDI hardware.

With electronic instruments such as these, it’s possible to make musical life more accessible through smart design choices – and the Kord Kontroller is another great example.

Quadcopter Uses Bare Metal STM32

[Tim Schumacher] got a Crazepony Mini quadcopter and has been reprogramming it “bare metal” — that is to say he’s programming the STM32 without using an operating system or do-it-all environment. His post on the subject is a good reference for working with the STM32 and the quadcopter, too.

If you haven’t seen the quadcopter, it is basically a PC board with props. The firmware is open source but uses the Keil IDE. The CPU is an STM32 with 64K of program memory. In addition, the drone sports a wireless module, a digital compass, an altimeter, and a gyro with an accelerometer.

Although the post is really about the quadcopter, [Tim] also gives information about the Blue Pill which could be applied to other STM32 boards, as well. On the hardware side, he’s using a common USB serial port and a Python-based loader.

On the software side, he shows how to set up the linker and, using gcc, control output ports. Of course, there’s more to go to work the other peripherals, and Tim’s planning to investigate CMSIS to make that work easier. Our earlier post on STM32 prompted [Wassim] over on Hackaday.io to review a bunch of IDEs. That could be helpful, too.

New Part Day: The STM32 That Runs Linux

There are a lot of ARM microcontrollers out there, and the parts from ST are featured prominently is the high-power builds we’re seeing. The STM32F4 and ~F7 are powerhouses with great support, and the STM32F0 and the other younger children of the family make for very good, low-power microcontrollers. Now, the STM32 family is getting a big brother. It runs Linux. It’s two ARM Cortex-A7 cores and one M4 core on the same chip. The STM32MP1 is the chip you want if you still can’t figure out how to waste computing cycles by blinking LEDs.

Block diagram of the STM32MP157 Image: ST

First, that Linux support. The STM32MP157C was mainlined into Linux last summer, and there is support for Android. So yes, this chip can run Linux. There is an optional 3D GPU in this family, a MIPI-DSI controller, support for HDMI-CEC, USB 2.0, and 10/100M or Gigabit Ethernet. This brings us the inevitable question of whether you can build a Raspberry Pi clone with these parts. Maybe, champ, but if you’re asking that question it’s probably not you that’s going to build one. It looks as if this chip is designed for phones, set-top boxes, and smart TVs. That doesn’t preclude a single board computer, but the biggest problem there is maintaining software support anyway.

The chip family in question all come with dual ARM Cortex-A7 processors running at a nominal 650MHz. There’s also a Cortex-M4 running at 209MHz, and the ST literature suggests that engineers are already running Linux on the A7 and an RTOS on the M4. This chip will need external memory, but DDR3 / DDR3L / LPDDR2 / LPDDR3 are supported.

This chip is only announced right now, you can’t get it on Mouser or Digikey yet, and there’s no information on pricing. However, there are two development boards available, the Evaluation board, which features 1 GB of DDR3L, 128 MB of Flash, and an 8 GB eMMC. There’s a 5.5″ display, and enough connectors to make your heart flutter. The Discovery board is a bit more cut down, and comes with a 4″ 480×800 LCD, WiFi, Bluetooth LE, and of course it comes with GPIO expansion connectors for an Arduino and Raspberry Pi. The Discovery Board is not available at this time, but it will sell for $99 USD.

Playing Pokemon On A CRT Thanks To A Powerful Microcontroller

Microcontrollers come in a broad swathe of capabilities these days. There are the venerable 8-bit micros that have been around forever and valiantly crunch away, all the way up to modern 32-bit powerhouses with advanced peripherals and huge amounts of RAM and ROM. If you’re blinking a few LEDs or opening a garage door, the former is fine. For what [Jared] had in mind, a little more horsepower was required.

[Jared]’s project started out as an experiment with composite video output on a STM32F446RE microcontroller. Using a 4-bit resistor DAC, the device was able to output NTSC signals, using interrupts and NOPs to handle timing. The hardware worked, and was tested by playing the entirety of Star Wars: A New Hope from an SD card.

Attention then turned to creating a Game Boy emulator for the platform. After many hurdles with various bugs and edge cases, things started working, albeit slowly. The Pokemon game ROM wouldn’t fit in the microcontroller’s limited flash storage, so [Jared] implemented a complicated bank switching scheme. This combined with the limited computational resources meant the game was playable, but limited to just 10 FPS.

Enter the STM32H7. With over double the clock speed and capable of 856 DMIPS versus 225 of the original chip, things were coming together. Pokemon now ran at 60 FPS, and the built-in DAC greatly improved the sound. The DMA subsystem allowed further performance gains, and even running in debug mode, performance far exceeded that of the previous hardware.

With unit prices of most microcontrollers being remarkably low, it goes to show that once you’ve tapped out on performance on one platform, there’s usually a faster option available. It’s possible to emulate the Game Boy on the ESP-32 too, as Sprite_TM showed us in 2016. Video after the break.

[Thanks to Ben for the tip!]

Continue reading “Playing Pokemon On A CRT Thanks To A Powerful Microcontroller”

Hackaday Podcast 004: Taking The Blue Pill, Abusing Resistors, And Not Finding Drones

Catch up on your Hackaday with this week’s podcast. Mike and Elliot riff on the Bluepill (ST32F103 boards), blackest of black paints, hand-crafted sorting machines, a 3D printer bed leveling system that abuses some 2512 resistors, how cyborgs are going mainstream, and the need for more evidence around airport drone sightings.

Stream or download Episode 4 here, and subscribe to Hackaday on your favorite podcasting platform! You’ll find show notes after the break.

Take a look at the links below if you want to follow along, and as always, tell us what you think about this episode in the comments!

Direct download (60 MB or so.)

Continue reading “Hackaday Podcast 004: Taking The Blue Pill, Abusing Resistors, And Not Finding Drones”

Short Length Of Wire Turns STM32 Microcontroller Into Good-enough Wireless UART Blaster

Hackaday regular [befinitiv] wrote into the tip line to let us know about a hack you might enjoy, wireless UART output from a bare STM32 microcontroller. Desiring the full printf debugging experience, but constrained both by available space and expense, [befinitiv] was inspired to improvise by a similar hack that used the STM32 to send Morse code over standard FM frequencies.

In this case, [befinitiv]’s solution is both more useful and slightly more legal, as the software uses the 27 MHz ISM band to blast out ASK modulated serial data through a simple wire antenna attached to one of the microcontroller’s pins. The broadcast can then be picked up by an RTL-SDR receiver and interpreted back into a stream of data by GNU Radio.

The software for the STM32 and the GNU Radio Companion graph are both available on Bitbucket. The blog post goes into some detail explaining how the transmitter works and what all the GNU Radio components are doing to claw the serial data back from the ether.

[cover image cc by-sa licensed by Adam Greig, randomskk on Flickr]