Toyota Heater Switches Learn New Tricks

The look, the feel, the sound — there are few things more satisfying in this world than a nice switch. If you’re putting together a device that you plan on using frequently, outfitting it with high-quality switches is one of those things that’s worth the extra cost and effort.

So we understand completely why [STR-Alorman] went to such great lengths to get the aftermarket seat heaters he purchased working with the gorgeous switches Toyota used in the 2006 4Runner. That might not sound like the kind of thing that would involve reverse engineering hardware, creating a custom PCB, or writing a bit of code to tie it all together. But of course, when working on even a halfway modern automobile, it seems nothing is ever easy.
The process started with opening up the original Toyota switches and figuring out how they work. The six-pin units have a lot going on internally, with a toggle, a rheostat, and multiple lights packed into each one. Toyota has some pretty good documentation, but it still took some practical testing to distill it down into something a bit more manageable. The resulting KiCad symbol for the switch helps explain what’s happening inside, and [STR-Alorman] has provided a chart that attributes each detent on the knob with the measured resistance.

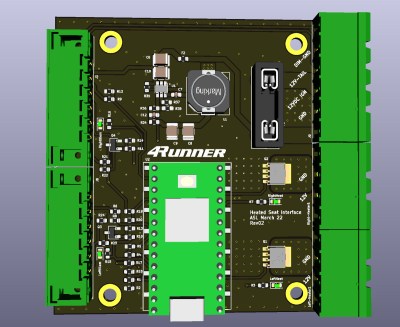
But understanding how the switches worked was only half the battle. The aftermarket seat heaters were only designed to work with simple toggles, so [STR-Alorman] had to develop a controller that could interface with the Toyota switches and convince the heaters to produce the desired result. The custom PCB hosts a Teensy 3.2 that reads the information from both the left and right seat switches, and uses that to control a pair of beefy MOSFETs. An interesting note here is the use of very slow pulse-width modulation (PWM) used to flip the state of the MOSFET due to the thermal inertia of the heater modules.

We love the effort [STR-Alorman] put into documenting this project, going as far as providing the Toyota part numbers for the switches and the appropriate center-console panel with the appropriate openings to accept them. It’s an excellent resource if you happen to own a 4Runner from this era, and a fascinating read for the rest of us.

The Most Annoying Among Us Tasks Created In Real Life

Among Us is a hit game of deception and intrigue. Those who have played it know the frustration of trying to complete some of the intentionally difficult tasks onboard the Skeld. [Zach Freedman] decided to recreate some of these in real life.

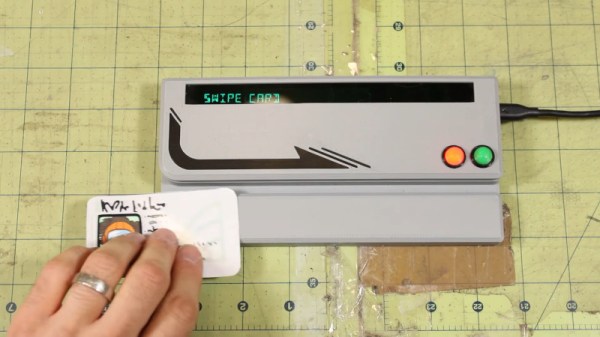
[Zach] built what are arguably the three most frustrating tasks from the game. There’s the excruciatingly slow upload/download station built out of an old Samsung tablet and an NFC tag, and the reactor start console created using a Raspberry Pi 3B, Teensy 3.2, and a custom mechanical keyboard. But perhaps most annoying of all is the infamous card reader. Built with another Teensy, it requires the user to swipe their ID card at just the right speed, except that speed is randomly generated for every swipe. Also, the machine fails 20% of good swipes just because. Perhaps what we love most is the way [Zach] recreated the classic VFD look by putting an OLED display behind bottle-green plastic and using a 14-segment font.

It’s a fun homage to a wildly successful indie game, and we could imagine these props would be a hit at a makerspace party. We’ve featured other Among Us themed builds before, too. Video after the break.

Continue reading “The Most Annoying Among Us Tasks Created In Real Life”

Smart Thermometer Can Tell Flu From Cold

Before the outbreak of coronavirus, the seasonal flu was one of the most dangerous infectious diseases, but a lot of people have trouble telling the difference between a flu and a cold by their symptoms alone. This gave [M. Bindhammer] the idea to design a smart thermometer that can distinguish between flu and cold.

Automated medical diagnostics is certainly an important technology of the future. [M. Bindhammer]’s project, named F°LUEX, is the second version of his iF°EVE thermometer. After taking the body temperature it asks the patient a set of questions about his symptoms and then calculates the probability of whether it is more likely to be a flu or a cold. [M. Bindhammer] uses a method commonly used in medical diagnostics based on Bayesian statistics which assigns a probability score to both hypotheses. It takes into account how often a certain symptom occurs when you have a common cold or flu as well as the overall probability of catching one or the other.

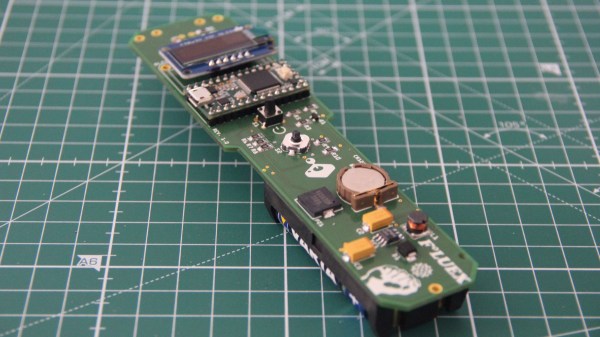
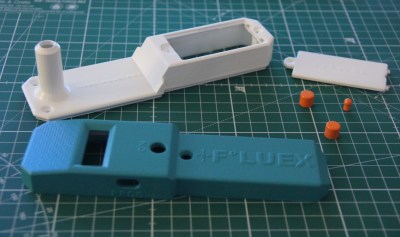
The hardware of the project is based on a custom PCB that includes a medical-grade MLX90614 infrared thermometer with an accuracy of ±0.2˚C around the human body temperature. The sensor is being read out by a Teensy 3.2 and information is displayed on a small OLED screen. Everything is housed in a 3D printed enclosure that received a nice finishing by painting with primer and acrylic spray paint. Unfortunately, [M. Bindhammer] project also got delayed by the corona crisis as his order for the temperature sensor got canceled due to the current high demand. But that does make us wonder how useful this could be to discriminate between cold, flu, and COVID-19.

An IR thermometer is something useful to have around not only for medical applications and can also be built without a custom PCB and minimal parts.

Breathing New Life Into Old School ThinkPad Keyboards

The ThinkPad is generally considered the unofficial laptop of hackerdom, so it’s no surprise that we see plenty of projects focused on repairing and modifying these reliable workhorses. But while we usually see folks working on relatively modern incarnations of this iconic line of computers, this project by [Frank Adams] and [Brian Chan] shows that the hacker’s love affair with the ThinkPad stretches back farther than many might realize.

As explained on the project’s Hackaday.io page, the duo have produced an open hardware board that will allow you to take the keyboard and trackpoint from a late ’90s ThinkPad 380ED and use it as a standard USB input device on a modern computer. According to [Frank], the keyboards on these machines are notable for having full-size keys rather than the “chicklet” boards that are so common today.

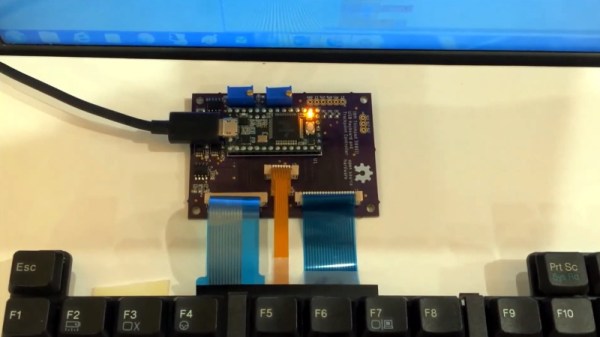
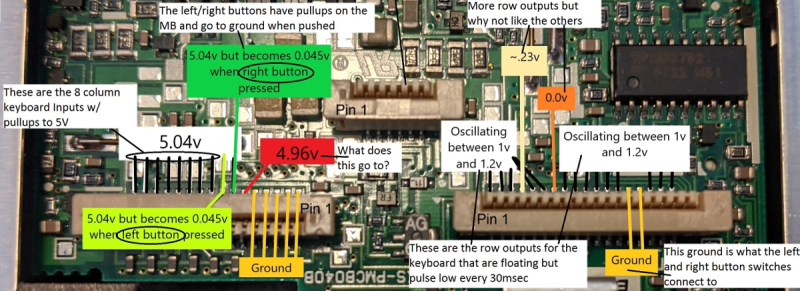
Now you may be wondering why this is significant. After all, we’ve seen plenty of projects that hook up an old keyboard to a USB-equipped microcontroller to get them speaking the lingua franca. Well, the trick here is that the trackpoint on these older ThinkPads actually required additional circuitry on the motherboard to function. The keyboard features three separate FPC connections for the matrix, the trackpoint buttons, and the analog strain gauges in the trackpoint itself.

After a considerable amount of reverse engineering, [Frank] and [Brian] have developed a board that uses the Teensy 3.2 to turn this plethora of pins into something useful. In the video after the break, you can see the new composite USB device working perfectly on a modern Windows computer.

It will probably come as little surprise to find that [Frank] is no stranger to hacking ThinkPad keyboards. In 2018 we covered a similar adapter he built for the far more modern T61, which was an absolute cakewalk by comparison.

Continue reading “Breathing New Life Into Old School ThinkPad Keyboards”

Millenium Falcon HID: Get Unity To Talk To Teensy

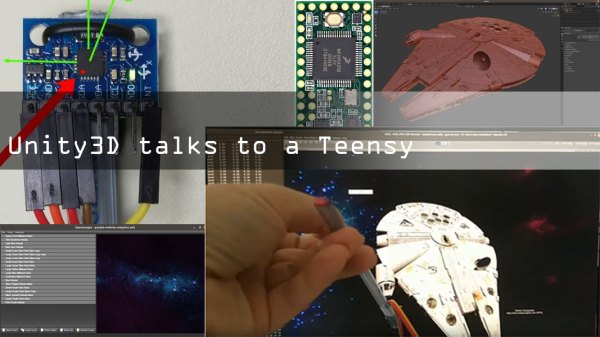
Here’s one that proves a hardware project can go beyond blinking LEDs and dumping massive chunks of data onto a serial console. Those practices are fine for some, but [dimtass] has found a more elegant hack for a more civilized age. His 3D Millennium Falcon model gets orientation data from his IMU as an an HID device.

The hardware involved is an MPU6050 6-axis sensor that is interfaced with a Teensy 3.2 board. [dimtass] documents his approach to calibrating the IMU going a bit further by using a Python script to generate offsets. We’ve advocated using Jupyter notebooks in the past and this is a good example of Jupyter plotting the data and visualizing the effect of the offsets in a second pass.

When in action, the Teensy reads IMU data and sends it over a USB RAW HID interface. For the uninitiated, HID transfers are more reliable than USB CDC transfers (virtual serial port) because they use smaller data chunks per event/transaction and usually don’t require special driversOn the computer side, [dimtass] has written a small application that gets the IMU values over the RAW HID and then provides it to the visualization application.

A 3D Millennium Falcon model is rendered in Unity, the popular open source game development engine. Even though Unity has an API, this particular approach is more OS specific using a shared-memory technique. The HID application writes to a file (/tmp/hid-shared-buffer) which is then read by Unity to make orientation changes to the rendered model.

[dimtass] provides lots of details on the tools used to bring his project to life and it can be a great starting point for more projects that need interfacing sensors with a visualization system. We have seen ways to turn a person’s head into a joystick and if you need a deeper dive into Unity, look no further.

Continue reading “Millenium Falcon HID: Get Unity To Talk To Teensy”

Gaze Upon This Daft Punk Helmet’s Rows Of Utterly Perfect Hand-Soldered LEDs

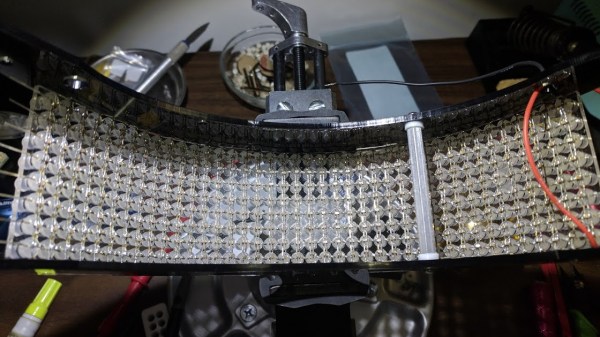
The iconic robot helmets of Daft Punk feature prominently as challenging DIY hardware projects in their own right, and the results never disappoint. But [Nathaniel Stepp]’s photo gallery of his own version really sets the bar in both quality and attention to detail. The helmet uses a Teensy 3.2 as the main processor, and the visor consists of 328 hand soldered through-hole APA106 addressable RGB LEDs. A laser cut panel serves as the frame for the LEDs, and it was heat-formed to curve around the helmet and mate into the surrounding frame. Each LED is meticulously hand-soldered, complete with its own surface mount decoupling cap; there’s no wasted space or excess wire anywhere to be seen. It looks as if a small 3D printed jig was used to align and solder the LEDs one or two columns at a time, which were then transferred to the visor for final connections with the power bus and its neighboring LEDs.
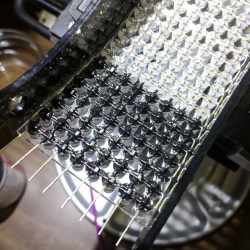
After the whole array was assembled and working, the back of each LED appears to have then been carefully coated in what looks like Plasti-Dip in order to block light, probably to minimize the blinding of the wearer. A small amount of space between each LED allows the eyeballs inside the helmet to see past the light show in the visor.
The perfectly done array of LEDs in the visor is just one of the design elements showing the incredible workmanship and detail in [Nathaniel]’s helmet. His website promises more build details are coming, but in the meantime you can drink in the details shown in the aforementioned photo gallery.

With Halloween approaching, you might be interested in rolling your own Daft Punk inspired helmet. Not ready to do everything from scratch? No problem, because it’s never been easier to make your own with the help of a 3D printer and some LED strips.

[via SparkFun Blog]

Stormtrooper Voice Changer Helmet Uses Teensy To Mangle Audio

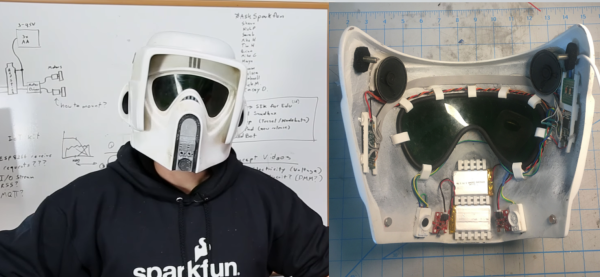
Halloween has come and gone, but this DIY voice changing Star Wars Stormtrooper helmet tutorial by [Shawn Hymel] is worth a look for a number of reasons. Not only is the whole thing completely self-contained, but the voice changing is done in software thanks to the Teensy’s powerful audio filtering abilities. In addition, the Teensy also takes care of adding the iconic Stormtrooper clicks, pops, and static bursts around the voice-altered speech. Check out the video below to hear it in action.

Besides a microphone and speakers, there’s a Teensy 3.2, a low-cost add-on board for the Teensy that includes a small audio amp, a power supply… and that’s about it. There isn’t a separate WAV board or hacked MP3 player in sight.

Continue reading “Stormtrooper Voice Changer Helmet Uses Teensy To Mangle Audio”