AI-powered chatbots are pretty cool, but most still require you to type your question on a keyboard and read an answer from a screen. It doesn’t have to be like that, of course: with a few standard tools, you can turn a chatbot into a machine that literally chats, as [Hoani Bryson] did. He decided to make a standalone voice-operated ChatGPT client that you can actually sit next to and have a conversation with.
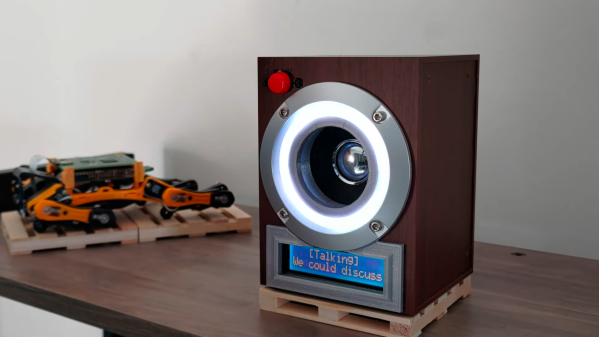
The base of the project is a USB speaker, to which [Hoani] added a Raspberry Pi, a Teensy, a two-line LCD and a big red button. When you press the button, the Pi listens to your speech and converts it to text using the OpenAI voice transcription feature. It then sends the resulting text to ChatGPT through its API and waits for its response, which it turns into sound again through the eSpeak speech synthesizer. The LCD, driven by the Teensy, shows the current status of the machine and also provides live subtitles while the machine is talking.
To spice up the AI box’s appearance, [Hoani] also added an LED ring which shows a spectrogram of the audio being generated. This small addition really makes the thing come alive, turning it into what looks like a classic Sci-Fi movie prop. Except that this one’s real, of course – we are actually living in the future, with human-like AI all around us.
All code, mostly written in Go, is freely available on [Hoani]’s GitHub page. It also includes a separate audio processing library called toot that [Hoani] wrote to help him interface with the micophone and do spectral analysis. Anyone with basic electronic skills can now build their own AI companion and talk to it – something that ham radio operators have been doing for a while.
Continue reading “AI-Powered Speaker Is A Chatbot You Can Actually Chat With”