Printed It: Parametric Hex Key Holder

Desktop 3D printing is an incredible technology to be sure, but it’s not a cure-all. If you’re interested in making something in large numbers, or if production speed is a concern, 3D printing probably isn’t what you’re looking for. But on the flip side, if you want to make a few highly specialized or customized objects, desktop 3D printing represents an absolute revolution in capability for the individual hacker and maker.

In our ongoing mission to prove that desktop 3D printing isn’t just a novelty, we keep a close eye out for printable objects which play to the strengths of the technology. You won’t find any benchmarks or dust collectors here; everything featured in Printed It is a bona fide practical object. An ideal entry into this series is something that you wouldn’t need to print more than a few times, isn’t easily sourced or made via traditional means, and if possible, offers some form of customization which makes it more suitable to the individual’s needs than what’s commercially available.

Not every object we feature hits all of these marks, but this parametric hex key holder designed by [Daniel Leitner] absolutely does. This object was created to address a problem that we imagine most Hackaday readers share: taming an ever-growing collection of hex keys. What’s more, this design is something of an open source success story. It’s an idea that passed through the hands of multiple community members, becoming more refined and functional as it went. Even if you don’t personally need to wrangle some unruly hex keys, this object is a fascinating look at how 3D printing and the community that has sprouted up around it is truly evolving the process of going from concept to execution.

Continue reading “Printed It: Parametric Hex Key Holder”

Woodworker Goes From 3D-Printing Skeptic To Believer

If there’s one place where the old ways of doing things live a longer life than you’d otherwise expect, it’s the woodshop. Woodworkers have a way of stubbornly sticking to tradition, and that usually works out fine. But what does it take to change a woodworker’s mind about a tool that seems to have little role in the woodshop: the 3D-printer?

That’s the question [Marius Hornberger] asked himself, and at least for him, there are a lot of woodworking gadgets that can be 3D-printed. [Marius] began his journey into additive manufacturing three years ago as a skeptic, not seeing how [Benchy] and friends could be of any value to his endeavors. But as is often the case with a tool that can build almost anything, all it takes is a little ingenuity to get started. His first tool was a pair of soft jaws for his bench vise. This was followed by a flood of useful doodads, including a clever center finder for round and square stock, custom panels for electrical switches, and light-duty pulleys for some of the machines he likes to build. But [Marius] obviously has an issue with dust, because most of his accessories have to do with helping control it in the shop. The real gem of this group is the hose clamp for spiral-reinforced vacuum hose; standard band clamps don’t fit well on those, but his clamps have an offset that straddles the wire for a neat fit. Genius!

[Marius] has kindly made all his models available on Thingiverse, so feel free to dig in and start kitting out your shop. Once you do maybe you can start building cool things like his all-wood scissors lift.

Continue reading “Woodworker Goes From 3D-Printing Skeptic To Believer”

A Scratch-Built Drill Press Vise From Scrap

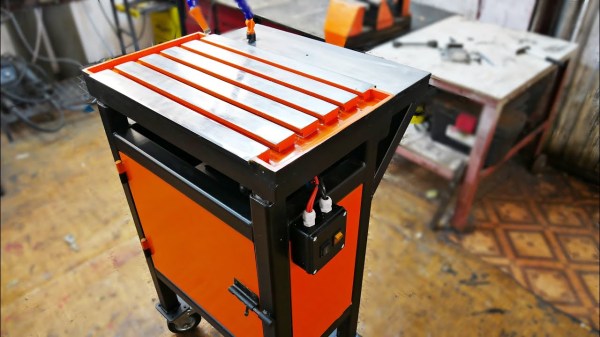
Never underestimate the importance of fixturing when you’re machining parts. No matter what the material, firmly locking it down is the key to good results, and may be the difference between a pleasant afternoon in the shop and a day in the Emergency Room. Flying parts and shattered tooling are no joke, but a lot of times quality commercial solutions are expensive and, well, commercial.  So this scratch-built drill press vise is something the thrifty metalworker may want to consider.

To be sure, [Ollari’s] vise, made as it is almost completely from scrap angle iron, is no substitute for a vise made from precision ground castings. But it’s clear that he has taken great care to keep everything as square and true as possible, and we give him full marks for maximizing his materials. And his tools — nothing more complicated than a MIG welder is used, and most of the fabrication is accomplished with simple hand tools. We like the way he built up sturdy profiles by welding strap stock across the legs of the angle iron used for the jaws, to give them a strong triangular cross-section to handle the clamping force. And using the knurled end of an old socket wrench as the handle was inspired; we’ll certainly be filing that idea away for a rainy day in the shop. Although we might use Acme rather than plain threaded rod.

We always enjoy seeing someone fabricate their own tools, and this one reminds us a bit of the full-size bench vise built up from layers of welded steel we featured a while back. It even looks a little like this 3D-printed vise, too.

Continue reading “A Scratch-Built Drill Press Vise From Scrap”

Restoring 100-year-old vice

Restoring A 100 Year Old Vice To Pristine Condition

We love our vices. They hold pipes for us to saw away at, wood while we carve, and circuit boards so that we can solder on components. So we keep them in shape by cleaning and greasing them every now and then, [MakeEverything] went even further. He found a 100-year-old vice that was in very rough shape and which was going to be thrown out and did a beautiful restoration job on it.

It was actually worse than in rough shape. At some point, one of the jaws had been replaced by welding on a piece of rebar where the jaw would normally go. So he made entirely new jaws from solid brass as well as the pins to hold them firmly in place. We applaud his attention to detail. After removing all the old paint and corrosion, he painted it with a “hammered” spray paint to give it a nice hammered look. Though when he made the raised letters stand out by applying gold paint to them using an oil-based paint marker, we felt that was just showing off. The result is almost too gorgeous to use, but he assures us he will use it. You can see his process, as well as have a good look at the newly revived vice in the video below.

Continue reading “Restoring A 100 Year Old Vice To Pristine Condition”

GPS synchronized Nixie tube clock from kit

3D Printed Tool Tips To Straighten DIP Chips And Unstraighten Resistors

Watching someone assemble a kit is a great way to see some tools you may have not encountered before and maybe learn some new tricks. During [Marco Reps’] recent build of a GPS synchronized Nixie clock kit we spied a couple of handy tools that you can 3D print for your own bench.

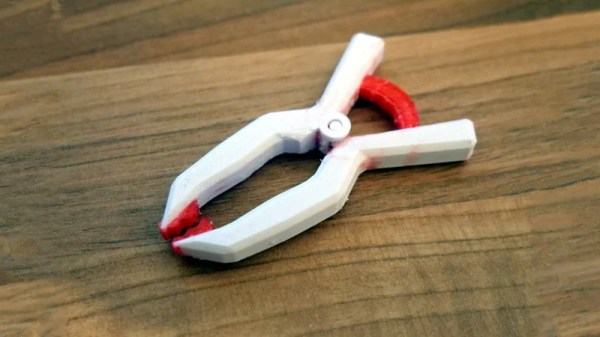
Fresh from the factory Dual Inline Package (DIP) chips come with their legs splayed every so slightly apart — enough to not fit into the carefully designed footprints on a circuit board. You may be used to imprecisely bending them by hand on the surface of the bench. [Marco] is more refined and shows off a neat little spring loaded tool that just takes a couple of squeezes to neatly bend both sides of the DIP, leaving every leg the perfect angle. Shown here is a 3D printed version called the IC Pin Straightener that you can throw together with springs and common fasteners.

Another tool which caught our eye is the one he uses for bending the metal film resistor leads: the “Biegelehre” or lead bending tool. You can see that [Marco’s] tool has an angled trench to account for different resistor body widths, with stepped edges for standard PCB footprint spacing. We bet you frequently use the same resistor bodies so 3D printing is made easier by using a single tool for each width. If you really must copy what [Marco] is using, we did find this other model that more closely resembles his.

As for new tricks, there are a lot of small details worth appreciating in the kit assembly. [Marco] cleans up the boards using snips to cut away the support material and runs them over sandpaper on a flat surface. Not all Nixie tubes are perfectly uniform so there’s some manual adjustment there. And in general his soldering practices are among the best we’ve seen. As usual, there’s plenty of [Marco’s] unique brand of humor to enjoy along the way.

We have a warm spot in our heart for simple tools you can whip up on the ‘ole 3D printer. Check out the PCB vise, a set of ball and socket helping hands, and a collection of toolbag essentials.

Continue reading “3D Printed Tool Tips To Straighten DIP Chips And Unstraighten Resistors”

Printed It: Toolbag Essentials

While complex devices assembled from 3D printed components are certainly impressive, it’s the simple prints that have always held the most appeal to me personally. Being able to pick an object up off the bed of your printer and immediately put it to use with little to no additional work is about as close as we can get to Star Trek style replicators. It’s a great demonstration to show off the utility of your 3D printer, but more importantly, having immediate access to some of these tools and gadgets might get you out of a jam one day.

With that in mind, I thought we’d do things a little differently for this installment of Printed It. Rather than focusing on a single 3D model, we’ll be taking a look at a handful of prints which you can put to practical work immediately. I started by selecting models based on the idea that they should be useful to the average electronic hobbyist in some way or another, and relatively quick to print. Each one was then printed and evaluated to determine its real-world utility. Not all made the grade.

Each model presented here is well designed, easy to print, and most critically, legitimately useful. I can confidently say that each one has entered into my standard “bag of tricks” in some capacity, and I’m willing to bet a few will find their way into yours as well.

Continue reading “Printed It: Toolbag Essentials”

Dispensing Solder Paste Automatically

Through-hole chips are slowly falling by the wayside, and if you want to build something with new parts you will be using surface mount components. This means spreading paste and throwing it in the toaster oven. Of course, if you don’t want to take the time to get a stencil for your solder paste, you can always lay it down by hand. For that, [owhite] has created a tiny, handheld, robotic solder paste dispenser. It’s a robotic pen that dispenses just the right amount of solder paste on your pads.

The design of this solder paste dispenser is basically a syringe filled with paste and a stepper motor to push the plunger down. Devices like this already exist, and the i-extruder can be had for somewhere around two hundred bucks. Why buy when you can build, so [owhite] set out to create his own.

The key to a successful solder paste pen, it seems, is driving the plunger with a small NEMA 8 stepper motor, using a very fine pitch on the threads of the gears pushing the plunger down, and surprisingly finding a small-diameter syringe. [owhite] found the last bit in the form of a gas-tight syringe with a nylon gasket. The electronics consist of just a Teensy 3.2, DRV8825 stepper driver, footswitch, and an OLED for a UI.

With just a few parts, [owhite] managed to create a solder paste pen that’s better than the commercial i-extruder, and with a bit of practice can be used to place paste on some SMD pads.