Best Of Both Worlds: The MacPad

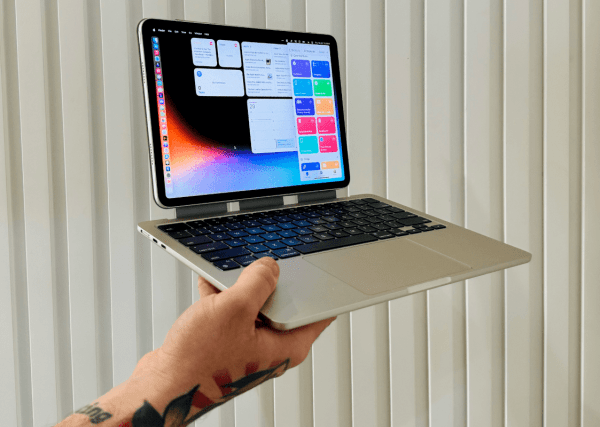
Despite a growing demand for laptop-tablet hybrid computers from producers like Lenovo, HP, and Microsoft, Apple has been stubbornly withdrawn this arena despite having arguably the best hardware and user experiences within the separate domains of laptop and tablet. Charitably one could speculate that this is because Apple’s design philosophy mandates keeping the user experiences of each separate, although a more cynical take might be that they can sell more products if they don’t put all the features their users want into a single device. Either way, for now it seems that if you want a touchscreen MacBook you’ll have to build one yourself like the MacPad from [Federico].

This project started as simply providing a high-quality keyboard and mouse for an Apple Vision Pro, whose internal augmented reality keyboard is really only up to the task of occasionally inputting a password or short string. For more regular computing, [Federico] grabbed a headless MacBook which had its screen removed. This worked well enough that it triggered another line of thought that if it worked for the Vision Pro it might just work for an iPad Pro as well. Using Apple tools like Sidecar makes this almost trivially easy from a software perspective, although setting up the iPad as the only screen, rather than an auxiliary screen, on the MacBook did take a little more customization than normal.

The build goes beyond the software side of setting this up, though. It also includes a custom magnetic mount so that the iPad can be removed at will from the MacBook, freeing both the iPad for times when a tablet is the better tool and the MacBook for when it needs to pull keyboard duty for the Vision Pro. Perhaps the only downsides are that this only works seamlessly when both devices are connected to the same wireless network and that setting up a headless MacBook without a built-in screen takes a bit of extra effort. But with everything online and working it’s nearly the perfect Apple 2-in-1 that users keep asking for. If you’re concerned about the cost of paying for an iPad Pro and a Macbook just to get a touchscreen, though, take a look at this device which adds a touchscreen for only about a dollar.

Thanks to [Stuart] for the tip!

“Cheap Yellow Display” Builds Community Through Hardware

For the most part, Hackaday is all about hardware hacking projects. Sometimes, though, the real hack in a project isn’t building hardware, but rather building a community around the hardware.

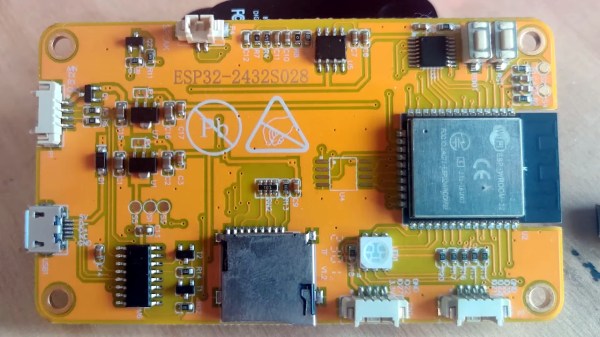
Case in point: [Brian Lough]’s latest project, which he dubs “CYD,” for the “cheap yellow display” that it’s based on; which is a lot easier to remember than its official designation, ESP32-2432S028R. Whatever you call it, this board is better than it sounds, with an ESP32 with WiFi, Bluetooth, a 320×480 resistive touch screen, and niceties like USB and an SD card socket — all on aforementioned yellow PCB. The good news is that you can get this thing for about $15 on Ali Express. The bad news is that, as is often the case with hardware from the Big Rock Candy Mountain, the only documentation available comes from a website we wouldn’t touch with a ten-foot pole.

To fix this problem, [Brian] started what he hopes will be a collaborative effort to build a knowledge base for the CYD, to encourage people to put these little gems to work. He has already kick-started that with a ton of quality documentation, including setup and configuration instructions, tips and gotchas, and some sample projects that put the CYD’s capabilities to the test. It’s all on GitHub and there’s already at least one pull request; hopefully that’ll grow once the word gets out.

Honestly, these look like fantastic little boards that are a heck of a bargain. We’re thinking about picking up a few of these while they last, and maybe even getting in on the action in this nascent community. And hats off to [Brian] for getting this effort going.

Continue reading ““Cheap Yellow Display” Builds Community Through Hardware”

Multi-Year Doorbell Project

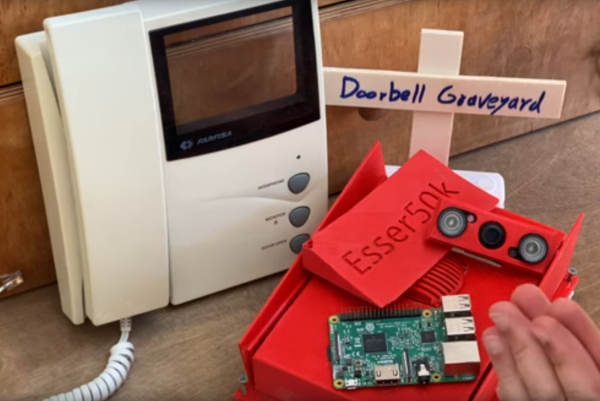
Camera modules for the Raspberry Pi became available shortly after its release in the early ’10s. Since then there has been about a decade of projects eschewing traditional USB webcams in favor of this more affordable, versatile option. Despite the amount of time available there are still some hurdles to overcome, and [Esser50k] has some supporting software to drive a smart doorbell which helps to solve some of them.

One of the major obstacles to using the Pi camera module is that it can only be used by one process at a time. The PiChameleon software that [Esser50k] built is a clever workaround for this, which runs the camera as a service and allows for more flexibility in using the camera. He uses it in the latest iteration of a smart doorbell and intercom system, which uses a Pi Zero in the outdoor unit armed with motion detection to alert him to visitors, and another Raspberry Pi inside with a touch screen that serves as an interface for the whole system.

The entire build process over the past few years was rife with learning opportunities, including technical design problems as well as experiencing plenty of user errors that caused failures as well. Some extra features have been added to this that enhance the experience as well, such as automatically talking to strangers passing by. There are other unique ways of using machine learning on doorbells too, like this one that listens for a traditional doorbell sound and then alerts its user.

Continue reading “Multi-Year Doorbell Project”

Supercon 2022: Andy Geppert Is Bringing Core Memory Back

Many Hackaday readers will be familiar with the term “core memory”, likely thanks to its close association with the Apollo Guidance Computer. But knowing that the technology existed at one point and actually understanding how it worked is another thing entirely. It’s a bit like electronic equivalent to the butter churn — you’ve heard of it, you could probably even identify an image of one — but should somebody hand you one and ask you to operate it, the result probably won’t be too appetizing.

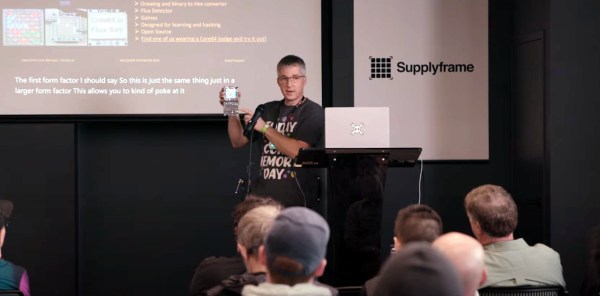
That’s where Andy Geppert comes in. He’s turned his own personal interest into magnetic core memory into a quest to introduce this fascinating technology to a whole new generation thanks to some modern enhancements through his Core64 project. By mating the antiquated storage technology with a modern microcontroller and LEDs, it’s transformed into an interactive visual experience. Against all odds, he’s managed to turned a technology that helped put boots on the Moon half a century ago into a gadget that fascinates both young and old.

In this talk at the 2022 Hackaday Supercon, Andy first talks the audience through the basics of magnetic core memory as it was originally implemented. From there, he explains the chain of events that lead to the development of the Core64 project, and talks a bit about where he hopes it can go in the future.

Continue reading “Supercon 2022: Andy Geppert Is Bringing Core Memory Back”

Turn Your Furniture Into A Light Show With Hyelicht

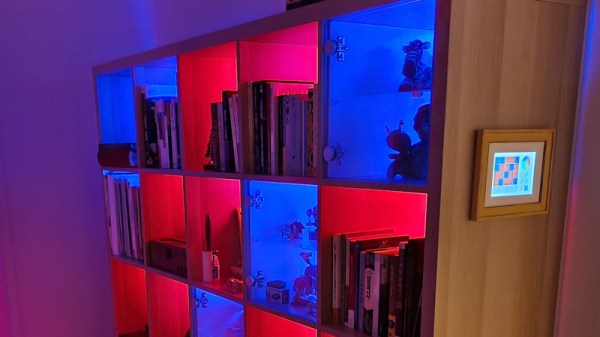
There’s something about the regimented square shapes of the IKEA Kallax shelf that convinced [Eike Hein] it could benefit from some RGB LED lighting, and while he could have simply used a commercial solution, he decided instead to develop Hyelicht: an incredibly well documented open source lighting system featuring multiple control interfaces and APIs. We’d say it was overkill, but truth be told, we dream of a world where everyone takes their personal projects to this level.

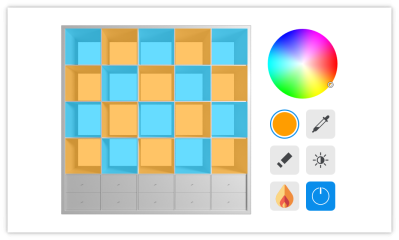
Hyelicht’s default touch UI

In the boilerplate configuration, [Eike] shows off controlling the LEDs using a graphical user interface running on a Waveshare 7″ touch screen mounted to the side of the shelf. That’s the most direct way of controlling the LEDs, as the touch screen is plugged into the Raspberry Pi 4B that’s actually running the software. But the same interface can also be remotely accessed by your smartphone or desktop.

You can also skip the GUI entirely and control the LEDs with a command line interface, or maybe poke Hyelicht’s HTTP REST interface instead. The system can even integrate with the Philips Hue ecosystem, if you prefer going that route.

The 5×5 Kallax shelf is the project’s official reference hardware, but of course it will work with anything else you might wish to cover with controllable LEDs. We’ve seen similar setups used to light storage bins in the past, but nothing that can even come close to the documentation and customization possibilities offered by Hyelicht. This is definitely a project to keep a close eye on if you’ve got the urge to add a little color to your world.

Odd Inputs And Peculiar Peripherals: Touch This Macro Pad

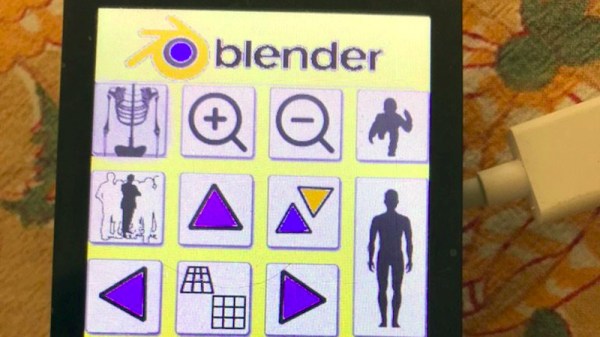
The need to provide custom controls for complex software packages has been satisfied in many ways, the most usual of which is to have a configurable keypad. It’s a challenge [Meir Michanie] has taken up in a slightly different way, by creating a custom touch-screen macro pad. Unlike the buttons, this allows entirely custom layouts with different shaped keys in any configuration.

At its heart is a versatile ESP32 touch screen development board of the type that can be found easily among the pages of your favorite online electronics mart. The Arduino IDE has been used to program the device, and configuration is as simple of providing it with a PNG of the desired layout, and a CSV file to define the buttons. The whole then connects via BLE where it’s presented to the host computer as a keyboard. The result is one of the coolest macro pads we’ve ever seen, with a limitless number of options.

With such a neat idea it’s perhaps no surprise among the numbers of macro pads that have made it to these pages there might be another take on the same idea.

Winamp Reborn With The Adafruit PyPortal

One look at the default Winamp skin is sure to reawaken fond memories for a certain segment of the community. For those who experienced the MP3 revolution first hand, few audio players stick out in the mind like Winamp and its llama whipping reputation. No, the proprietary Windows-only media player isn’t the sort of thing you’d catch us recommending these days; but it was the 1990s, and things were very different.

For those who want to relive those heady peer-to-peer days, [Tim C] has posted a tutorial on how to turn Adafruit’s PyPortal into a touch screen MP3 player that faithfully recreates the classic Winamp look. As you can see in the video below it certainly nails the visuals, down to the slightly jerky scrolling of the green track info which we’re only now realizing was probably the developer’s attempt to mimic some kind of a physical display like a VFD.

With minimal UI functionality, playlists must be created manually.

[Tim] has even included support for original Winamp themes, although as you might expect, some hoop-jumping is required. In this case, it’s a Python script that you have to run against an image of the original skin pulled from the Winamp Skin Museum. From there, you just need to edit a couple of lines of code to point the player at the right skin files. In other words, switching between skins is kind of a hassle, but you should at least be able to get your favorite flavor from back in the day up and running.

But before you get too excited, there’s a bit of a catch. For one thing, the Winamp UI isn’t actually functional. You can tap the top section of the screen to pause the playback, and tapping down in the lower playlist area lets you change songs, but all the individual buttons and that iconic visual equalizer are just for show. Managing your playlists also requires you to manually edit a JSON file, which even in the 1990s we would have thought was pretty wack, to use the parlance of the times.

Of course, things could easily be streamlined a bit with further revisions to the code, and since [Tim] has released it into the public domain under the Unlicense, anyone can help out. As it stands, it’s still a very slick media display that we certainly wouldn’t mind having on our desk.

Continue reading “Winamp Reborn With The Adafruit PyPortal”