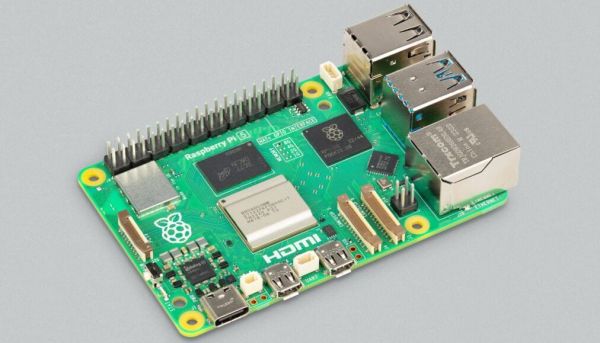
A Free Speed Boost For Your Pi 5

The world of the overclocker contains many arcane tweaks to squeeze the last drops of performance from a computer, many of which require expert knowledge to understand. Happily for Raspberry Pi 5 owners the Pi engineers have come up with a set of tweaks you don’t have to be an overclocker to benefit from, working on the DRAM timings to extract a healthy speed boost. Serial Pi hacker [Jeff Geerling] has tested them and thinks they should be good for as much as 20% boost on a stock board. When overclocked to 3.2 GHz, he found an unbelievable 32% increase in performance.

We’re not DRAM experts here at Hackaday, but as we understand it they have been using timings from the Micron data sheets designed to play it safe. In consultation with Micron engineers they were able to use settings designed to be much faster, we gather by monitoring RAM temperature to ensure the chips stay within their parameters. Best of all, there’s no need to get down and dirty with the settings, and they can be available to all with a firmware update. It’s claimed this will help Pi 4 owners to some extent as well as those with a Pi 5, so even slightly older boards get some love. So if you have a Pi 5, don’t wait for the Pi 6, upgrade today, for free!

Prusa Picks Up The Pace With New MK4S Printer

One of the things you’re paying for when you buy a 3D printer from Prusa Research is, essentially, your next 3D printer. That’s because Prusa’s machines are designed to be upgraded and modified as time goes on. An upgrade kit is always released to allow each older printer to be converted into its successor, and while there’s occasionally been some debate about whether or not it’s the most cost-effective choice, at least it is a choice you have as an owner.

If you’ve got a Prusa MK4, you’ll soon get to make that decision for yourself. Announced earlier today, the new MK4S brings some notable changes to last year’s printer. The $99 upgrade is scheduled to be available by the end of the month for existing owners, but if you’ve been on the fence about joining Team Orange and Black, you can purchase the MK4S right now in both kit and assembled forms for the same price ($799 and $1,099 respectively) as the previous MK4.

Continue reading “Prusa Picks Up The Pace With New MK4S Printer”

Making Intel Mad, Retrocomputing Edition

Intel has had a deathgrip on the PC world since the standardization around the software and hardware available on IBM boxes in the 90s. And if you think you’re free of them because you have an AMD chip, that’s just Intel’s instruction set with a different badge on the silicon. At least AMD licenses it, though — in the 80s there was another game in town that didn’t exactly ask for permission before implementing, and improving upon, the Intel chips available at the time.

The NEC V20 CPU was a chip that was a drop-in replacement for the Intel 8088 and made some performance improvements to it as well. Even though the 186 and 286 were available at the time of its release, this was an era before planned obsolescence as a business model was king so there were plenty of 8088 systems still working and relevant that could take advantage of this upgrade. In fact, the V20 was able to implement some of the improved instructions from these more modern chips. And this wasn’t an expensive upgrade either, with kits starting around $16 at the time which is about $50 today, adjusting for inflation.

This deep dive into the V20 isn’t limited to a history lesson and technological discussion, though. There’s also a project based on Arduino which makes use of the 8088 with some upgrades to support the NEC V20 and a test suite for a V20 emulator as well.

If you had an original IBM with one of these chips, though, things weren’t all smooth sailing for this straightforward upgrade at the time. A years-long legal battle ensued over the contents of the V20 microcode and whether or not it constituted copyright infringement. Intel was able to drag the process out long enough that by the time the lawsuit settled, the chips were relatively obsolete, leaving the NEC V20 to sit firmly in retrocomputing (and legal) history.

Cheap Microscope Can Take Amazing Images With Some Simple Upgrades

[Birdbrain] is trying to make their own microfluidic devices. To aid in this quest, they need a quality microscope to see what they’re doing. Instead of buying one outright, they purchased a cheap microscope and upgraded it to do the job instead.

Usability and performance is greatly improved over the stock unit, which was really only fit for learning purposes.

The cheap education-grade microscope cost around $50 USD, had few features, and wasn’t much chop out of the box. The worst part was the sample stage — which was poorly adjustable in the up-and-down axis and could only track about two centimeters up and down. There was no X or Y axis panning either, and it lacked a proper condensor iris, too. Oh, and the included camera module had a resolution of just 240p.

To fix these problems, the microscope was first outfitted with a fully redesigned X-Y-Z stage built out of old components from a salvaged DVD drive and an additional NEMA stepper motor. Camera-wise, it was hooked up with a 2K Raspberry Pi Camera Module 3 running at 10 to 15 frames per second, which broadcasts video over a local network for easy viewing on an external monitor. It also gained an epi-illumination setup for doing reflected light microscopy.

If you’re eager to build a quality microscope with all the controls you personally dream of, this could be a relevant project for you to study. We’ve featured some other builds along these lines before, too. Video after the break.

Continue reading “Cheap Microscope Can Take Amazing Images With Some Simple Upgrades”

Resistor Swap Gives Honda Insights More Power

A common complaint around modern passenger vehicles is that they are over-reliant on electronics, from overly complex infotainment systems to engines that can’t be fixed on one’s own due to the proprietary computer control systems. But even still, when following the circuits to their ends you’ll still ultimately find a physical piece of hardware. A group of Honda Insight owners are taking advantage of this fact to trick the computers in their cars into higher performance with little more than a handful of resistors.

The relatively simple modification to the first-generation Insight involves a shunt resistor, which lets the computer sense the amount of current being drawn from the hybrid battery and delivered to the electric motor. By changing the resistance of this passive component, the computer thinks that the motor is drawing less current and allows more power to be delivered to the drivetrain than originally intended. With the shunt resistor modified, which can be done with either a bypass resistor or a custom circuit board, the only other change is to upgrade the 100 A fuse near the battery for a larger size.

With these two modifications in place, the electric motor gets an additional 40% power boost, which is around five horsepower. But for an electric motor which can output full torque at zero RPM, this is a significant boost especially for a relatively lightweight car that’s often considered under-powered. It’s a relatively easy, inexpensive modification though which means the boost is a good value, although since these older hybrids are getting along in years the next upgrade might be a new traction battery like we’ve seen in the older Priuses.

Thanks to [Aut0l0g1c] for the tip!

The controller after the rebuild, looking just like the stock controller but with an external antenna attached

An Extensive Walkthrough On Building Your Own KSP Controller

Having a game-tailored controller is a level-up in more ways than one, letting you perform in-game actions quickly and intuitively, instead of trying to map your actions to a clunky combination of keyboard and mouse movements. [abzman] took the Pelco KBD300A, a DVR-intended camera controller panel with a joystick, reverse-engineered it, and then rebuilt it into a Kerbal Space Program controller. What’s more, he documented every detail along the way!

The write-up is so extensive, it’s four separate posts — all of them worth reading without a doubt. In the first post, he describes the original hardware, the process of reverse-engineering it, and a few tips for your own RE journeys. Next, he covers about making his own board, showing all the small decisions he’s had to make, with plenty of KiCad screenshots. If you are on the lookout for designing such a board, there’s plenty to learn!

The original hardware didn’t go down without a fight — the third post talks about taming the seven-segment displays, the onboard joystick, and fighting with the key matrix wired in exactly the way you wouldn’t want. In the end, he shows us how you could tie a controller easily into Kerbal Space Program.

One more piece of hardware liberated, one more win for the hacker world. Whether it’s a Macintosh SE, a classic ThinkPad, or even a generic rotary tool, these upgrades are always a joy to see. If you wanted to learn to do such an upgrade yourself, here’s us showing how you can pull this off with a classic Sony Vaio!

Transform An Original Xbox Controller To A 360 Controller

If you’re looking for a controller for your computer or mobile device, you could certainly do worse than one of the latest iterations of the Xbox pad. They might not be perfect, but they’re fairly well-made, not particularly expensive, use standard USB and Bluetooth interfaces, and even have decent support in the open-source community. So if you’re gaming on Linux or working on any other kind of retro gaming rig it’ll likely be plug-and-play.

This wasn’t the case with the first generation Xbox controller, though, and although its proprietary connector was actually using USB, the controller scheme wasn’t as open. This is [Tom]’s effort of upcycling his original Xbox controller to work indistinguishably from a stock Xbox 360 controller.

For those asking why anyone would want to do this, [Tom] is actually one of the few who enjoyed the original bulky Xbox “Duke” controller that released with the console in 2001. It wasn’t a popular choice in the larger gaming community and a year later Microsoft released a smaller version, but we all have our quirks. A Teensy 4.1 is attached to the end of the controller cable and acts as an intermediary to intercept the proprietary signalling coming from this controller and convert it into something usable. Since the controller doesn’t even show up as a standard USB HID device it took a little more sniffing of the protocol to decipher what was going on at all, but eventually some help was found within this other driver that gave [Tom] the clues he needed to get it working.

There were some other headaches to this project as well, especially since USB debugging USB connections while using USB isn’t exactly a streamlined process, but after a couple of breakthroughs the Teensy pass-through interface began working and [Tom] can use his controller of choice across multiple platforms now. If you’re looking to upgrade in other ways take a look at this build which seeks to recalibrate, rather than replace, an older Xbox controller experiencing drift on its analog control sticks.

Continue reading “Transform An Original Xbox Controller To A 360 Controller”