Readers of a certain vintage will remember the glee of building your own levels for DOOM. There was something magical about carefully crafting a level and then dialing up your friends for a death match session on the new map. Now computers scientists are getting in on that fun in a new way. Researchers from Politecnico di Milano are using artificial intelligence to create new levels for the classic DOOM shooter (PDF whitepaper).
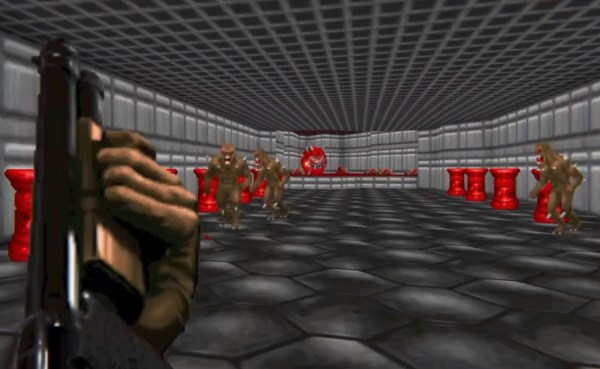
While procedural level generation has been around for decades, recent advances in machine learning to generate game content (usually levels) are different because they don’t use a human-defined algorithm. Instead, they generate new content by using existing, human-generated levels as a model. In effect they learn from what great game designers have already done and apply those lesson to new level generation. The screenshot shown above is an example of an AI generated level and the gameplay can be seen in the video below.
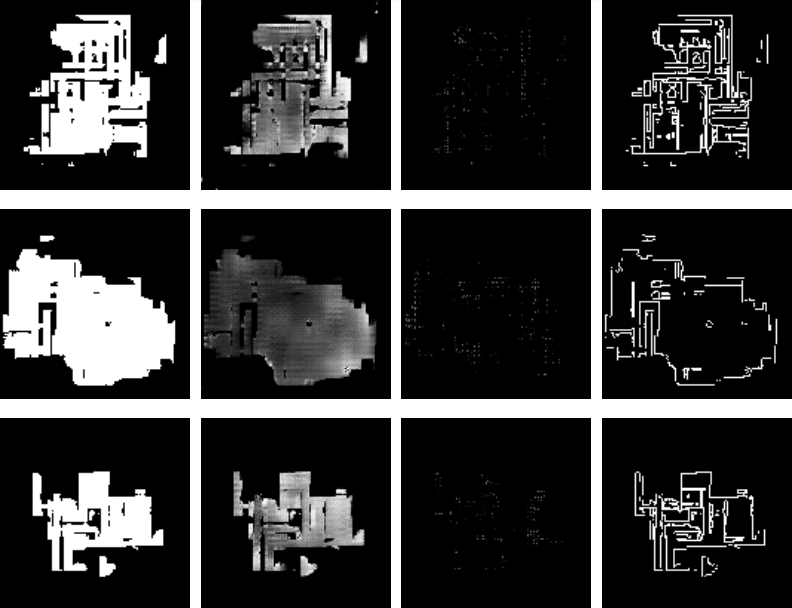
The idea of an AI generating levels is simple in concept but difficult in execution. The researchers used Generative Adversarial Networks (GANs) to analyze existing DOOM maps and then generate new maps similar to the originals. GANs are a type of neural network which learns from training data and then generates similar data. They considered two types of GANs when generating new levels: one that just used the appearance of the training maps, and another that used both the appearance and metrics such as the number of rooms, perimeter length, etc. If you’d like a better understanding of GANs, [Steven Dufresne] covered it in his guide to the evolving world of neural networks.
While both networks used in this project produce good levels, the one that included other metrics resulted in higher quality levels. However, while the AI-generated levels appeared similar at a high level to human-generated levels, many of the little details that humans tend to include were omitted. This is partially due to a lack of good metrics to describe levels and AI-generated data.
We can only guess that these researcher’s next step is to use similar techniques to create an entire game (levels, characters, and music) via AI. After all, how hard can it be?? Joking aside, we would love to see you take this concept and run with it. We’re dying to play through some gnarly levels whipped up by the AI from Hackaday readers!
Continue reading “Neural Networks Using Doom Level Creator Like It’s 1993”


 [Rudeism] didn’t let that stop him.