This is Thanksgiving weekend in the United States; the country’s most congested travel weekend of the year. It’s common knowledge, and it’s easy to infer that this holiday weekend is one of the busiest for air travel. But can you prove it empirically? Apparently so. [Bertrand Fan] filed a Freedom of Information Act request for the WiFi traffic at San Francisco International Airport and used the access point data from the past year and a half to show which days were most congested in the airport.
FOIA actually has its own website which boils down the act as follows:
The basic function of the Freedom of Information Act is to ensure informed citizens, vital to the functioning of a democratic society.
 We’re not sure if this particular data mining hack falls under that description, but it’s good to know if you want information about what government is doing, you can get it and fast! From the first request to receiving the info was just 10 days.
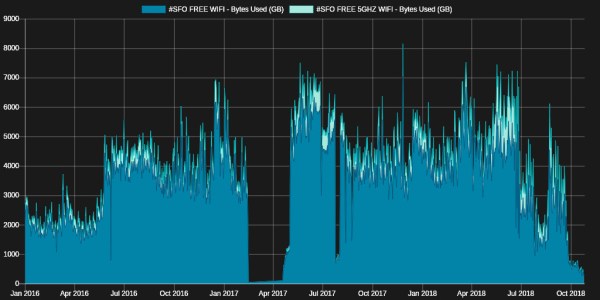
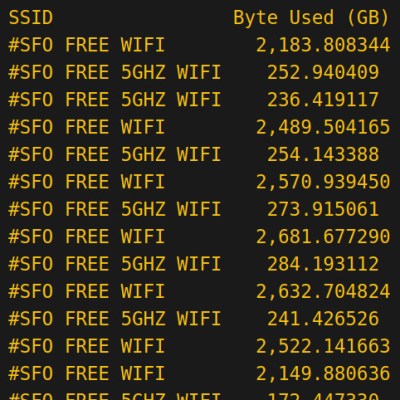
Ghostscript was used to turn the PDF into a CSV which was then plotted on a graph. It shows that the heaviest WiFi usage was on 11/26/17, the Sunday after Thanksgiving. As you can see, the only thing returned was data used per day for each SSID (plus dates which aren’t shown in this screenshot). But in theory the more people stuck at the airport the more data they’ll consume, so the method is reasonable.
This was all just to color a conversation he was having with his parents about the weekend’s travel. It’s a long way to go to prove a point, but we had fun joining along in the ride!
[via Lobsters]