Flashing TI Chips With An ESP

Texas Instruments is best known to the general public for building obsolete calculators and selling them at extraordinary prices to students, but they also build some interesting (and reasonably-priced) microcontrollers as well. While not as ubiquitous as Atmel and the Arduino platform, they can still be found in plenty of consumer electronics and reprogrammed, and [Aaron] aka [atc1441] demonstrates how to modify them with an ESP32 as an intermediary.

Specifically, the TI chips in this build revolve around the 8051-core  microcontrollers, which [Aaron] has found in small e-paper price tags and other RF hardware. He’s using an ESP32 to reprogram the TI chips, and leveraging a web server on the ESP in order to be able to re-flash them over WiFi. Some of the e-paper displays have built-in header pins which makes connecting them to the ESP fairly easy, and once that’s out of the way [Aaron] also provides an entire software library for interacting with these microcontrollers through the browser interface.

Right now the project supports the CC2430, CC2510 and CC1110 variants, but [Aaron] plans to add support for more in the future. It’s a fairly comprehensive build, and much better than buying the proprietary TI programmer, so if you have some of these e-paper displays laying around the barrier to entry has been dramatically lowered. If you don’t have this specific type of display laying around, we’ve seen similar teardowns and repurposing of other e-paper devices in the past as well.

Continue reading “Flashing TI Chips With An ESP”

Adding WiFi Remote Control To Home Electronics? Be Prepared To Troubleshoot

[Alex] recently gave a Marantz audio amplifier the ability to be remotely-controlled via WiFi by interfacing an ESP32 board to a handy port, but the process highlights how interfacing to existing hardware often runs into little, unforeseeable problems that can sink the project unless solved.

At its core, the project uses an ESP32 and the ESPAsyncWebServer project to create a handy web interface that is accessible over WiFi. Then, to actually control the amplifier, [Alex] decoded the IR-based remote signals by watching the unit’s REMOTE ports, which are intended as a pass-through and repeater for IR signals to other Marantz units. This functionality can be exploited; by sending the right signals to the REMOTE IN port, the unit can be controlled by the ESP32. With the ESP32 itself accessible by just about any WiFi device, [Alex] gains the freedom to control his amplifier with much greater flexibility than just the IR remote would offer.

Sounds fairly straightforward, but as usual when interfacing to an existing piece of electronics, there were a few glitches. The first was that high and inconsistent latency (from 10 ms to 100 ms) made controlling the amplifier a sometimes frustrating experience, but that was solved by disabling power saving on the WiFi interface. Another issue was that sending signals by connecting a GPIO pin to the REMOTE IN port of the amplifier worked, but had the side effect of causing the amplifier to no longer listen to the IR remote. Apparently, current flowing from the REMOTE port to the ESP32’s GPIO pin was to blame, because adding a diode in between fixed the problem.

The GitHub repository holds the design files and code. This kind of project can be pretty complex, because the existing hardware doesn’t always play nice, and useful boards like a modern ESP32 aren’t always available. Adding a wireless interface to vintage audio equipment has in the past involved etching circuit boards and considerably more parts.

WiFi bird box with phone showing video of a rubber ducky

Building A WiFi-Enabled Bird Box On The Cheap

[Jude] was looking for a fun DIY project for him and his son and thought that a bird box might be a good option. He wanted to equip the box with a WiFi camera so he could watch his little guests from his phone but didn’t find any suitable, inexpensive, commercially-available options. So with that, he built one himself.

He did, however, start with a generic bird box, which he bought online, and then modified with his particular features of interest. He wanted the project to be scalable so after-school programs and other kids clubs could easily implement his design within a classroom setting. He figured minimizing the woodwork would make the project easier for children.

He added a dowel to the generic bird box he bought online, but cautions that readers need to investigate if a dowel would attract invasive species in their area. He found a relatively inexpensive WiFi-enabled endoscope that he noted was far more affordable than the camera-equipped, commercially-available bird boxes he found earlier. He craftily used a plastic syringe as a waterproof spy hole that housed the endoscope, allowing him to easily slip the camera in and out of the bird box without disturbing its occupants. He noted that the 3 mL syringe had the perfect inner diameter to fit the endoscope rather snugly.

[Jude] doesn’t intend to have the endoscope active 24/7, so he needed a way to seal the access hole when the camera was not in use. His many years at Dyson taught him that implementing a removable, water-tight, rubber seal is not as easy as people may think. Fortunately, the rubber stopper at the tip of the syringe’s plunger was naturally a perfect removable seal and he could use it to plug the access hole when the endoscope was not in use.

The endoscope was mostly waterproof, except for the WiFi transmitter, so [Jude] needed to place that end of the device in a waterproof enclosure. He said these are often called “IP rated” enclosures and he figured these could come in handy for any number of outdoor electronics projects so we imagine this might come in handy for a lot of our readers as well.

Mother nature has certainly inspired many projects here at Hackaday and [Jude]’s bird box is no exception. Cool project!

Remoticon 2021: Uri Shaked Reverses The ESP32 WiFi

You know how when you’re working on a project, other side quests pop up left and right? You can choose to handle them briefly and summarily, or you can dive into them as projects in their own right. Well, Uri Shaked is the author of Wokwi, an online Arduino simulator that allows you to test our your code on emulated hardware. (It’s very, very cool.) Back in the day, Arduino meant AVR, and he put in some awesome effort on reverse engineering that chip in order to emulate it successfully. But then “Arduino” means so much more than just AVR these days, so Uri had to tackle the STM32 ARM chips and even the recent RP2040.

Arduino runs on the ESP32, too, so Uri put on his reverse engineering hat (literally) and took aim at that chip as well. But the ESP32 is a ton more complicated than any of these other microcontrollers, being based not only on the slightly niche Xtensa chip, but also having onboard WiFi and its associated binary firmware. Reverse engineering the ESP32’s WiFi is the side-quest that Uri embarks on, totally crushes, and documents for us in this standout Remoticon 2021 talk. Continue reading “Remoticon 2021: Uri Shaked Reverses The ESP32 WiFi”

New Pi Zero Gains Unapproved Antennas Yet Again

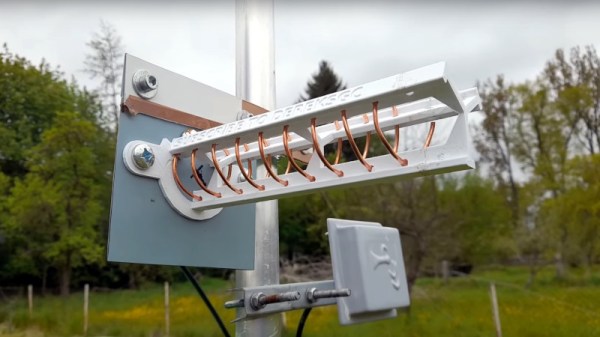
We’ve only started to tap into the potential of the brand new Pi Zero 2. Having finally received his board, [Brian Dorey] shows us how to boost your Pi’s WiFi, the hacker way. Inline with the onboard WiFi antenna can be found a u.FL footprint, and you just know that someone had to add an external antenna. This is where [Brian] comes in, with a photo-rich writeup and video tutorial, embedded below, that will have you modify your own Zero in no time. His measurements show seeing fourteen networks available in a spot where he’d only see four before, and the RSSI levels reported have improved by 5 dB -10 dB, big when it comes to getting a further or more stable connection.

With old laptops being a decent source of WiFi antennas, you only need to procure a u.FL connector and practice soldering a bit before you take this on! The hardest part of such a project tends to be not accidentally putting any solder on the u.FL connector’s metal can – and [Brian] mostly succeeds in that! He shows how to disconnect the external antenna to avoid signal reflections and the like, and, of course, you will be expected to never power your Pi Zero on without an attached antenna afterwards, lest you have your transmitter become fatally confused by the mismatch of hardware-defined impedance expectations. A Pi Zero isn’t the only place where you’ll encounter footprints for connectors you can add, and arguably, that’s your duty as a hacker – modifying the things you work with in a way that adds functionality. Don’t forget to share how you did it!

This trick should be pretty helpful if you’re ever to put your new Pi Zero in a full-metal enclosure. Curious about the Raspberry Pi antenna’s inner workings? We’ve covered them before! If you’d like to see some previous Raspberry Pi mods, here’s one for the Pi 3, and here’s one for the original Zero W – from [Brian], too!
Continue reading “New Pi Zero Gains Unapproved Antennas Yet Again”

Comfortable, wearable packaging for biometric device for monitoring physiological data and pushing the data to the cloud

A DIY Biometric Device With Some Security Considerations

Biohacking projects are not new to Hackaday and it’s certainly a genre that really piques our interest. Our latest biohacking device comes courtesy of [Manivannan] who brings his flavor of a wearable biosensor with some security elements built-in through AWS.

The hardware is composed of some impressive components we have seen. He has an AD8232 electrocardiogram front end, the MAX30102 integrated pulse oximeter IC for determining blood oxygen and heart rate, and the ever-popular LM35 for measuring body temperature. Either of these chips would be perfect for your next DIY biosensor project though you might try the MAX30205 body temperature sensor given its 0.1-degree Celsius accuracy. However, what really piqued our interest was the use of Microchip’s AVR-IoT WA Development Board. Now we’ve talked about this board before and also mentioned you could probably do all the same things with an ESP-device, but perhaps now we get to see the board a bit more in action.

[Manivannan] walks the reader through the board’s setup and everything looks to be pretty straightforward. He ultimately rigged together a very primitive dashboard for viewing all his vitals in real-time, demonstrating how you could put together your own patient dashboard for remote monitoring of vitals or other sensor signals. He emphasizes that all this is powered through AWS, giving him some added security layers that are critical for protecting his data from unwanted viewers.

Though [Manivannan’s] security implementation doesn’t rise to the standard of medical devices, maybe it will serve as a case study in the growing open-source medical device movement.

Continue reading “A DIY Biometric Device With Some Security Considerations”

wifi scanner

Visualizing WiFi With A Converted 3D Printer

We all know we live in a soup of electromagnetic radiation, everything from AM radio broadcasts to cosmic rays. Some of it is useful, some is a nuisance, but all of it is invisible. We know it’s there, but we have no idea what the fields look like. Unless you put something like this 3D WiFi field strength visualizer to work, of course.

Granted, based as it is on the gantry of an old 3D printer, [Neumi]’s WiFi scanner has a somewhat limited work envelope. A NodeMCU ESP32 module rides where the printer’s extruder normally resides, and scans through a series of points one centimeter apart. A received signal strength indicator (RSSI) reading is taken from the NodeMCU’s WiFi at each point, and the position and RSSI data for each point are saved to a CSV file. A couple of Python programs then digest the raw data to produce both 2D and 3D scans. The 3D scans are the most revealing — you can actually see a 12.5-cm spacing of signal strength, which corresponds to the wavelength of 2.4-GHz WiFi. The video below shows the data capture process and some of the visualizations.

While it’s still pretty cool at this scale, we’d love to see this scaled up. [Neumi] has already done a large-scale 3D visualization project, using ultrasound rather than radio waves, so he’s had some experience in this area. But perhaps a cable bot or something similar would work for a room-sized experiment. A nice touch would be using an SDR dongle to collect signal strength data, too — it would allow you to look at different parts of the spectrum.

Continue reading “Visualizing WiFi With A Converted 3D Printer”