Digitizing Sound On An Unmodified Sinclair ZX81

Whatever the first computer you used to manipulate digital audio was, the chances are it came with dedicated sound hardware that could play, and probably record, digitized audio. Perhaps it might have been a Commodore Amiga, or maybe a PC with a Sound Blaster. If you happen to be [NICKMANN] though, you can lay claim to the honor of doing so on a machine with no such hardware, because he managed it on an unmodified Sinclair ZX81.

For those of you unfamiliar with the ZX, it embodied Clive Sinclair’s usual blend of inflated promises on minimal hardware and came with the very minimum required to generate a black-and-white TV picture from a Zilog Z80 microprocessor. All it had in the way of built-in expansion was a cassette interface, 1-bit read and write ports exposed as 3.5 mm jacks on its side. It’s these that in an impressive feat of hackery he managed to use as a 1-bit sampler with some Z80 assembler code, capturing a few seconds of exceptionally low quality audio in an ’81 with the plug-in 16k RAM upgrade.

From 2023 of course, it’s about as awful as audio sampling gets, but in 1980s terms it’s pulling off an almost impossible feat that when we tried it with a 1-bit PC speaker a few years later, we didn’t succeed at. We’re impressed.

The ’81 may be one of the simplest of the 8-bit crop, but in its day it set many a future software developer on their career path. It’s still a machine that appears here today, from time to time.


A Studio Condenser Microphone For A Constrained Budget

As the Internet has turned so many of us into content creators, we’ve seen the quality of webcams and microphones steadily increase to the point at which even a fairly modestly-equipped YouTuber now captures their wisdom at a quality far exceeding that you might have found in some broadcast studios not so long ago. Still, decent quality costs money, and for that reason [Spirit532] has built his own high quality condenser microphone for less expenditure.

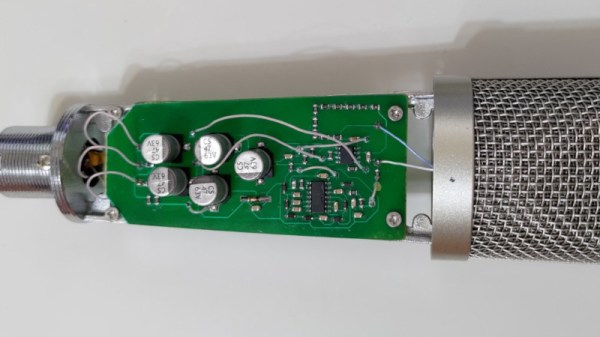
The capsule and body are off-the-shelf items — what he’s produced is the bias voltage supply and preamplifier. In both cases these are the interesting parts of a condenser microphone, so their circuit bears a second look.
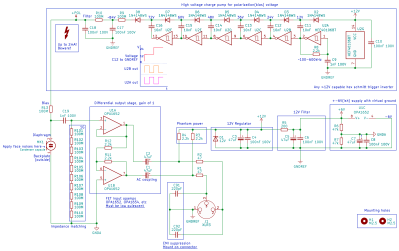
The condenser microphone takes a diaphragm and turns it into one side of a capacitor. If you apply a charge to this capacitor, the voltage over it changes minutely with the capacitance as the diaphragm vibrates. Thus to have a usable audio signal level a high-voltage bias supply is required to provide the charge, and a very high impedance preamplifier circuit  to catch the signal without draining the capacitor.

His bias supply is a charge pump using a string of diodes and capacitors fed by a chain of CMOS inverters, with an RC filter and resistor chain to provide that super-high impedance. The preamplifier meanwhile is a unity gain high-impedance op-amp with an inverting stage to provide a balanced connection. For good measure the circuit also includes a phantom power supply.

This is an interesting project for anyone with an interest in audio. if you’re further interested in condenser microphones, how about also looking at electret microphones?

A Feature-Rich Amplifier Module For 3-Way Speaker Builds

There’s something rewarding about building your own DIY audio hardware. Knowing you put it together yourself gives you faith in the construction, and psychosomatically makes the music sound all that much sweeter. If you’re into that kind of thing, you might like to give [Eric Sorensen’s] Denmark amplifier module a look.

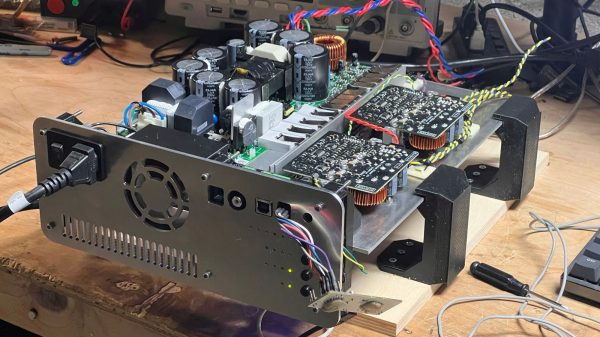
The amplifier is intended to be used in a 3-way system, running a subwoofer, woofer, and tweeter. It uses a 1000 W ICEpower module to run the subwoofer, with a pair of 500W ICEpower modules to run the woofer and tweeter respectively. Meanwhile, a MiniDSP 2x4HD is used to accept optical audio input. It also offers digital signal processing and serves as a crossover to split the signal across the three speakers. An STM32F401 is used to run the show, controlling all the various modules and the necessary status LEDs. It’s a feature-rich build, too, with overtemperature monitoring, fan control, and clipping warnings built in.

The whole setup is built on to a sturdy aluminium backplate. The CNC-machined panel has simple tactile buttons for control. There’s also a nifty use of clear PETG 3D printer filament as a light pipe for LEDs. It’s effective, and it looks great. The whole module is designed to slide into the bottom of a 3-way speaker housing like a drawer.

Overall, if you’re building a big set of 3-way speakers, you might find the Denmark amplifier module is perfect for your needs. Alternatively, you could experiment with a different kind of speaker entirely. Video after the break.

Continue reading “A Feature-Rich Amplifier Module For 3-Way Speaker Builds”

Ploopy Builds Open Source RP2040-Powered Headphones And You Can Too!

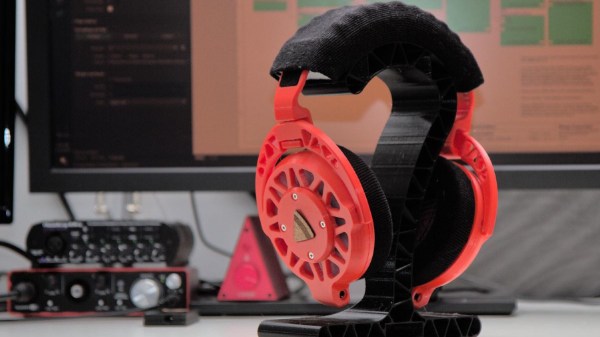
We’ve seen many DIY headphones projects on these fair pages over the years, but not many that are quite as DIY as the Ploopy Headphones. What makes this project interesting is the sheer depth of the construction, with every single part being made from what we might call base materials. Materials such as 3D printer filament, foam and felt, and the usual metallic vitamins.

The electronics are fairly straightforward, with an RP2040 functioning as the USB audio interface and equalizer function. Audio samples are emitted as I2S into a PCM3050 24-bit stereo codec which generates a pair of differential output audio signals. These are then converted from differential to single-ended signals and passed on to the coil drivers. The coil drivers consist of no fewer than eight-paralleled opamps per channel. All of this is powered by the USB-C connection to the host computer. Whilst a kit of parts is available for this, you can make your own if you wish, as the full source (Altium designer needed for tweaks) is available on the Ploopy headphone GitHub.

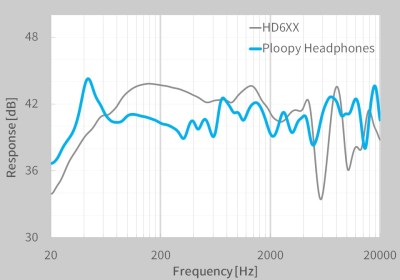
A pretty ploopy response

Many DIY headphone builds would likely be using off-the-shelf speaker units, with large parts of the ear cups being taken from spare parts kits for commercial offerings. But not the Ploopy. The drivers are constructed from flex PCB coils with a standard TRRS jack on each side. Magnets for these coils to react against are held in a 3D-printed frame that is attached to the outer cover. The coils are aligned with a special jig and bonded to the ‘driver foam’ with some 3M VHB tape.

The ear cups are constructed with some 3D printed rings, foam pieces, and simple woven material. The resonator plates push into the inner side of the cup, and the assembly simply screws to the driver assembly. The incredibly detailed assembly wiki makes it look easy, but we reckon there are a few tricky steps in there to trip the unwary. The headband again consists of printed spring sections, some woven material, and foam with a few metallic vitamins thrown in. That makes it sounds simple, but it isn’t.

On the whole the build looks fantastic, but what does it sound like? The Ploopy team has tested them against a pair of Sennheiser HDRXX giving a broadly comparable response, but we’re no audio experts, and the proof, as always, is in the wearing. This project seems to be the ultimate in audio tweakability, with the punchy RP2040 capable of running six audio filters at the full 48 KHz, 16-bit audio, though, the PCM3050 is capable of more.

Want to build some headphones, but need a Bluetooth interface? We got you covered. Can 3D printed headphones ever compare to the big names? We’ll see.

How To Build Jenny’s Budget Mixing Desk

Jenny did an Ask Hackaday article earlier this month, all about the quest for a cheap computer-based audio mixer. The first attempt didn’t go so well, with a problem that many of us are familiar with: Linux applications really doesn’t like using multiple audio devices at the same time. Jenny ran into this issue, and didn’t come across a way to merge the soundcards in a single application.

I’ve fought this problem for a while, probably 10 years now. My first collision with this was an attempt to record a piano with three mics, using a couple different USB pre-amps. And of course, just like Jenny, I was quickly frustrated by the problem that my recording software would only see one interface at a time. The easy solution is to buy an interface with more channels. The Tascam US-4x4HR is a great four channel input/output audio interface, and the Behringer U-PHORIA line goes all the way up to eight mic pre-amps, expandable to 16 with a second DAC that can send audio over ADAT. But those are semi-pro interfaces, with price tags to match.

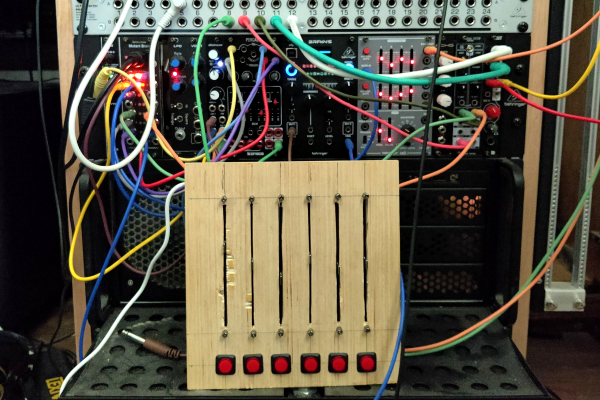
But what about Jenny’s idea, of cobbling multiple super cheap interfaces together? Well yes, that’s possible too. I’ll show you how, but first, let’s talk about how we’re going to control this software mixer monster. Yes, you can just use a mouse or keyboard, but the challenge was to build a mixing desk, and to me, that means physical faders and mute buttons. Now, there are pre-built solutions, with the Behringer X-touch being a popular solution. But again, we’re way above the price-point Jenny set for this problem. So, let’s do what we do best here at Hackaday, and build our own. Continue reading “How To Build Jenny’s Budget Mixing Desk”

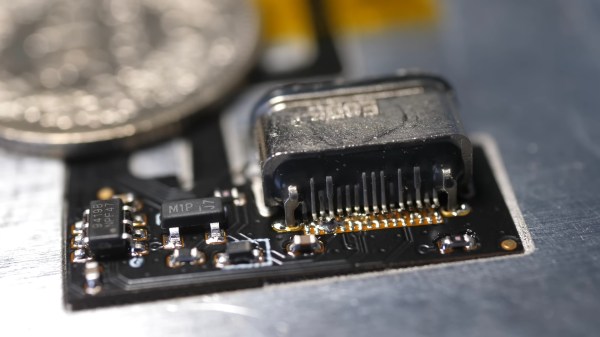
A closeup of a black flexible PCB with an out-of-focus quarter in the background, approximately the same size as the end of the PCB we're looking at. One the right is a USB C connector and to its left are two SMD components with visible pins. Several smaller SMD components (resistors or caps?) are soldered to other parts of the board.

Making The AirPods Pro Case Repairable

Apple is often lauded for its design chops, but function is often sacrificed at the altar of form, particularly when repair is involved. [Ken Pillonel] has made it easier for everyone to replace the batteries or lightning port in the AirPods Pro case. (YouTube)

With such notable hacks as adding USB C to the iPhone already under his belt, [Pillonel] has turned his attention to fixing the notoriously poor repairability of AirPods and AirPods Pro, starting with the cases. While the batteries for these devices are available, replacement Lightning ports are not, and taking the housing apart for the case is an exercise in patience where the results can’t be guaranteed.

He designed a USB C replacement port for broken Lightning ports that is a perfect fit if you happen to get the case apart in one piece. If you’re less successful, he has you covered there too with a 3D printable enclosure replacement.

We sure miss the days of schematic proliferation here at Hackaday, but we know you don’t let glued enclosures or unobtainium parts stand in the way of repairs.

Continue reading “Making The AirPods Pro Case Repairable”

Count Leading Zeros For Efficient Logarithms

[Ihsan Kehribar] points out a clever trick you can use to quickly and efficiently compute the logarithm of a 32-bit integer. The technique relies on the CLZ instruction which counts the number of leading zeros in a machine word and is available in many modern processors. Typical algorithms used to compute logarithms are not quick and have a variable execution time depending on the input value. The technique [Ihsan] is using is both fast and has a constant run time.

The above equation summarized the math behind the algorithm. We get the first term easily using the CLZ instruction. Using the remainder and a pre-computed lookup table, it is possible to get the second term to various degrees of accuracy, depending on how big you make the table and whether or not you take the performance hit of interpolation or not — those of a certain age will no likely groan at the memory of doing interpolation by hand from logarithm tables in high school math class. [Ihsan] has posted an MIT-licensed implementation of this technique in his GitHub repository, which includes both the C-language algorithm and Python tools to generate the lookup table and evaluate the errors.

Why would you do this? Our first thought was real-time streaming DSP operations, where you want fast and deterministic calculations, and [Ihsan]’s specifically calls out embedded audio processing as one class of such applications. And he should know, after all, since he developed a MIDI capable polyphonic FM synthesizer on a Cortex M0 that we covered way back in 2015.