A Three Axis Mill For The End Of The World

A mill is one of those things that many hackers want, but unfortunately few get their hands on. Even a low-end mill that can barely rattle its way through a straight cut in a piece of aluminum is likely to cost more than all the other gear on your bench. A good one? Don’t even ask. So if something halfway decent is out of your price range, you might as well throw caution to the wind and build one.
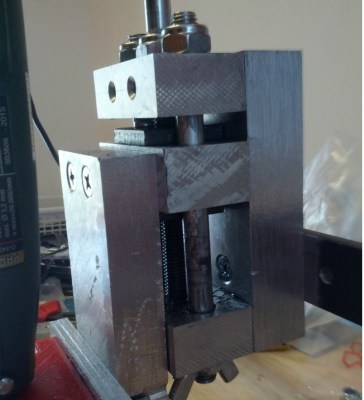
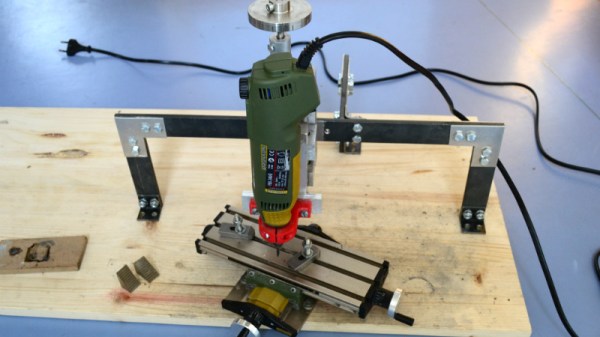
That’s more or less the goal behind this extremely basic three axis mill built by [Michael Langeder]. Designed around a cheap rotary tool, it’s hard to imagine a more simplistic mill. Almost all the components are stuff you could pick up from the local hardware store, or probably even the junk pile if you were really in a pinch. It won’t be the best looking piece of gear in your shop, but it’s good enough to learn the basics on and just might be able to bootstrap a second-generation mill RepRap-style.

Made out of scrap blocks of aluminum and some threaded rod, the Z axis itself represents the bulk of the work on this project. It gives the user fine control over the height of the rotary tool by way of a large knob on the top. It’s held over the work piece with some flat steel bars and corner brackets rather hastily cut out of aluminum sheet.

While the tool holder is 3D printed, you could probably hack something up out of a block of wood if you didn’t have access to a printer. The only part of the mill that’s really “cheating” is the cross slide table, but at least they can be had for relatively cheap. If you really wanted to do this with junk bin finds, you could always replicate the Z axis design for X and Y.

If you’re not looking for something quite so austere, we’ve covered slightly more advanced DIY mills in the past. You could always go in the opposite direction and put a cross slide vise on your drill press, but do so at your own risk.

Chordata motion capture dancer and 3D model

A Motion Capture System For Everyone

[Chordata] is making a motion capture system for everyone to build and so far the results are impressive, enough to have been a finalist in the Hackaday Human Computer Interface ChallengeIt started a few years ago as one person’s desire to capture a digital performance of a dancer on a stage and has grown into a community of contributors. The board files and software have just been released as alpha along with some instructions for making it work, though more detailed documentation is on the way.

Chordata motion capture dancer and BlenderFifteen sensor boards, called K-Ceptors, are attached to various points on the body, each containing an LSM9DS1 IMU (Inertial Measurement Unit). The K-Ceptors are wired together while still allowing plenty of freedom to move around. Communication is via I2C to a Raspberry Pi. The Pi then sends the collected data over WiFi to a desktop machine. As you move around, a 3D model of a human figure follows in realtime, displayed on the desktop’s screen using Blender, a popular, free 3D modeling software. Of course, you can do something else with the data if you want, perhaps make a robot move? Check out the overview and the performance by a clearly experienced dancer putting the system through its paces in the video below.

As a side note, the latest log entry on their Hackaday.io page points out that whenever changes are made to the K-Ceptor board, fifteen of them need to be made in order to try it out. To help with that, they show the testbed they made for troubleshooting boards as soon as they come out of the oven.

Continue reading “A Motion Capture System For Everyone”

Box Forts For Adults: Best Practices And Design Strategies

Many a grown up can reminisce about building various architectural wonders in their youth. Forts, whether based on boxes or blankets, were the order of the day, and an excellent way to spend a rainy Sunday afternoon.

It just so happens that there is no law against scaling up such activities once one has reached the age of majority. However, to build a structure at this level takes some careful planning and consideration, and that is the purpose of our article here today.

Location, Location, Location

To avoid an awkward conflict, be sure to warn your housemates of impending construction well ahead of time.

The first major consideration when starting your build should be the area in which you wish to do it. Building inside has the advantage of avoiding the weather, however hard floors can lead to sore knees when crawling around. Additionally, you’re a grown up now, so it’s less likely your peers will be impressed to hear you sat inside a box in your living room.

No, if you’re going to do this right, you’ll want to go outside. A nice flat lawn is best, providing soft ground and plenty of space. The challenges of the elements will guide your work – sitting inside your cardboard home feels all the more satisfying when you’re cosy and dry as you listen to the patter of rain on the roof. There’s a real sense of accomplishment when you’ve built something that can survive the harsh outdoors, and besides, the views are better, too. Continue reading “Box Forts For Adults: Best Practices And Design Strategies”

A Rotary Axis CNC Machine

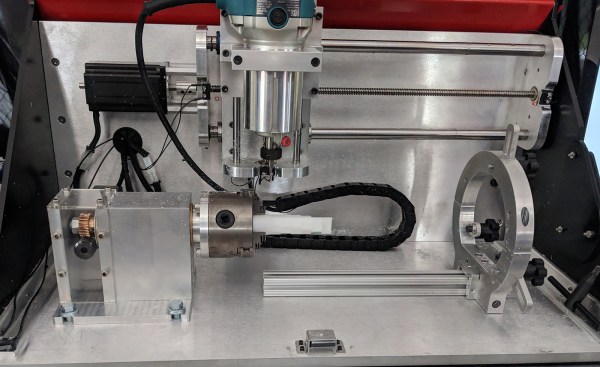
There’s a certain class of parts that just can’t be made on a standard 3-axis mill, nor with a 3D printer or a lathe. These parts — weird screws, camshafts, strange gears, or simply a shaft with a keyway (or two) — can really only be made with a rotary axis on a CNC machine. Sure, you could buy a rotary axis for a Haas or Tormach for thousands of dollars, or you could build your own. That’s exactly what [Adam Zeloof] and [Matt Martone] did with their project at this year’s World Maker Faire in New York. It’s the Rotomill, a simple three-axis CNC machine, with a rotary axis, that just about anyone can build.

The design of the Rotomill uses a standard, off-the-shelf Makita rotary tool for the spindle, and uses leadscrews to move the X and Z axes around with NEMA 24 stepper motors. The A axis — the rotary bit — is driven through a worm gear, also powered by a NEMA 24. Right now this provides more than enough power to cut foam, plastic, and wood, and should be enough to cut aluminum. That last feat is as yet untested, but the design is open enough that a much more powerful spindle could be attached.

The software for this machine is a bit weird. For most CNC machines with a rotary axis, the A axis is treated as such — a rotary axis. For the Rotomill, [Adam] and [Matt] are generating G Code like it’s a normal Cartesian machine, only with one axis ‘wrapped’ around itself. This is all done through Autodesk HSM, and a properly configured Arduino running GRBL makes sense of all this arcane geometry.

It’s a great looking machine, and the guys behind it say it’s significantly less expensive than any other machine with a rotary axis. That’s to be expected, as it’s basically a five axis mill with two axes removed. Still, this entire project was built for about $2000, and some enterprising salvage and hacking could bring that price down a bit.

Planned Obsolescence Isn’t A Thing, But It Is Your Fault

The common belief is that big companies are out to get the little people by making products that break after a short period, or with substantially new features or accessories that make previous models obsolete, requiring the user to purchase a new model. This conspiracy theory isn’t true; there’s a perfectly good explanation for this phenomenon, and it was caused by the consumers, not the manufacturers.

When we buy the hottest, shiniest, smallest, and cheapest new thing we join the wave of consumer demand that is the cause of what often gets labelled as “Planned Obsolescence”. In truth, we’re all to blame for the signals our buying habits send to manufacturers. Dig in and get your flamewar fingers fired up.

Continue reading “Planned Obsolescence Isn’t A Thing, But It Is Your Fault”

Tearing Into A $1.3 Million Oscilloscope

Most hackers are rankled by those “Warranty Void If Broken” seals on the sides of new test equipment. Even if they’re illegal, they at least put the thought in your head that the space inside your new gear is off-limits, and that prevents you from taking a look at what’s inside. Simply unacceptable.

[Shahriar] has no fear of such labels and tears into just about everything that comes across his bench. Including, most recently, a $1.3 million 110-GHz oscilloscope from Keysight. It’s a teardown that few of us will ever get the chance to do, and fewer still would be brave enough to attempt. Thankfully he does, and the teardown video below shows off the remarkable engineering that went into this monster.

The numbers boggle the mind. Apart from the raw bandwidth, this is a four-channel scope (althought the unit [Shahriar] tested is a two-channel) that doesn’t split its bandwidth across channels. The sampling rate is 256 GS/s and the architecture is 10-bits, so this thing is dealing with 10 terabits per second. We found the extra thick PCBs, which are perhaps 32-layer boards, to be especially interesting, and [Shariar]’s tour of the front end was fascinating.

It all sounds like black magic at first, but he really makes the technology approachable, and his appreciation for fine engineering is obvious. If you’ve got even a passing interest in RF electronics you should check it out. You might want to brush up on microwave topics first, though; this Doppler radar teardown might help.

Continue reading “Tearing Into A $1.3 Million Oscilloscope”

Feeding Dogs Over Twitch Is Latest E-Sport Craze

The modern social-networking fueled Internet loves two things more than anything: pets, and watching other people do stuff. There’s probably a scroll tucked behind a filing cabinet at Vint Cerf’s house that foretells anyone who can harness these two elements will gain control of the Internet Ready Player One style. If so, we’re thinking [Tyler Pearce] is well on his way to ascending the throne.

In an effort to make the Overwatch Twitch streams of his betrothed even more enticing, [Tyler] came up with a way for viewers to feed their dog Larry by dropping a command in the chat. There’s a surprisingly complex dance of software and hardware to make this reliable and visually appealing, but it’s worth it as showmanship is important in the brave new world of competitive e-sports. We’re assuming that’s what it says in the issue of ESPN Magazine with the Fortnite player on the cover, but nobody at Hackaday would qualify for a subscription to it so we don’t really know for sure.

A server running on the computer provides a slick administrative dashboard for the treat system, including a running log of who fed Larry and when. There’s also a number of checks in place to prevent too many treats being dispensed in a short time period, and to keep an individual from spamming the system.

On the hardware side, he’s using two NodeMCU ESP8266 microcontollers connected to a local MQTT broker: one to handle the lighting and one to run the 3D printed auger that actually pushes the food out. The printed auger is powered by a standard hobby servo, and even includes an IR sensor to automatically stop spinning when it detects a treat has been dispensed. [Tyler] reports the auger works quite well, though does have a tendency to jam up if overfilled.

We’ve seen all manner of automated pet feeders over the years, even ones with their own email accounts. So it was probably only a matter of time until they came to Twitch. If you can install Linux with it, why not use it to feed your dog? Or somebody else’s, as the case may be.