32 Shades Of Gray

The ATtiny85 is an incredible piece of engineering. In just eight pins, you get a microcontroller with just enough oomph to do some really heavy lifting. You get an Open Source toolchain, and if you’re really good, you can build your own programmer. It does have its limits though; there isn’t a whole lot of Flash, and of course you’re always going to need a few extra pins.

For his Hackaday Prize entry, [danjovic] is pushing whatever limits are left with the ‘tiny85. He’s using it as a test pattern generator, pushing out pixels to any old TV. The entire circuit is powered by a coin cell, and the entire thing fits in a Tic-Tac box.

The heart of the project, as you would expect, is a resistor ladder using all six available pins, using five for luminance and one for the sync. That is thirty-two shades of gray, if you’re keeping track. The trick is using the internal PLL and a bit of math to calculate the proper resistor values. The result is just a test pattern, yes, but [danjovic] managed to get a test pattern that has a resolution of 850 pixels across. That’s not bad by any measure.

Of course, if grayscale isn’t your thing, you can also use the ‘tiny85 to send Never The Same Color over the air or even push out the jams over a VGA port.

The Hacky Throttle Repair That Got Me On The Road Again

Old cars are great. For the nostalgia-obsessed like myself, getting into an old car is like sitting in a living, breathing representation of another time. They also happen to come with their fair share of problems. As the owner of two cars which are nearing their 30th birthdays, you start to face issues that you’d never encounter on a younger automobile. The worst offender of all is plastics. Whether in the interior or in the engine bay, after many years of exposure to the elements, parts become brittle and will crack, snap and shatter at the slightest provocation.

You also get stuck bolts. This was the initial cause of frustration with my Volvo 740 Turbo on a cold Sunday afternoon in May. As I tried in vain to free the fuel rail from its fittings, I tossed a spanner in frustration and I gave up any hope of completing, or indeed, starting the job that day. As I went to move the car back into the driveway, I quickly noticed a new problem. The accelerator was doing approximately nothing. Popping the hood, found the problem and shook my head in resignation. A Volvo 740 Turbo is fitted with a ball-jointed linkage which connects the accelerator cable to the throttle body itself. In my angst, the flying spanner had hit the throttle body and snapped the linkage’s plastic clips. It was at this point that I stormed off, cursing the car that has given me so much trouble over the past year.

Continue reading “The Hacky Throttle Repair That Got Me On The Road Again”

Friday Hack Chat: Hacking The Wild

It’s nearly summer, and that means we’re right at the start of conference season, at least for the tech and netsec crowd. Conferences, if you’re not aware, are a conspiracy for the hotel-industrial complex and a terrible way to spend thousands of dollars on a crappy hotel room and twenty-five dollar hamburgers.

[Andrew Quitmeyer] is working on an experimental academic conference that might just put an end to the horrors of conference season. He’s creating his own conference called Dinacon, and it’s going to be cheaper to attend, even though it’s on a tropical island in the Pacific.

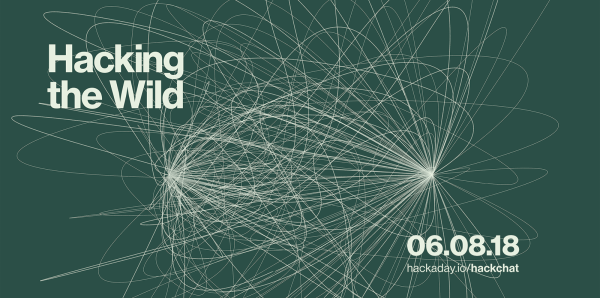
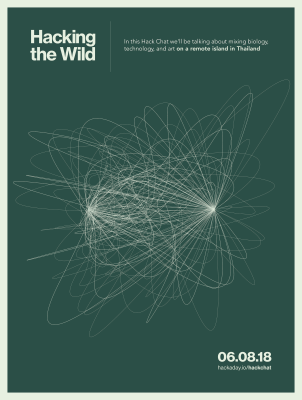
For this week’s Hack Chat, we’re going to be talking with [Andrew] about Dinacon, a free, two-month-long conference with over 140 attendees from every continent except Antarctica. [Andrew]’s research is in ‘digital naturalism’ at the National University of Singapore and blends biological fieldwork with DIY crafting. The focus of this conference will be workshops where participants build technology in the wild meant to interact with nature.

Not only is the intersection of DIY electronics interesting to the Hackaday community, this is also an interesting conference from a logistical standpoint. The conference philosophy spells it out pretty clearly, with the main takeaway being that [Andrew] is self-funding this conference himself. It’s only going to take about $10,000 USD to host this conference (!), and there are even a few travel stipends to go around. This is also a two-month-long conference. I assure you, after dealing with Supercons, Hackaday meetups, and all the other events Hackaday puts on, this is exceptionally interesting. It’s unheard of, even.

For this week’s Hack Chat, we’re going to be discussing:

  • What is digital Naturalism?
  • What does DIY electronics look like in the forest? 
  • What did you learn from Hacking The Wild
  • What kind of things do people make at Dinacon? 
  • What is the biggest bug that ever got into one of your electronics experiments? 

You are, of course, encouraged to add your own questions to the discussion. You can do that by leaving a comment on the Hack Chat Event Page and we’ll put that in the queue for the Hack Chat discussion.join-hack-chat

Our Hack Chats are live community events on the Hackaday.io Hack Chat group messaging. This week is just like any other, and we’ll be gathering ’round our video terminals at noon, Pacific, on Friday, June 8th.  Here’s a clock counting down the time until the Hack Chat starts.

Click that speech bubble to the right, and you’ll be taken directly to the Hack Chat group on Hackaday.io.

You don’t have to wait until Friday; join whenever you want and you can see what the community is talking about.

Illuminated Bread For A Cookie Cutter World

Just in case you thought your eyes were playing tricks on you, we’d like to confirm right from the start that what you are looking at is a loaf of bread with internal LED lighting. Why has this bread been internally lit? We can’t really say. But what we can do is pass on the fascinating process that took an unremarkable piece of stale bread and turned it into an exceptional piece of stale bread.

As demonstrated by [The Maker Monster], working with stale bread is basically like working with wood. Wood that you can dip in soup, granted, but wood nonetheless. The process of electrifying the loaf starts with cutting it down the length on a bandsaw, and then hollowing it out with a rotary tool. This creates a fairly translucent shell that’s basically just crust.

You’re probably wondering how you keep a bread-light from getting moldy, and thankfully [The Maker Monster] does address that issue. The bread shell is completely coated with shellac, which creates a hard protective layer that will not only prevent decay but should give it some added strength. In the video it looks like only one coat is applied, but if we had to guess, a few coats would be necessary to really seal it up. Coating it with epoxy wouldn’t be a terrible idea either.

While the shellac dries on the bread, he gets to work on the lighted base (bet you never imagined you’d read a sentence like that), which is really just a sanded piece of wood with a standard LED strip stuck too it. It’s very understated, but of course the glowing loaf really draws the eye anyway. All that’s left is to glue the bread down to the base, and proudly display your creation at your next dinner party.

We can’t say that an electric ciabatta is in the cards for Hackaday HQ; but we know that baking good bread is a science in itself, and turning the failed attempts into works of art does have a certain appeal to it.

Continue reading “Illuminated Bread For A Cookie Cutter World”

Mechanisms: Abrasives

In our “Mechanisms” series, we’ve featured the fascinating bits and pieces that go into making our mechanical world work. From simple machines such as screws and levers, from springs to couplings, and even more complex mechanisms like zippers and solenoids, we’ve covered the gamut. But we haven’t talked about one of the very earliest mechanisms, captured from nature by our clever ancestors to do useful work like grinding grain and shaping materials into tools: grit, sand, abrasives.

Continue reading “Mechanisms: Abrasives”

Cracking The Case Of Capcom’s CPS2 Security

We love a good deep-dive on a specialized piece of technology, the more obscure the better. You’re getting a sneak peek into a world that, by rights, you were never meant to know even existed. A handful of people developed the system, and as far as they knew, nobody would ever come through to analyze and investigate it to find out how it all went together. But they didn’t anticipate the tenacity of a curious hacker with time on their hands.

[Eduardo Cruz] has done a phenomenal job of documenting one such system, the anti-piracy mechanisms present in the Capcom CPS2 arcade board. He recently wrote in to tell us he’s posted his third and final entry on the system, this time focusing on figuring out what a mysterious six pin header on the CPS2 board did. Hearing from others that fiddling with this header occasionally caused the CPS2 board to automatically delete the game, he knew it must be something important. Hackaday Protip: If there’s a self-destruct mechanism attached to it, that’s probably the cool part.

He followed the traces from the header connector, identified on the silkscreen as C9, back to a custom Capcom IC labeled DL-1827. After decapping the DL-1827 and putting it under the microscope, [Eduardo] made a pretty surprising discovery: it wasn’t actually doing anything with the signals from the header at all. Once the chip is powered up, it simply acts as a pass-through for those signals, which are redirected to another chip: the DL-1525.

[Eduardo] notes that this deliberate attempt at obfuscating which chips are actually connected to different headers on the board is a classic trick that companies like Capcom would use to try to make it harder to hack into their boards. Once he figured out DL-1525 was what he was really after, he was able to use the information he gleaned from his earlier work to piece together the puzzle.

This particular CPS2 hacking journey only started last March, but [Eduardo] has been investigating the copy protection systems on arcade boards since 2014.

[Thanks to Arduino Enigma for the tip.]

Homebrew SDR Ham Radio In 9 Parts

It used to be homebrew ham gear meant something simple. A couple of active devices that could send CW. Maybe a receiver with a VFO. But only the most advanced builders could tackle a wide range SSB transceiver. Today, that goal is still not trivial, but it is way easier due to specialty ICs, ready access to high-speed digital signal processing, and advances in software-defined radio techniques. [Charlie Morris] decided to build an SSB rig that incorporated these technologies and he shared the whole process from design to operation in a series of nine videos. You can see the first one below.

The NE612 is a child of the popular NE602 chip, which contains a Gilbert-cell mixer, and an oscillator that makes building a receiver much easier than it has been in the past. The chips are set up as direct conversion receivers and feed a Teensy which does the digital signal processing on the recovered audio.

Continue reading “Homebrew SDR Ham Radio In 9 Parts”