Resuming Failed 3D Prints Automatically

What happens to your 3D printer if the power goes out? What happens if there’s a jam in the nozzle? What happens if your filament breaks, runs out, or turns into a plate of spaghetti? For all these situations, the print fails, wasting plastic and time. For his Hackaday Prize entry, [robert] has come up with a tiny device that saves all those failed prints, and it does it without batteries or a UPS.

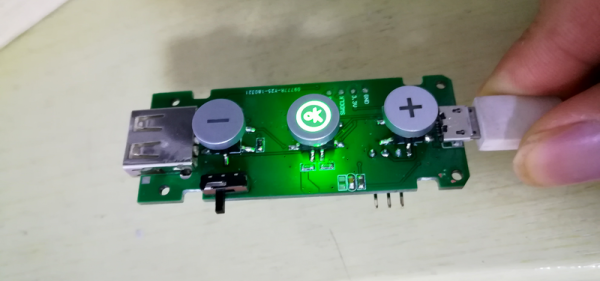
The idea behind [robert]’s box is to monitor all the G-code being sent to the printer, and allow a print to be resumed after a failure. The design is simple enough — just a USB mini port on one end, a USB A port on the other, and three buttons in between. This box logs the G-code, and if the printer happens to fail, the box will spring into life allowing you to resume a print from any Z position.

Already [robert] has tested this box on a number of printers including the Prusa i3, the Creality CR-10, and the ever-popular, explodey Anet A8. The project has already gone through a few hardware revisions and there is, of course, a fancy 3D printed enclosure for the board. It’s a great project, and one of the more interesting 3D printing tools we’ve seen in this year’s Hackaday Prize.

Mechanisms: The Spring

Most people probably don’t think about springs until one kinks up or snaps, but most of the world’s springs are pretty crucial. The ones that aren’t go by the name Slinky.

We all use and encounter dozens of different types of springs every day without realizing it. Look inside the world of springs and you’ll find hundreds of variations on the theme of bounce. The principle of the spring is simple enough that it can be extended to almost any shape and size that can be imagined and machined. Because it can take so many forms, the spring as a mechanism has thousands of applications. Look under your car, take apart a retractable pen, open up a stapler, an oven door, or a safety pin, and you’ll find a spring or two. Continue reading “Mechanisms: The Spring”

Up, Up, Up: $2,000 More Seed Funding For Hackaday Prize Entries

Getting a project off the ground often means an up-front investment in parts. Hackaday is upping our efforts to smooth out that obstacle for those who want to Build Something That Matters. Seed funding for the 2018 Hackaday Prize is simple, enter your Open Hardware design, share it far and wide so that a lot of people will show their admiration with a ‘like’ on the project page. If you’re in the Prize competition, you get a dollar for each like to help jump-start the build phase. If you haven’t entered, you get to encourage and reward the projects that inspire you most.

This year has started off like a rocket. We’ve already passed the $4,000 seed funding limit and you still have until a week from Monday to take part in this seed funding. With so much excitement around this first challenge, Supplyframe, Hackaday’s parent company, is raising the pot to a total of $6,000. That means there’s more up for grabs. Enter your project now. If you’ve already done that, polish up your presentation and show it around to your friends and on social media. Entries with the most likes will get a dollar for every like up to $200 max, or until we undoubtedly reach the new limit once again. Don’t delay, it’s time to Build Something that Matters!

Seed funding is a big deal as we found out with Alex Williams, the 2018 Grand Prize Winner. He mentioned that the money really helped him with early build costs, and the interest from the community inspired him to keep up development throughout the contest. Help us give away this extra funding and inspire the next generation of finalists by commenting on and upvoting great entries!

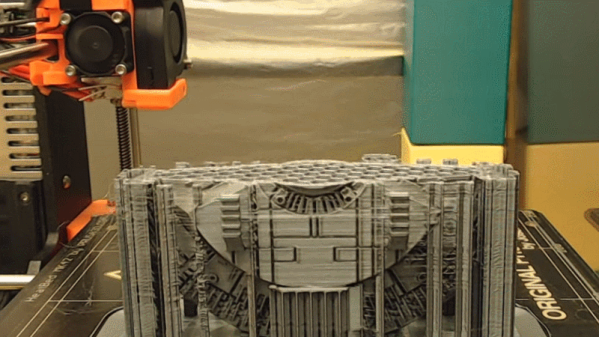
3D Printer Time Lapse Videos Ditch The Blur

Example output of Octolapse with the print head absent from the images.

Most time-lapse videos of 3D prints show a steadily growing print with a crazy blur of machine movement everywhere else. This is because an image is captured at a regular time interval, regardless of what’s physically going on with the machine. But what if images were captured at consistent machine positions instead? [FormerLurker]’s Octolapse plugin for OctoPrint came out of beta recently and does exactly that, and the results are striking. Because OctoPrint knows where a 3D printer’s print head is at all times, it’s possible for a plugin to use this information to create time-lapse videos where the print head position is consistent instead of a crazy blur, or even have the print head absent from the shot altogether.

[FormerLurker] had originally created stabilized time lapses by hand editing G-code, which had great results but was inefficient and time-consuming. This plugin is the result of his work at automating and enhancing the process, and is also his first serious open source programming project. We’ve covered upgrading a 3D printer with OctoPrint before, and the plugins functionality of OctoPrint means features can be added independently from the core system, which itself largely remains a one-woman effort by creator and maintainer [Gina Häußge].


Another Reason To Learn Morse Code: Kidnapping

Morse code — that series of dots and dashes — can be useful in the strangest situations. As a kid I remember an original Star Trek episode where an injured [Christopher Pike] could only blink a light once for yes and twice for no. Even as a kid, I remember thinking, “Too bad they didn’t think to teach him Morse code.” Of course odd uses of Morse aren’t just for TV and Movies. Perhaps the strangest real-life use was the case of the Colombian government hiding code in pop music to send messages to hostages.

In 2010, [Jose Espejo] was close to retirement from the Colombian army. But he was bothered by the fact that some of his comrades were hostages of FARC (the Revolutionary Armed Forces of Colombia; the anti-government guerrillas), some for as many as ten years. There was a massive effort to free hostages underway, and they wanted them to know both to boost morale and so they’d be ready to escape. But how do you send a message to people in captivity without alerting their captors?

Continue reading “Another Reason To Learn Morse Code: Kidnapping”

The Ultimate IPhone Upgrade

While Apple products have their upsides, the major downside with them is their closed environment. Most of the products are difficult to upgrade, to say the least, and this is especially true with the iPhone. While some Android devices still have removable storage and replaceable batteries, this has never been an option for any of Apple’s phones. But that doesn’t mean that upgrading the memory inside the phone is completely impossible.

[Scotty] from [Strange Parts] is no stranger to the iPhone, and had heard that there are some shops that can remove the storage chip in the iPhone and replace it with a larger one so he set out on a journey to try this himself. The first step was to program the new chip, since they must have software on them before they’re put in the phone. The chip programmer ironically doesn’t have support for Mac, so [Scotty] had to go to the store to buy a Windows computer first before he could get the chip programmer working right.

After that hurdle, [Scotty] found a bunch of old logic boards from iPhones to perfect his desoldering and resoldering skills. Since this isn’t through-hole technology a lot of practice was needed to desolder the chip from the logic board without damaging any of the other components, then re-ball the solder on the logic board, and then re-soldering the new larger storage chip to the logic board. After some hiccups and a lot of time practicing, [Scotty] finally had an iPhone that he upgraded from 16 GB to 128 GB.

[Scotty] knows his way around the iPhone and has some other videos about other modifications he’s made to his personal phone. His videos are very informative, in-depth, and professionally done so they’re worth a watch even if you don’t plan on trying this upgrade yourself. Not all upgrades to Apple products are difficult and expensive, though. There is one that costs only a dollar.

We sat down with him after his talk at the Hackaday Superconference last November, and we have to say that he made us think more than twice about tackling the tiny computer that lies hidden inside a cell phone. Check out his talk if you haven’t yet.

Continue reading “The Ultimate IPhone Upgrade”

A Hacker’s Epic Quest To Keep His Son Entertained

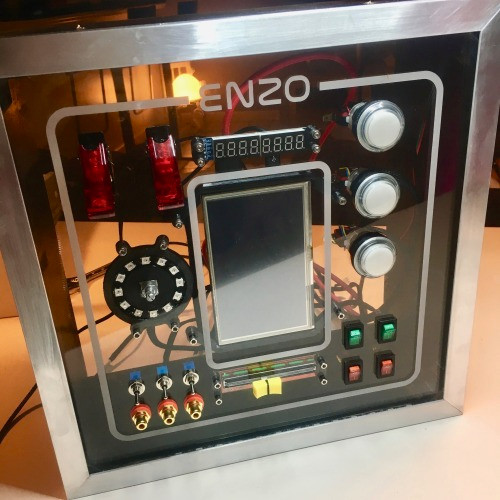
Little humans have a knack for throwing a wrench in the priorities of their parents. As anyone who’s ever had children will tell you, there’s nothing you wouldn’t do for them. If you ever needed evidence to this effect, just take a gander at the nearly year-long saga that chronicles the construction of an activity board [Michael Teeuw] built for his son, Enzo.

Whether you start at the beginning or skip to the end to see the final product, the documentation [Michael] has done for this project is really something to behold. From the early days of the project where he was still deciding on the overall look and feel, to the final programming of the Raspberry Pi powered user interface, every step of the process has been meticulously detailed and photographed.

The construction methods utilized in this project run the gamut from basic woodworking tools for the outside wooden frame, to a laser cutter to create the graphical overlay on the device’s clear acrylic face. [Michael] even went as far as having a custom PCB made to connect up all the LEDs, switches, and buttons to the Arduino Nano by way of an MCP23017 I2C I/O expander.

Even if you aren’t looking to build an elaborate child’s toy that would make some adults jealous, there’s a wealth of first-hand information about turning an idea into a final physical device. It isn’t always easy, and things don’t necessarily go as planned, but as [Michael] clearly demonstrates: the final product is absolutely worth putting the effort in.

Seeing how many hackers are building mock spacecraft control panels for their children, we can’t help but wonder if any of them will adopt us.

Continue reading “A Hacker’s Epic Quest To Keep His Son Entertained”