Manufacturing In China Hack Chat

Join us on Wednesday 10 July 2019 at noon Pacific for the Manufacturing in China Hack Chat with Jesse Vincent!

It started out where many great stories start: as a procrastination project. Open source developer Jesse Vincent decided that messing around with a new keyboard design was a better thing to spend time on than whatever he was supposed to be doing, and thus Keyboardio was born.

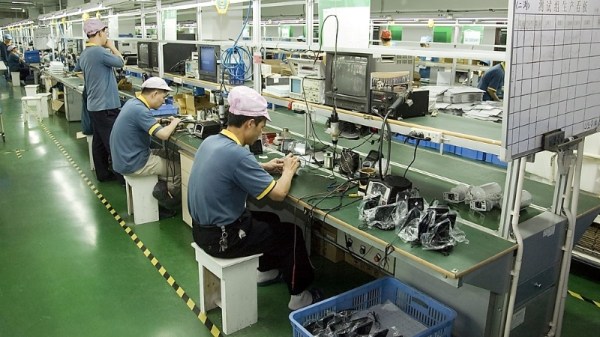
Their heirloom-grade keyboards of solid maple and with sculpted keycaps are unique to the eye and to the touch, but that’s only part of the Keyboardio story. Jesse has moved further down the road of turning a project into a product and a product into a company than most of us have, and he’s got some insights about what it takes. Particularly in climbing the learning curve of off-shore manufacturing, which will be the focus of this Hack Chat. Join us to learn all about the perils, pitfalls, and potential rewards of getting your Next Big Idea manufactured in China.

join-hack-chatOur Hack Chats are live community events in the Hackaday.io Hack Chat group messaging. This week we’ll be sitting down on Wednesday July 10 at 12:00 PM Pacific time. If time zones have got you down, we have a handy time zone converter.

Click that speech bubble to the right, and you’ll be taken directly to the Hack Chat group on Hackaday.io. You don’t have to wait until Wednesday; join whenever you want and you can see what the community is talking about.

BGA Hand Soldering Uses Tombstone Resistor Technique, Demands Surgical Precision

Most Hackaday readers will be a pretty dab hand with a soldering iron. We can assemble surface-mount boards, SOICs and TSSOPs are a doddle, 0402s we take in our stride, and we laugh in the face of 0201s. But a Twitter thread from [Greg Davill] will probably leave all but the most hardcore proponents of the art floundering, as he hand-wires a tiny FPGA in a BGA package to the back of a miniature dot-matrix LED display module.

Resistors soldered on-end, awaiting wires to connect to the BGA microcontroller

As far as we can see the module must once have had its own microcontroller which has been removed. We’d guess it was under an epoxy blob but can’t be sure, meanwhile its pads are left exposed. The Lattice LP1k49 fits neatly into the space, but a web of tiny wires are required to connect it to those pads. First, [Greg] populates the pads with a set of “tombstoned” tiny (we’re guessing 0R) resistors, then wires them to the pads with 30μm wire. He describes a moment of confusion as he attempts to tin a stray hair, which burns rather than accepting the solder.

The result is a working display with a new brain, which surprises even him. We’ve seen more than one BGA wiring over the years, but rarely anything at this scale.

It’s worth mentioning that [Greg] was behind the FLIR frame grabber that was a runner-up in last year’s Hackaday Prize. We admire the photos he’s able to get of all of his projects and aspire to reach this level with our own. Take this as inspiration and then check out the Hackaday contest for Beautiful Hardware images happening right now.

Thanks [Sophi] for the tip.

Five Years Of The Raspberry Pi Model B+ Form Factor, What Has It Taught Us?

With all the hoopla surrounding the recent launch of the new Raspberry Pi 4, it’s easy to overlook another event in the Pi calendar. July will see the fifth anniversary of the launch of the Raspberry Pi Model B+ that ushered in a revised form factor. It’s familiar to us now, but at the time it was a huge change to a 40-pin expansion connector, four mounting holes, no composite video socket, and more carefully arranged interface connectors.

As the Pi 4 with its dual mini-HDMI connectors and reversed Ethernet and USB positions marks the first significant deviation from the standard set by the B+ and its successors, it’s worth taking a look at the success of the form factor and its wider impact. Is it still something that the Raspberry Pi designers can take in a new direction, or like so many standards before it has it passed from its originator to the collective ownership of the community of manufacturers that support it?

Continue reading “Five Years Of The Raspberry Pi Model B+ Form Factor, What Has It Taught Us?”

Enclosure Needs Labels? Make The 3D Printer Do It

Tool changing on 3D printers is hot right now, and it’s going to be really interesting to see the ideas that reliable tool changing lets people try out. One such idea is having the 3D printer use a marker to label the enclosure and buttons it just 3D printed.

The 3D print shown is an enclosure for a Pocket Operator by Teenage Engineering. [Marc Schömann] made the enclosure on Blackbox, a tool-changing 3D printer that he designed. The video below shows a pen holder drawing the labels directly onto the printed object. Pocket Operators may look like calculators, but they are clever electronic musical devices capable of producing real music. (The best way to learn about what they are and what they can do is to watch a tutorial video or two.)

Continue reading “Enclosure Needs Labels? Make The 3D Printer Do It”

No Filament Needed In This Direct Extrusion 3D-Printer

Ground plastic bits go in one end, finished 3D-prints come out the other. That’s the idea behind [HomoFaciens]’ latest build: a direct-extrusion 3D-printer. And like all of his builds, it’s made from scraps and bits most of us would throw out.

Pellet agitator is part of the extruder. All of this travels along with the print head.

Take the extrusion screw. Like the homemade rotary encoders [HomoFaciens] is known for, it appears at first glance that there’s no way it could work. An early version was just copper wire wrapped around a threaded rod inside a Teflon tube; turned by a stepper motor, the screw did a decent job of forcing finely ground PLA from a hopper into the hot end, itself just a simple aluminum block with holes drilled into it. That worked, albeit only with basically powdered PLA. Later versions of the extruder used a plain galvanized woodscrew soldered to the end of a threaded rod, which worked with chunkier plastic bits. Paddles stir up the granules in the hopper for an even flow into the extruder, and the video below shows impressive results. We also picked up a few tips, like using engine gasket paper and exhaust sealant to insulate a hot end. And the slip coupling, intended to retract the extruder screw slightly to reduce stringing, seems brilliant but needs more work to make it practical.

It’s far from perfect, but given the inputs it’s pretty amazing, and there’s something attractive about reusing all those failed prints. It reminds us a bit of the trash printer we featured recently, which is another way to stick it to the filament man. Continue reading “No Filament Needed In This Direct Extrusion 3D-Printer”

A Guide To Shop Equipment Nobody Thinks About: Clean, Organized, And Efficient

When planning out a workspace at home, the job, or at a makerspace, we all tend to focus on the fun parts. Where the equipment will go, how you’ll power it, what kind of lights you’ll get, etc, etc. It’s easy to devote all your attention to these high-level concepts, which often means the little details end up getting addressed on the fly. If they get addressed at all.

But whether we want to admit it or not, an organized workspace tends to be more efficient. That’s why [Eric Weinhoffer] has put together a blog post that details all those mundane details that we tend to forget about. It’s not exactly exciting stuff, and contains precisely as much discussion about whiteboards as you probably expect. That said, it’s thorough and clearly comes from folks who’ve had more than a little experience with setting up an efficient shop.

So what’s the first thing most shops don’t have enough of? Labels. [Eric] says you should put labels on everything, parts bins, tools, machines, if it’s something you need to keep track of, then stick a label on it. This does mean you’ll likely have to buy a label maker, but hey, at least that means a new gadget to play with.

Of course, those self-stick labels don’t work on everything. That’s why [Eric] always has a few rolls of masking tape (such as the blue 3M tape you might be using on your 3D printer bed) and some quality markers on hand to make arbitrary labels. Apparently there’s even such a thing as dry erase tape, which lets you throw an impromptu writing surface anywhere you want.

[Eric] also suggests investing in some collapsible cardboard bins which can be broken down and stored flat when not in use. If you’ve got the kind of situation where you’ll always have more or less the same amount of stuff then plastic is probably your best bet, but in a more dynamic environment, being able to collapse the bins when they aren’t in use is a capability we never even realized we needed until now.

As you might imagine, the post also touches on the issues of keeping sufficient safety gear available. We’ve talked about this in the past, but it’s one of those things that really can’t be said too many times. Having a wall of meticulously labeled storage bins is great, but it’s going to be the last thing on your mind if you manage to get an eye full of superglue.

Vintage Philco Radio Looks Stock, Contains Modern Secret: A Raspberry Pi

Antique radio receivers retain a significant charm, and though they do not carry huge value today they were often extremely high quality items that would have represented a significant investment for their original owners. [CodeMakesItGo] acquired just such a radio, a Philco 37-11 made in 1937, and since it was it a bit of a state he set about giving it some updated electronics. Vintage radio purists, look away from the video below the break.

Stripping away the original electronics, he gave it a modern amplifier with Bluetooth capabilities, and a Raspberry Pi. Vintage radio enthusiasts will wince at his treatment of those classic parts, but what else he’s put into it makes up for the laying waste to a bit of ’30s high-tech.The original tuning dial was degraded so he’s given it a reproduction version, and behind that is an optical encoder and two optical sensors. This is used to simulate “tuning” the radio between different period music “stations” being played by the PI, and for an authentic feel he’s filled the gaps with static. The result is a functional and unusual device, which is probably better suited than the original to a 2019 in which AM radio is in decline.

If you think of a high-end set like this Philco as being the ’30s equivalent of perhaps an 8K TV set, you can imagine the impact of AM radio in those early days of broadcasting. We recently took a look at some of the directional antenna tricks that made so many AM stations sharing the band a possibility.

Continue reading “Vintage Philco Radio Looks Stock, Contains Modern Secret: A Raspberry Pi”