The Redesigned CNC Scroll Saw Rides Again

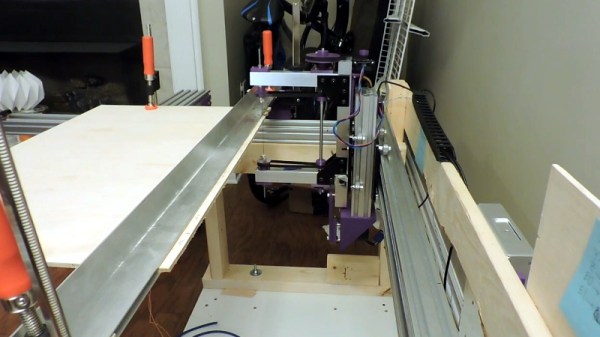
When [Andrew Consroe] tried to build a CNC scroll saw, he quickly learned how tricky of a design problem it is. With a blade that only cuts in one direction, you can’t simply move the tool in the X and Y dimensions like you can with a laser or router; either the work piece or the blade itself needs to continuously rotate towards the direction of the cut.

He’s recently shown off the third version of the machine, and while it’s still not exactly a practical tool, there’s no question it’s a brilliantly designed one, or that it works, slowly. Earlier attempts used a rotating table to spin the work piece, but [Andrew] found this to be an imperfect solution. Building a mechanism heavy duty enough to spin the material being cut while remaining accurate enough not to break the blade was a tall order, though he did get pretty close.
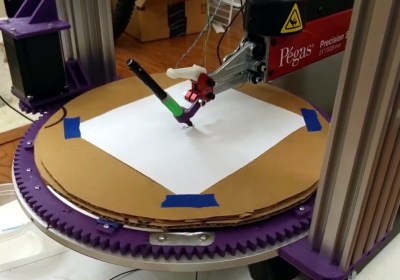
The earlier version used a rotating table.

This time around he’s decided to simply rotate the blade itself. This can be accomplished with a single stepper motor and some suitably sized pulleys, while maintaining an exceptionally high degree of accuracy. The whole blade assembly moves up and down on an aluminum extrusion rail with a motor and crank arrangement. By synchronizing the rotation of the blade with the vertical movement of the saw, the software can be sure that everything is where it needs to be before the cutting stroke actually happens.

Judging by the video after the break, the system works quite well. The complex rounded shapes he cuts out of the piece of plywood look essentially perfect, and it sounds like this new version of the machine isn’t breaking blades due to positional errors like the previous one did. Unfortunately, it’s also very slow. There’s so many moving parts and careful positioning required that even when the video is sped up 10x, the saw still appears to only be creeping its way through the  material.

On the back half of the video, [Andrew] details another approach to rotating the blade that would reduce the amount of moving mass in the saw. This would give the machine a considerable speed boost, and we’d love to see him implement it. By the way, before anyone says it: using a spiral blade is cheating.

Continue reading “The Redesigned CNC Scroll Saw Rides Again”

Proteus, The Shape-Shifting And Possibly Non-Cuttable Material

How cool would it be if there was a material that couldn’t be cut or drilled into? You could make the baddest bike lock, the toughest-toed work boots, or the most secure door. Really, the list of possibilities just goes on and on.

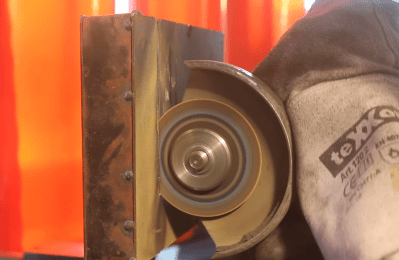
Proteus chews through an angle grinder disc in seconds.

Researchers from the UK and Germany claim that they’ve created such a magical material. It can destroy angle grinder discs, resist drill bits, and widen the streams of water jet cutters.

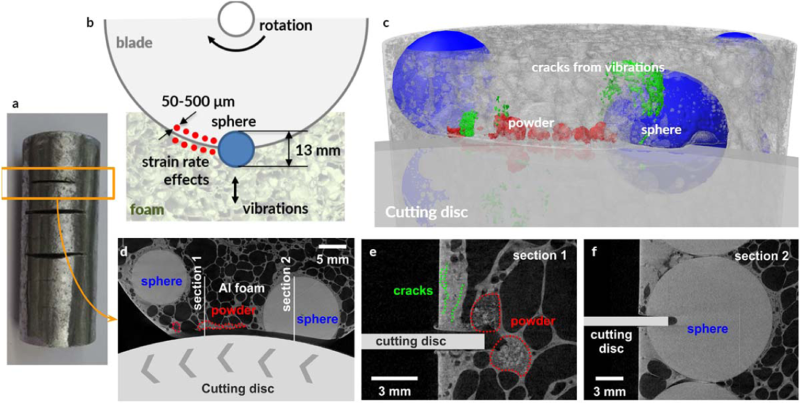
The material is made of aluminium foam that’s embedded with a bunch of small ceramic spheres. It works by inducing retaliatory vibrations into the cutting tools, which turns the tools’ force back on themselves and quickly dulls their edges.

The creators have named the material Proteus after the elusive and shape-shifting prophet of Greek mythology who would only share his visions of the future with those who could get their arms around him and keep him still. It sounds like this material could give Proteus a run for his money.

The ceramic spheres themselves aren’t indestructible, but they’re not supposed to be. Abrading the spheres only makes Proteus stronger. As the cutting tool contacts them, they’re crushed into dust that fills the voids in the aluminium foam, strengthening the material’s destructive vibratory effect. The physical inspiration for Proteus comes from protective hierarchical structures in nature, like the impact-resistant rind of grapefruit and the tendency of abalone shells to resist fracture under the impact of shark teeth.

How It’s Made

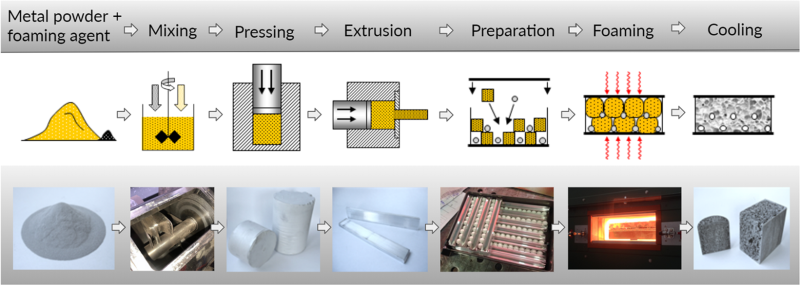
Proteus recipe in pictures.

At this point, Proteus is a proof of concept. Adjustments would likely have to be made before it can be produced at any type of scale. Even so, the recipe seems pretty straightforward. First, an aluminium alloy powder is mixed with a foaming agent. Then the mixture is cold compacted in a compressor and extruded in dense rods. The rods are cut down to size and then arranged along with the ceramic spheres in a layered grid, like a metallurgical lasagna.

The grid is spot-welded into a steel box and then put into a furnace for 15-20 minutes. Inside the furnace, the foaming agent releases hydrogen gas, which introduces voids into the aluminium foam and gives it a cellular structure.

Effects of cutting into a cylinder of Proteus with an angle grinder.

According to their paper, the researchers tried to penetrate the material with an angle grinder, a water jet cutter, and a drill. Of these, the drill has the best chance of getting through because the small point of contact can find gaps more easily, so it’s less likely to hit a ceramic sphere. The researchers also made cylindrical samples without steel cladding which they used to test the compressive strength and prove Proteus’ utility as a structural material for beams and columns. It didn’t fare well initially, but became less compressible as the foam matrix collapsed.

The creation process lends some leeway for customization, because the porosity of the aluminium foam can be varied by changing the bake time. As for the drill bit problem, tightening up security is as easy as adjusting the size and/or density of the ceramic spheres.

In the video after the break, you can watch a chunk of Proteus eat up an angle grinder disc in under a minute. Some may argue about the tool wielder’s technique, but we think there’s something to be said for any material that can destroy a cutting disc that fast. They don’t claim that Proteus is completely impenetrable, but it does look impressive. We wish they would have tried more cutting tools like a gas torch, or experimented with other destructive techniques, like plastic explosives, but we suppose that research budgets only go so far.

Continue reading “Proteus, The Shape-Shifting And Possibly Non-Cuttable Material”

Scratch Built Subnautica Sub Explores The Pool

In Subnautica, players explore an alien underwater landscape with the help of a number of futuristic tools and vehicles. [Robert Cook] found himself particularly enamored with the large submarine you unlock towards the later parts of the game, so much so that he decided to build his own real-life version.

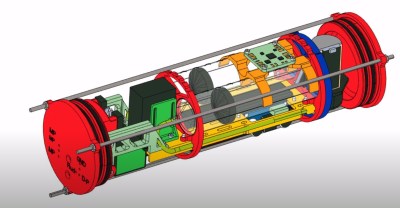
Even though the RC version of the Cyclops [Robert] has designed is only big enough to explore swimming pool sized alien landscapes, it’s by no means a simple build. In fact, the sub’s internal watertight compartment holds an impressive array of electronics and systems that are arguably overkill for what’s essentially a toy. Not that we’re complaining, of course.

Beyond the electronics and a few key components, almost every part of the RC Cyclops has been 3D printed. From the bulkheads that cap off the internal watertight acrylic tube to the hull itself, there’s a lot of plastic aboard this ship. Which might explain why it takes nearly two kilograms of lead weight to get the sub close to neutral buoyancy. From there, a clever ballast tank arrangement made from a syringe and peristaltic pump allow the vehicle to dive and surface on command.

[Robert] is in the process of releasing the STL files for all the submarine’s 3D printed components, and has done an excellent job of documenting the roughly four months he’s spent working on the project in a series of videos on his YouTube channel. The videos contain a wealth of fascinating tips and tricks regarding DIY submersible vehicles, such as selecting the proper radio frequencies for maximum penetration through water and counteracting the permeability of 3D printed parts with a generous coating of epoxy.

Modern RC hardware makes it easier than ever to cobble together a “submarine”, but there’s still something to be said for a project that takes the long way around and actually implements features like a functioning ballast system.

Continue reading “Scratch Built Subnautica Sub Explores The Pool”

Miles The Spider Robot

Who doesn’t love robotic spiders? Today’s biomimetic robot comes in the form of Miles, the quadruped spider robot from [_Robox].

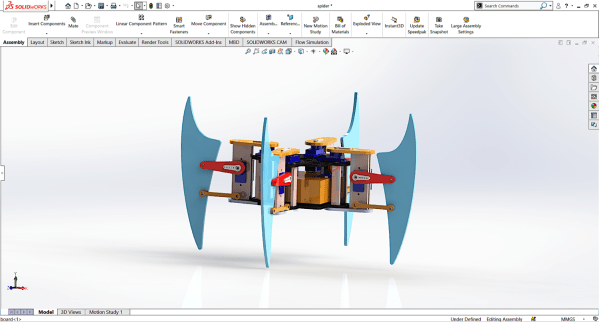
Miles uses twelve servos to control its motion, three on each of its legs, and also includes a standard HC-SR04 ultrasonic distance sensor for some obstacle avoidance capabilities. Twelve servos can use quite a bit of power, so [_Robox_] had to power Miles with six LM7805 ICs to get sufficient current. [_Robox_] laser cut acrylic sheets for Miles’s body but mentions that 3D printing would work as well.

Miles uses inverse kinematics to get around, which we’ve seen in a previous project and is a pretty popular technique for controlling robotic motion. The Instructable is a little light on the details, but the source code is something to take a look at. In addition to simply moving around [_Robox_] developed code to make Miles dance, wave, and take a bow. That’s sure to be a hit at your next virtual show-and-tell.

By now you’re saying “wait, spiders have eight legs”, and of course you’re right. But that’s an awful lot of servos. Anyway, if you’d rather 3D print your four-legged spider, we have a suggestion.

Mold-Making Masterclass In Minutes

Making silicone molds seems easy, but there are a lot of missteps to be made along the way that can mean the difference between a great, reusable mold, and one that’s a sad waste of silicone. If you’re helpless to know the difference, then check out [Eric Strebel]’s 9-minute masterclass teaser video on making a two-part mold for resin casting, which is also embedded below.

Even if you already know how to do this, there’s probably a good tip in here somewhere. One of them being that you should always pour your silicone from one place and let it coat the piece being copied. Otherwise, there might be lines on the mold. Another tip is for DIY mold release made from petroleum jelly thinned with naphtha.

Our favorite tip has to do with the way [Eric] makes this a reusable two-part mold, which is more akin to injection molding. To pour silicone for the second part and get it to separately nicely, [Eric] uses sprues made out of resin rods that were cast inside of drinking straw molds. These he chamfers against a belt sander to minimize the contact with the cast part, which makes them a snap to break off. [Eric] says this is just the beginning, and there are more videos to come that will break down the steps.

There’s more than one way to make a mold, especially for casting in metal. We’ve seen everything from 3D-printed molds to kinetic sand.

Continue reading “Mold-Making Masterclass In Minutes”

Can You Remembrandt Where This Is From?

A group of researchers have built an algorithm for finding hidden connections in artwork.

The team, comprised of computer scientists from MIT’s Computer Science and Artificial Intelligence Laboratory (CSAIL) and Microsoft, used paintings from the Metropolitan Museum of Art and Amsterdam’s Rijksmuseum to demonstrate these hidden connections, which link artwork that shares similar styles, such as Francisco de Zurbarán’s The Martyrdom of Saint Serapion (above left) and Jan Asselijn’s The Threatened Swan (above right). They were initially inspired by the “Rembrandt and Velazquez” exhibition in the Rijksmuseum, which demonstrated similarities between the artists’ work despite the former hailing from the Protestant Netherlands and the latter from Catholic Spain.

The algorithm, dubbed “MosAIc”, differs from probabilistic generative adversarial network (GAN)-based projects that generate artwork since it focuses on image retrieval instead. Rather than focusing solely on obvious factors such as color and style, the algorithm also tries to uncover meaning and theme. It does this by constructing a data structure called a conditional k-nearest neighbor (KNN) tree, which provides a tree-like structure where branches off a central image indicate similarity to the image. In order to query the data structure, these branches are followed until the closest match to an image in a dataset is found. In further iterations, it prunes unpromising branches in order to improve its time for new queries.

Some results from running the algorithm against museum collections were finding similarities between the Dutch Double Face Banyan and a Chinese ceramic figurine, traced to the flow of porcelain and iconography from the Chinese to the Dutch in the 16th to 20th centuries.

A surprising result of this study was discovering that the approach could also be applied to find problems with deep nerual networks, which are used for creating deepfakes. While GANs can often have blind spots in their models, struggling to recreate certain classes of photos, MosAIc was able to overcome these shortcomings and accurately reproduce realistic images.

While the team admits that their implementation isn’t the most optimized version of KNN, their main objective was to present a broad conditioning scheme that is simple but effective for applications. Their hope is to inspire related researchers to consider multi-disciplinary applications for algorithms.

A Wood Gas Powered Lawn Mower

When mowing the lawn, you generally have a choice of pushing power, electric or gasoline. Thanks to the nutty inventor [Colin Furze], you can now add wood gas to the list, as long as you don’t mind some inconvenience. He built a wood gas generator on top of a formerly gasoline powered lawn mower, so he can now run his lawn mower on wood chips.

Wood gas generators have been used with internal combustion engines for a very long time, reaching their peak in the later parts of WW2 when fuel shortages plagued Europe. When wood is burned at high temperature but with limited oxygen, it produces a combustible gas mix that can be fed into an internal combustion engine. [Colin]’s generator went through a number of iterations, and the problem-solving that goes into a project like this is always interesting to watch. We would not recommend running tests like these indoors, but we suppose no [Colin Furze] video would be complete without a bit of danger.

On his first version he had an extraction fan that was too close to the outlet of the burn chamber, so it melted very quickly. The combustion temperature was also not high enough, which required some changes to the chamber geometry. The main problem that plagued the project was filtering out the moisture and tar. [Colin] did eventually get the lawn mower to run on wood gas, but tar was still getting into the engine, which prevented it from starting the second time. The filtering system will need some refinement, which [Colin] will address in his next video, which he also hints will involve some sort of diabolical swing set. Continue reading “A Wood Gas Powered Lawn Mower”