True Networked KVM Without Breaking The Bank

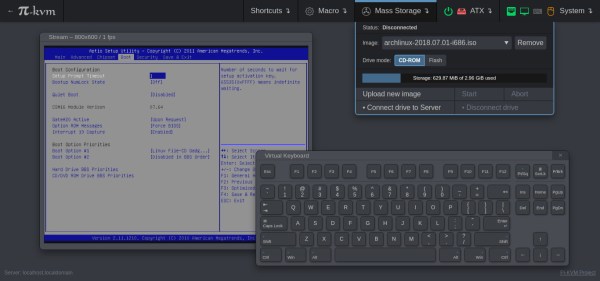
For administering many computers at once, an IP KVM is an invaluable piece of equipment that makes it possible to get the job done over the network without having to haul a keyboard, monitor, and mouse around to each computer. The only downside is that they can get pricey, unless of course you can roll one out based on the Raspberry Pi and the PiKVM image for little more than the cost of the Pi itself.

The video linked below shows how to set all of this up, which involves flashing the image and then setting up the necessary hardware. The build shows an option for using HDMI over USB, but another option using the CSI bus would allow for control over options like video resolution and color that a USB HDMI dongle doesn’t allow for. It also makes it possible to restart the computer and do things like configure BIOS or boot from removable media, which is something that would be impossible with a remote desktop solution like VNC.

The creator of PiKVM was mentioned in a previous post about the creation of the CSI bus capture card, and a Pi hat based on this build will be available soon which would include options for ATX controls as well. Right now, though, it’s possible to build all of this on your own without the hat, and is part of what makes the Pi-KVM impressive, as well as its very low cost.

Continue reading “True Networked KVM Without Breaking The Bank”
Full 8-Bit Computer On Breadboards

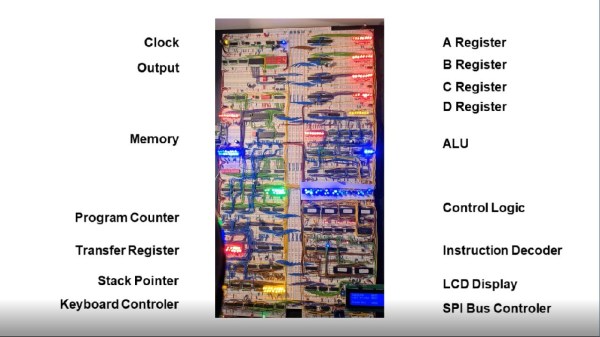
Getting into a big electronics project often involves the use of specialized tools, namely the use of some sort of soldering iron or other way to apply solder to often intricate, tiny, and heat-sensitive parts. While it’s best to learn to pick up this skill at some point, it’s not always necessary, even for big, complicated projects like [DerULF1]’s full 8-bit computer that he built entirely on breadboards.

For a fully featured 8-bit computer, this build goes deep into the details of how the computer works. The clock allows programs to be stepped through one cycle at a time, and even the memory can be individually accessed with a set of switches. There are plenty of other interesting features as well, such as using registers to access extra memory. It features an SPI port and PS/2 keyboard controller and also loads programs from an SD card.

The build was inspired by some of [Ben Eater]’s projects which famously focus on using logic gates and TTL chips to perform complex tasks, such as another breadboard computer which plays snake on a small display. It’s certainly a great way to learn about the inner function of computers, and better still that no soldering is required. But you may need a few extra breadboards.

Continue reading “Full 8-Bit Computer On Breadboards”

Beer Pong Difficulty Level: 10

Beer pong is a fun enough game for those of a certain age, but one thing that it lacks is a way of cranking up the difficulty setting independent of the amount of beer one has consumed. At least, that was the idea [Ty] had when he came up with this automated beer pong table which allows the players to increase the challenge of this game by sliding the cups around the top of the table.

The build uses a belt-driven platform under a clear cover with a set of magnets attached. Each of the cups on the table has a corresponding magnet, which allows them to slide fairly easily back and forth on the table. The contraption is controlled by an Arudino Nano with a small screen and dial that allows the players to select a difficulty level from 1 to 10. The difficulty levels increase the speed that the cups oscillate on the table, which certainly adds another layer of complexity to this already challenging game.

While we hope to eventually see a beer pong table that can automatically arrange the cups as the game is played, we do appreciate the effort to make an already difficult game even more difficult. Of course, if you have problems with the difficulty level you might want to pick up a PongMate CyberCannon Mark III to help with those clutch beer pong shots.

Continue reading “Beer Pong Difficulty Level: 10”

Micropython On Microcontrollers

There are plenty of small microcontrollers available for all kinds of tasks, each one with its unique set of features and capabilities. However, not all of us want to spend time mucking about in C or assembly to learn the intricacies of each different chip. If you prefer the higher planes of Python instead, it’s not impossible to import Python on even the smallest of microcontrollers thanks to MicroPython, which [Rob] shows us in this project based on the ESP32.

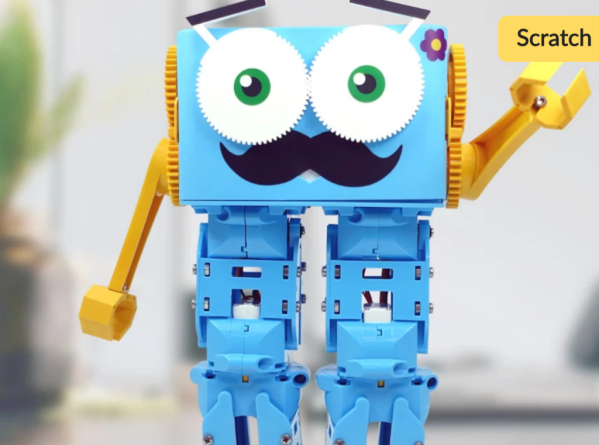
[Rob] has been working on a small robot called Marty which uses an ESP32 as its brain, so the small microcontroller is already tasked with WiFi/Bluetooth communications and driving the motors in the robot. Part of the problem of getting Python to run on a platform like this is that MicroPython is designed to be essentially the only thing running on the device at any one point, but since the ESP32 is more powerful than the minimum requirements for MicroPython he wanted to see if he could run more than just Python code. He eventually settled on a “bottum-up” approach to build a library for the platform, rather than implementing MicroPython directly as a firmware image for the ESP32.

The blog post is an interesting take on running Python code on a small platform, and goes into some details with the shortcomings of MicroPython itself which [Rob] ended up working around for this project. He’s also released the source code for his work on his GitHub page. Of course, for a different approach to running Python and C on the same small processor, there are some libraries that accomplish that as well.

Really Useful Robot

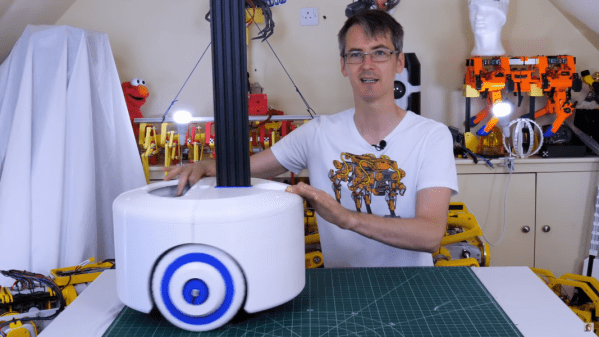
[James Bruton] is an impressive roboticist, building all kinds of robots from tracked, exploring robots to Boston Dynamics-esque legged robots. However, many of the robots are proof-of-concept builds that explore machine learning, computer vision, or unique movements and characteristics. This latest build make use of everything he’s learned from building those but strives to be useful on a day-to-day basis as well, and is part of the beginning of a series he is doing on building a Really Useful Robot. (Video, embedded below.)

While the robot isn’t quite finished yet, his first video in this series explores the idea behind the build and the construction of the base of the robot itself. He wants this robot to be able to navigate its environment but also carry out instructions such as retrieving a small object from a table. For that it needs a heavy base which is built from large 3D-printed panels with two brushless motors with encoders for driving the custom wheels, along with a suspension built from casters and a special hinge. Also included in the base is an Nvidia Jetson for running the robot, and also handling some heavy lifting tasks such as image recognition.

As of this writing, [James] has also released his second video in the series which goes into detail about the mapping and navigation functions of the robots, and we’re excited to see the finished product. Of course, if you want to see some of [James]’s other projects be sure to check out his tracked rover or his investigations into legged robots.

Continue reading “Really Useful Robot”

Escalating Privileges In Ubuntu 20.04 From User Account

Ubuntu 20.04 is an incredibly popular operating system, perhaps the most popular among the Linux distributions due to its ease-of-use. In general, it’s a fairly trustworthy operating system too, especially since its source code is open. However, an update with the 20.04 revision has led to security researcher [Kevin Backhouse] finding a surprisingly easy way to escalate privileges on this OS, which we would like to note is not great.

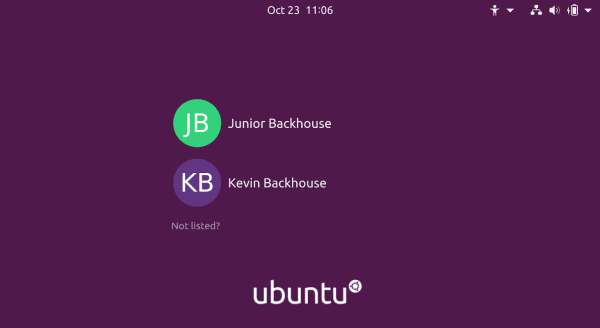
The exploit involves two bugs, one in accountservice daemon which handles user accounts on the computer, and another in the GNOME Display Manager which handles the login screen. Ubuntu 20.04 added some code to the daemon which looks at a specific file on the computer, and with a simple symlink, it can be tricked into reading a different file which locks the process into an infinite loop. The daemon also drops its privileges at one point in this process, a normal security precaution, but this allows the user to crash the daemon.

The second bug for this exploit involves how the GNOME Display Manager (gdm3) handles privileges. Normally it would not have administrator privileges, but if the accountservice daemon isn’t running it escalates itself to administrator, where any changes made have administrator privileges. This provides an attacker with an opportunity to create a new user account with administrator privileges.

Of course, this being Ubuntu, we can assume that this vulnerability will be immediately patched. It’s also a good time to point out that the reason that open-source software is inherently more secure is that when anyone can see the source code, anyone can find and report issues like this which allow the software maintainer (or even the user themselves) to make effective changes more quickly.

“Brain In A Vat” 6502

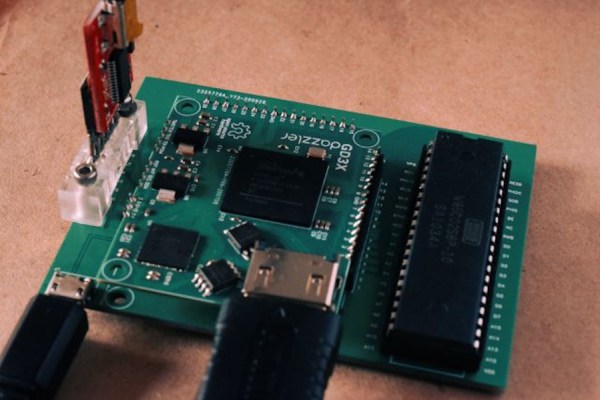
The 6502 was a revolutionary processor for its time. Offered at a small fraction of the cost of other processors available when it was released, it became adopted in such iconic computers at the Atari 2600, the Apple II, the NES, and the Commodore 64. For that reason it’s still extremely popular among retrocomputing enthusiasts who will often go to great lengths to restore these computers or build them from scratch. [jamesbowman] had an idea to build a 6502-based computer with the processor only, leaving the rest of the computer up to an FPGA.

He describes the system as a “brain in a vat” since a real 6502 is used as the “brain” and all other functions are passed off to the FPGA. In his build he uses an FPGA board with built-in graphics abilities, but the truly interesting part of this build is how the FPGA handles memory. If a particular value is placed on the data bus of the 6502, it loops forever through the entire memory and executes all of the instructions it finds. This saved a lot of time getting this system up and running, and he is able to demonstrate it by showing a waveform on the video output of the device.

Of course you can take an FPGA and emulate an entire computer based on a 6502, but using the actual silicon in a build like this really ensures that the user can learn and understand the hardware involved without some of the other tedium of doing things such as converting old video signals to HDMI for example. It’s a great take on retrocomputing that we expect to see more of in the future.