Killing Mosquitoes With Cardi B

Keeping a bird bath or a pond in your yard is a great way to add ambiance and style, but both of these things can be a haven for mosquitoes. Popular methods of getting rid of them are often with harsh pesticides, but [Shane] has brought us a more environmentally-friendly way of taking care of these disease-carrying insects by looping a Cardi B playlist underwater, killing the mosquito larvae.

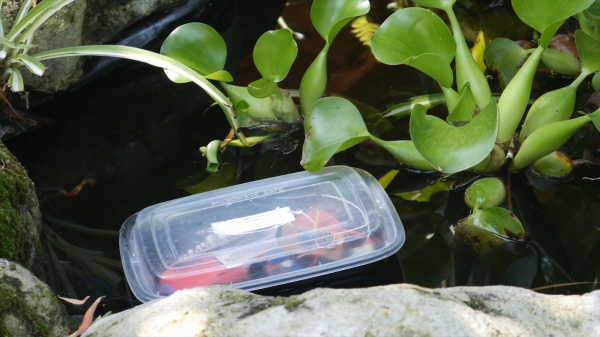
While the build does include some other favorites such as “Baby Shark” and would probably work with any song (or audio of sufficient volume) the build is still pretty interesting. It’s based on a 555 timer circuit which powered an ultrasonic sound gun, but was repurposed for this build. The ultrasonic modules were replaced with piezo modules which were waterproofed with silicone. The sound produced vibrates at a frequency which resonates with the mosquito larvae and is fatal to them. [Shane] put the build into a small boat which can be floated in any pond, bird bath, horse trough, or water feature.

The major caveat to this build is that it may be damaging to other beneficial animals such as fish or frogs, so he suggests limiting its use to uninhabited stagnant water. Either way, though, it’s a pretty unique way of taking care of a mosquito problem not unlike another build which takes care of these insects in water a slightly different way.

Continue reading “Killing Mosquitoes With Cardi B”

FM Radio From Scratch Using An Arduino

Building radio receivers from scratch is still a popular project since it can be done largely with off-the-shelf discrete components and a wire long enough for the bands that the radio will receive. That’s good enough for AM radio, anyway, but you’ll need to try this DIY FM receiver if you want to listen to something more culturally relevant.

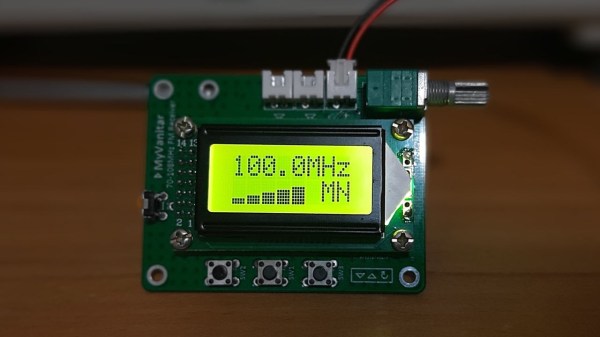
Receiving frequency-modulated radio waves is typically more difficult than their amplitude-modulated cousins because the circuitry necessary to demodulate an FM signal needs a frequency-to-voltage conversion that isn’t necessary with AM. For this build, [hesam.moshiri] uses a TEA5767 FM chip because of its ability to communicate over I2C. He also integrated a 3W amplifier into this build, and everything is controlled by an Arduino including a small LCD screen which displays the current tuned frequency. With the addition of a small 5V power supply, it’s a tidy and compact build as well.

While the FM receiver in this project wasn’t built from scratch like some AM receivers we’ve seen, it’s still an interesting build because of the small size, I2C capability, and also because all of the circuit schematics are available for all of the components in the build. For those reasons, it could be a great gateway project into more complex FM builds.

Continue reading “FM Radio From Scratch Using An Arduino”

Hardware Keymapper Routes Through Raspberry Pi

There are a lot of keyboards to choose from, and a quick trip through some of the forums will quickly show you how fanatical some people can be about very specific styles or switches. [Crdotson] doesn’t seem to be too far down the rabbit hole in that regard, but he does have a keyboard that he really likes despite one small quirk: it’s built for Mac, and some of the modifier keys aren’t laid out correctly for Windows. Since Windows has limited (and poor) options for software keymapping, he took an alternative route and built a keymapper in hardware instead.

The build uses a Raspberry Pi as a go-between from the keyboard to his computer. The Pi watches the USB bus using usbmon, which allows inspection of the packets and can see which keys have been pressed. It then passes those keypresses through to the computer. His only modification to the keyboard mapping is to swap the Alt and Super (Windows) keys for his keyboard of choice, although using this software would allow any other changes to be made as well. Latency is only on the order of a few microseconds, which is not noticeable for normal use cases.

While we have seen plenty of other builds around that can map keyboards in plenty of custom ways, if you don’t have the required hardware for a bespoke solution it’s much more likely that there’s a Raspberry Pi laying around that can do the job instead. There are a few issues with the build that [crdotson] is planning to tackle, though, such as unplugging the device while a key is being pressed, which perpetually sends that keystroke to the computer without stopping. But for now it’s a workable solution for his problem.

Recovering Metal From Waste

Refining precious metals is not as simple as polishing rocks that have been dug out of the ground. Often, complex chemical processes are needed to process the materials properly or in high quantities, but these processes leave behind considerable waste. Often, there are valuable metals left over in these wastes, and [NerdRage] has gathered his chemistry equipment to demonstrate how it’s possible to recover these metals.

The process involved looks to recover copper and nitric acid from copper nitrate, a common waste byproduct of processing metal. While a process called thermal decomposition exists to accomplish this, it’s not particularly efficient, so this alternative looks to improve the yields you could otherwise expect. The first step is to react the copper nitrate with sulfuric acid, which results in nitric acid and copper sulfate. From there, the copper sulfate is placed in an electrolysis cell using a platinum cathode and copper anodes to pass current through it. After the process is complete, all of the copper will have deposited itself on the copper electrodes.

The other interesting thing about this process, besides the amount of copper that is recoverable, is that the sulfuric acid and the nitric acid are recoverable, and able to be used again in other processes. The process is much more efficient than thermal decomposition and also doesn’t involve any toxic gasses either. Of course, if collecting valuable metals from waste is up your alley, you can also take a look at recovering some gold as well.

Thanks to [Keith] for the tip!

Continue reading “Recovering Metal From Waste”

Gathering Eclipse Data Via Ham Radio

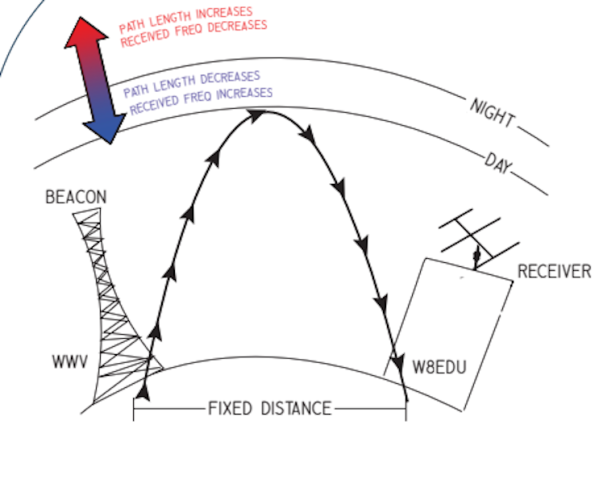
A solar eclipse is coming up in just a few weeks, and although with its path of totality near the southern tip of South America means that not many people will be able to see it first-hand, there is an opportunity to get involved with it even at an extreme distance. PhD candidate [Kristina] and the organization HamSCI are trying to learn a little bit more about the effects of an eclipse on radio communications, and all that is required to help is a receiver capable of listening in the 10 MHz range during the time of the eclipse.

It’s well-known that certain radio waves can propagate further depending on the time of day due to changes in many factors such as the state of the ionosphere and the amount of solar activity. What is not known is specifically how the paths can vary over the course of the day. During the eclipse the sun’s interference is minimized, and its impact can be more directly measured in a more controlled experiment. By tuning into particular time stations and recording data during the eclipse, it’s possible to see how exactly the eclipse impacts propagation of these signals. [Kristina] hopes to take all of the data gathered during the event to observe the doppler effect that is expected to occur.

The project requires a large amount of volunteers to listen in to the time stations during the eclipse (even if it is not visible to them) and there are only a few more days before this eclipse happens. If you have the required hardware, which is essentially just a receiver capable of receiving upper-sideband signals in 10 MHz range, it may be worthwhile to give this a shot. If not, there may be some time to cobble together an SDR that can listen in (even an RTL-SDR set up for 10 MHz will work) provided you can use it to record the required samples. It’s definitely a time that ham radio could embrace the hacker community.

He’s The Operator Of His Pocket Arduino

The band Kraftwerk hit the music scene with its unique electronic sound in the 70s in Germany, opening the door for the electronic music revolution of the following decade. If you’re not familiar with the band, they often had songs with a technology theme as well, and thanks to modern microcontroller technology it’s possible to replicate the Kraftwerk sound with microcontrollers as [Steven] aka [Marquis de Geek] demonstrates in his melodic build.

While the music is played on a Stylophone and a Korg synthesizer, it is fed through five separate Arduinos, four of which have various synths and looping samplers installed on them (and presumably represent each of the four members of Kraftwerk). Samplers like this allow pieces of music to be repeated continuously once recorded, which means that [Steven] can play entire songs on his own. The fifth Arduino functions as a controller, handling MIDI and pattern sequencing over I2C, and everything is finally channeled through a homemade mixer.

[Marquis] also dressed in Kraftwerk-appropriate attire for the video demonstration below, which really sells the tribute to the famous and groundbreaking band. While it’s a great build in its own right and is a great recreation of the Kraftwerk sound, we can think of one more way to really put this project over the top — a Kraftwerk-inspired LED tie.

Continue reading “He’s The Operator Of His Pocket Arduino”

Electric BMX With Friction Drive

Electric bikes have increased in popularity dramatically over the past few years, and while you can easily buy one from a reputable bicycle manufacturer, most of us around here might be inclined to at least buy a kit and strap it to a bike we already have. There aren’t kits available for every bike geometry, though, so if you want an electric BMX bike you might want to try out something custom like [Shea Nyquist] did with his latest build. (Video, embedded below.)

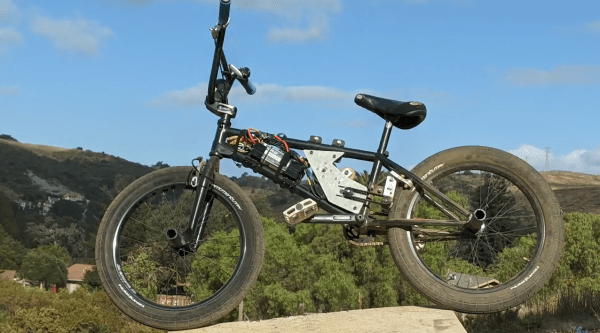
BMX frames have a smaller front triangle than most bikes, so his build needed to be extremely compact. To that end, it uses two small-sized motors connected together with a belt, which together power a friction drive which clamps against the rear tire to spin it directly. This keeps the weight distribution of the bike more balanced as well when compared to a hub drive, where the motor is installed in the rear wheel. It also uses a more compact lithium polymer battery pack instead of the typical 18650 lithium ion packs most e-bikes use, and although it only has a range of around three miles it’s more than enough charge to propel it around a skate park.

The build boasts impressive numbers too, at 2.5 kW peak power per motor. This puts it in electric motorcycle territory, and it’s indeed fast despite its small stature. For a true high speed e-bike experience, though, you’ll need a slightly larger frame and motor even if it means tossing safety out of the window. Continue reading “Electric BMX With Friction Drive”