DIY Pressure Regulator For Exciting SCUBA

To get a SCUBA certification, a prospective diver will need to find a dive shop and take a class. Afterwards, some expensive rental equipment is in order. That is, unless you’re [biketool] who has found a way to build some of his own equipment. If you’re looking for a little bit of excitement on your next dive, this second stage regulator build might be just the thing for you.

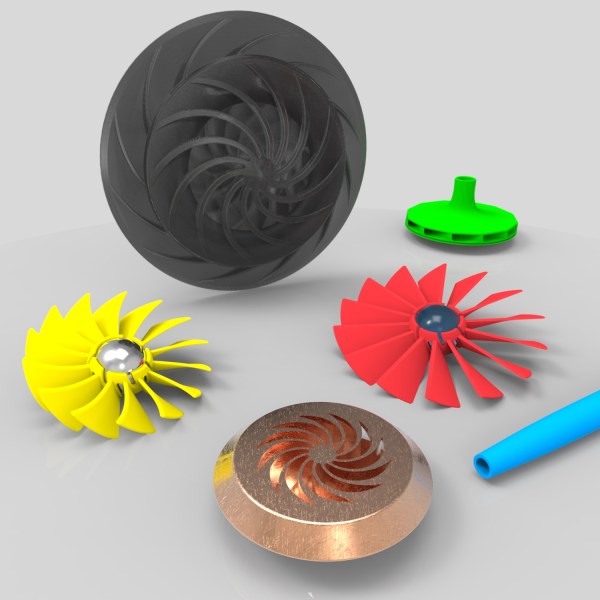
It’s worth noting that [biketool] makes it explicitly clear that this shouldn’t be used on any living being just yet. The current test, though, was at 120 PSI using some soda bottles and some scrap bike parts. The OpenSCAD-designed regulator seems to work decently well for something that’s been homemade using some 3D-printed parts and other things available to most tinkerers/makers/hackers. [biketool] also goes over some issues with the regulator leaking and discusses porosity issues inherent in FDM printing but overall this project looks promising. Whether or not you want a pressurized 3D printed vessel that close to your face is rife for debate.

We don’t see a lot of SCUBA-related hacks around here. After all, it’s one thing to power an air horn with SCUBA tanks, but it’s a completely different thing to build something that keeps you from drowning.

Thanks to [dave] for the tip!

Retrofitted Retro Radio

In a world full of products that are only used for a brief time and then discarded, it gives a lot of us solace to know that there was a time when furniture was made out of solid wood and not particle board, or when coffee makers were made out of metal and not plastic. It’s hard to say exactly what precipitated the change to our one-time-use culture, but in the meantime there are projects that serve to re-purpose those old, durable products from another time so that they can stay relevant in today’s ever-changing world. [Jose]’s new old radio is a great example of this style of hack.

[Jose] had a 1970s-era single-speaker radio that he found in a thrift store. The first thought that he had to get the aesthetically pleasing radio working again was to install a Bluetooth receiver into the radio’s amplifier. This proved to be too time-consuming of a task, and [Jose] decided to drive the Bluetooth module off of the power circuit for the light bulb. He built a 6V AC to 4.2V DC circuit, swapped over the speaker cable, and started listening to his tunes. The modifications he made aren’t destructive, either. If he wants, he will be able to reconnect the original (and still functional) circuitry back to the speaker and pretend he’s back in 1970.

While this isn’t the most intricate hack we’ve ever featured, it’s always refreshing to see someone get use out of an old piece of technology rather than send it off to the landfill with all of our Pentium IIs or last year’s IKEA shelves that have already fallen apart. And even if the 70s aren’t your era of choice, perhaps something newer will inspire you to bust a move.

Two Pins For The Price Of One

One of the most common problems in the world of microcontrollers is running out of resources. Sometimes it’s memory, where the code must be pared down to fit into the flash on the microcontroller. Other times, as [Fabien] found out when he ran out of pins, the limitations are entirely physical. Not one to give up, he managed to solve the problem by using one pin for two tasks. (Google Translate from French)
During a recent project, [Fabien] realized he had forgotten to add a piezo buzzer to his project. All of the other pins were in use, though, so his goal was to use one of the input pins to handle button presses but to occasionally switch to output mode when the piezo buzzer was needed. After all, the button is only used at certain times, and the microcontroller pin sits unused otherwise. After a few trials, he has a working solution that manages to neither burn out itself nor the components in the circuit, and none of the components interfere with the other’s normal operation.
While it isn’t the most technically advanced thing we’ve ever seen here, it is a great example of using the tools at your disposal to elegantly solve a problem. More than that, though, it’s a thorough look into the details of pull-up and pull-down resistors, how microcontrollers see voltage as logic levels, and how other pieces of hardware interact with microcontrollers of all different types. This is definitely worth a read, especially if you are a beginner in this world.

Home Pool Added To Home Automation

Anyone who owns their own pool knows it’s not as simple as filling it up with water and jumping in whenever you want. There’s pool covers to deal with, regular cleaning with the pool vacuum and skimmers, and of course, all of the chemicals that have to be added to keep the water safe. While there are automatic vacuums, there aren’t a whole lot of options for automating the pool chemicals. [Clément] decided to tackle this problem, eliminating one more task from the maintenance of his home. (Google Translate from French.)

The problem isn’t as simple as adding a set amount of chemicals at a predetermined time. The amount of chemicals that a pool owner has to add are dependent on the properties of the water, and the amount of time that’s elapsed since the previous chemical treatment, and the number of people who have been using the water, and whether or not the pool cover is in use. To manage all of this, [Clément] used an ORP/Redox probe and a pH probe, and installed both in the filtration system. The two probes are wired to an Arduino with an ethernet shield. The Arduino controls electrically actuated chemical delivery systems that apply the required amount of chemicals to the pool, keeping it at a nice, healthy balance.
Continue reading “Home Pool Added To Home Automation”

Animated Progress Bar Shows LCD New Tricks

A small LCD screen can be extremely helpful with small microcontroller projects. Not everything needs to communicate to a fancy server using an ESP8266. However, if the simplicity of the character displays irks you, it’s possible to spice them up a little bit with custom characters and create animations, like [Fabien] did with his animated Arduino progress bar. (Google Translate from French)
The project started out simply enough: all [Fabien] needed was a progress bar. It’s easy enough to fill in the “characters” on the 2×16 character LCD screen one-by-one to indicate progress, and the first version of this did exactly that. The second version got a little bit fancier by adding a border around the progress bar and doubling its resolution, but the third version is where knowing the inner machinations of the microcontroller really paid off. Using a custom charset reuse optimization, [Fabien] was able to use 19 custom characters at a time when the display will normally only allow for eight. This was accomplished by placing the custom characters in memory in the correct order, to essentially trick the microcontroller into displaying them.
These types of microcontroller hacks get deep into the inner workings of the microcontroller and help expose some tricks that we can all use to understand their operation on a deeper level. Whether you’re using PWM to get a microcontroller to operate a TV, or creating the ATtiny-est MIDI synth, these tricks are crucial to getting exactly what you want out of a small, inexpensive microcontroller.

3D Printer Enclosure Is Pleasant On The Eyes And Ears

There’s a lot going on in the 3D printing world. Huge printing beds, unique materials like concrete, and more accessible, inexpensive printers for us regular folk. The only thing that’s often overlooked with these smaller printers is the ruckus that they can make. The sounds of all those motors can get tiresome after a while, which was likely the inspiration for [Fabien]’s home 3D printer workstation. (Google Translate from French)
After acquiring a new printer, [Fabien] needed a place to put it and created his own piece of furniture for it. The stand is made out of spruce and is lined with insulation. He uses a combination of cork, foam, and recycled rubber tile to help with heat, sound, and vibration respectively. Don’t worry, though, he did install a ventilation system for the fumes! After the printer housing is squared away, he place a webcam inside so that the user can monitor the print without disturbing it. Everything, including the current print, is managed with a computer on the top of the cabinet.
Having a good workspace is just as important as having a quality tool, and [Fabien] has certainly accomplished that for his new 3D printer. There have been a lot of good workspace builds over the years, too, including electronics labs in a portable box and this masterpiece workbench. If you’ve ever experienced the frustration of working in an area that wasn’t designed for the task at hand, you’ll easily be able to appreciate any of these custom solutions.

FPGA Drives Old Laptop Screen

Every year, new models of laptops arrive on the shelves. This means that old laptops usually end up in landfills, which isn’t exactly ideal. If you don’t want to waste an old or obsolete laptop, though, there’s a way to reuse at least the screen out of one. Simply grab an FPGA off the shelf and get to work.

[Martin] shows us all how to perform this feat on our own, and goes into great detail about how all of the electronics involved work. Once everything was disassembled and the FPGA was wired up, it took him a substantial amount of time just to turn the display on. From there it was all downhill: [Martin] can now get any pattern to show up on the screen, within reason. The only limit to his display now seems to be the lack of external RAM. He currently uses the setup to drive an impressive-looking clock.

This is a big step from days passed where it was next to impossible to repurpose a laptop screen. Eventually someone discovered a way to drive these displays, and now there are cheap electronics from China that can usually get a screen like this running. It’s impressive to see it done from scratch, though, and the amount of detail in the videos are a great way to understand how everything is working.

Continue reading “FPGA Drives Old Laptop Screen”