Take Pottery For A Spin With A Pocket-Sized Wheel

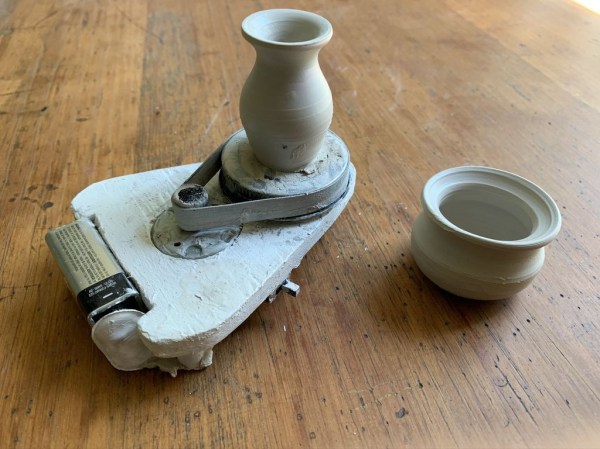
If 2020 can be remembered in any positive light, it would be that this has been the year of the hobby tryouts. Why not pottery? Sure, throwing pots won’t fill your belly like homemade bread. But we would bet you can see the value in having a bunch of expendable objects that are easily (and quite satisfyingly) smashed to smithereens. The best part is that between the workbench, junk box, and recycle bin, you can probably build [Jadem52]’s pottery wheel for ants with stuff you already have. Bonus!

Pottery wheels aren’t that complicated. They’re honestly kind of expensive for what they are — a motor and a belt driving a rotating platter. It’s like a record player, but less fussy. Where they really get you on expense is the kiln to heat-treat those pots into sturdy vessels. But you could always use air-dry clay, especially if you’re making these things just to smash them whenever you need to let off some steam.

So anyway, you don’t need much more than a motor, a jar lid for a wheel to throw on, and a bearing to make it spin smoothly. Store-bought pottery wheels have a foot feed to control the motor speed, but this pocket version is either spinning on nine volts or it isn’t. The great thing about a project like this is that once you have the general principle down and use the thing, you can iterate and upgrade to your heart’s content. Take it for a little spin after the break.

If you want to hack together a more conventionally-sized wheel, an old ceiling fan motor should be more than sufficient.

Continue reading “Take Pottery For A Spin With A Pocket-Sized Wheel”

An Easier Way To Roll Your Own LED Ball

Yes, circuit sculptures are amazing. But the patience and skill required puts most of the designs we’ve seen fairly far out of reach of the average beginner. We totally understand — not everyone finds fun in fiddly, structural soldering.

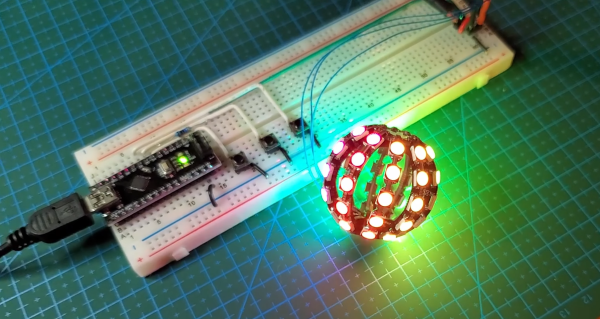
[Hari Wiguna] was captivated by the LED ball that [Jiří Praus] made last Christmas and figured there had to be less painful ways to cover a sphere in blinkenlights than printing a negative to use as a soldering jig. Turns out there is at least one way — just design the structure to use PCBs in place of brass rod, and fit everything together like a 3D puzzle made of FR4.

This SMD LED ball is almost ready for prime time. [Hari] wants this to be accessible for everyone and completely parametric, so he’s still working out the kinks. Check out the current form after the break as [Hari] rolls the ball through the various display modes using an Arduino and talks about the failures along the way, like having to file out the LED slots because they were designed too tightly the first time. [Hari] is also working on the friction fit of the pieces so the ball is easier to assemble, especially at the beginning.

3D prints as circuit sculpture soldering jigs are great tools, don’t get us wrong. How else are you gonna solder brass rod together on a curve?

Continue reading “An Easier Way To Roll Your Own LED Ball”

Bubbles, The People-Pleasing Pandemic Panda

This year, [Thomas]’ neighborhood has gone from a quiet burg to a bustling lane full of families and children who go out walking for exercise and a change of scenery. Early on, a game emerged to distract children from the pandemic by turning these walks into bear hunts — that is, looking for stuffed bears sitting in the windows of houses and keeping count of them.

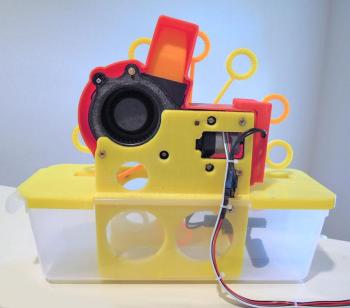
With no stuffed bears in the house, he decided to join in the fun by pasting up a 2D panda bear in the window that’s cute enough to calm anyone’s nerves. That was fun for a while, but then he turned it up to eleven by making an interactive 3D version named Bubbles the Bear that blows bubbles and speaks in a friendly voice.

Bubbles sits in a second-story window and waits for passers-by to press one of the buttons mounted on the utility pole below. Both buttons are wired to a 433MHz remote that sends a signal to an ESP32 in Bubbles’ habitat that says it’s time to perform.

We particularly like the bubble maker that [Thomas] designed, which aims a blower fan with an air concentrator at a carousel of 3D printed bubble wands. Both the fan and the carousel can be controlled with a custom web app, and he gets an email every time Bubbles has a visitor that tells him how much bubble liquid is left. Check out the fun-size demo after the break.

Bubbles are fun, especially if you can make them in extremely large quantities. Bubbles can also do work — remember this next time you need a random number generator.

Continue reading “Bubbles, The People-Pleasing Pandemic Panda”

Build An Everlasting Continuity Tester

When you need a continuity tester at the bench, what do you reach for? Probably your multimeter, right? It may surprise you to know that the continuity tester in the meter isn’t all that sensitive, even if it’s the yellow expensive kind. [Leo]’s will beep even if there is 50Ω of resistance in the line.

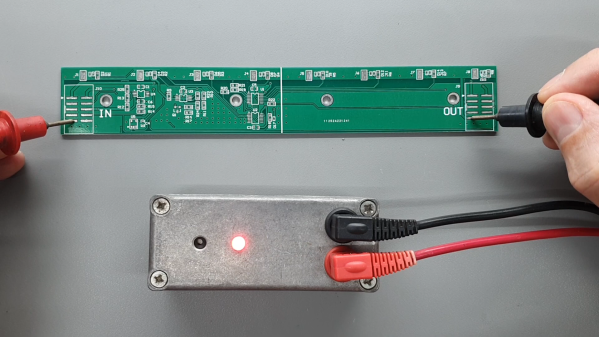
Disgusted by modern commercial testers, [Leo] set out to make the ideal continuity tester in the spirit of old school tools that do one thing and do it really well. It had to be simple to use, always ready to go, and capable of measuring continuity at 5Ω or less resistance (video, embedded below).

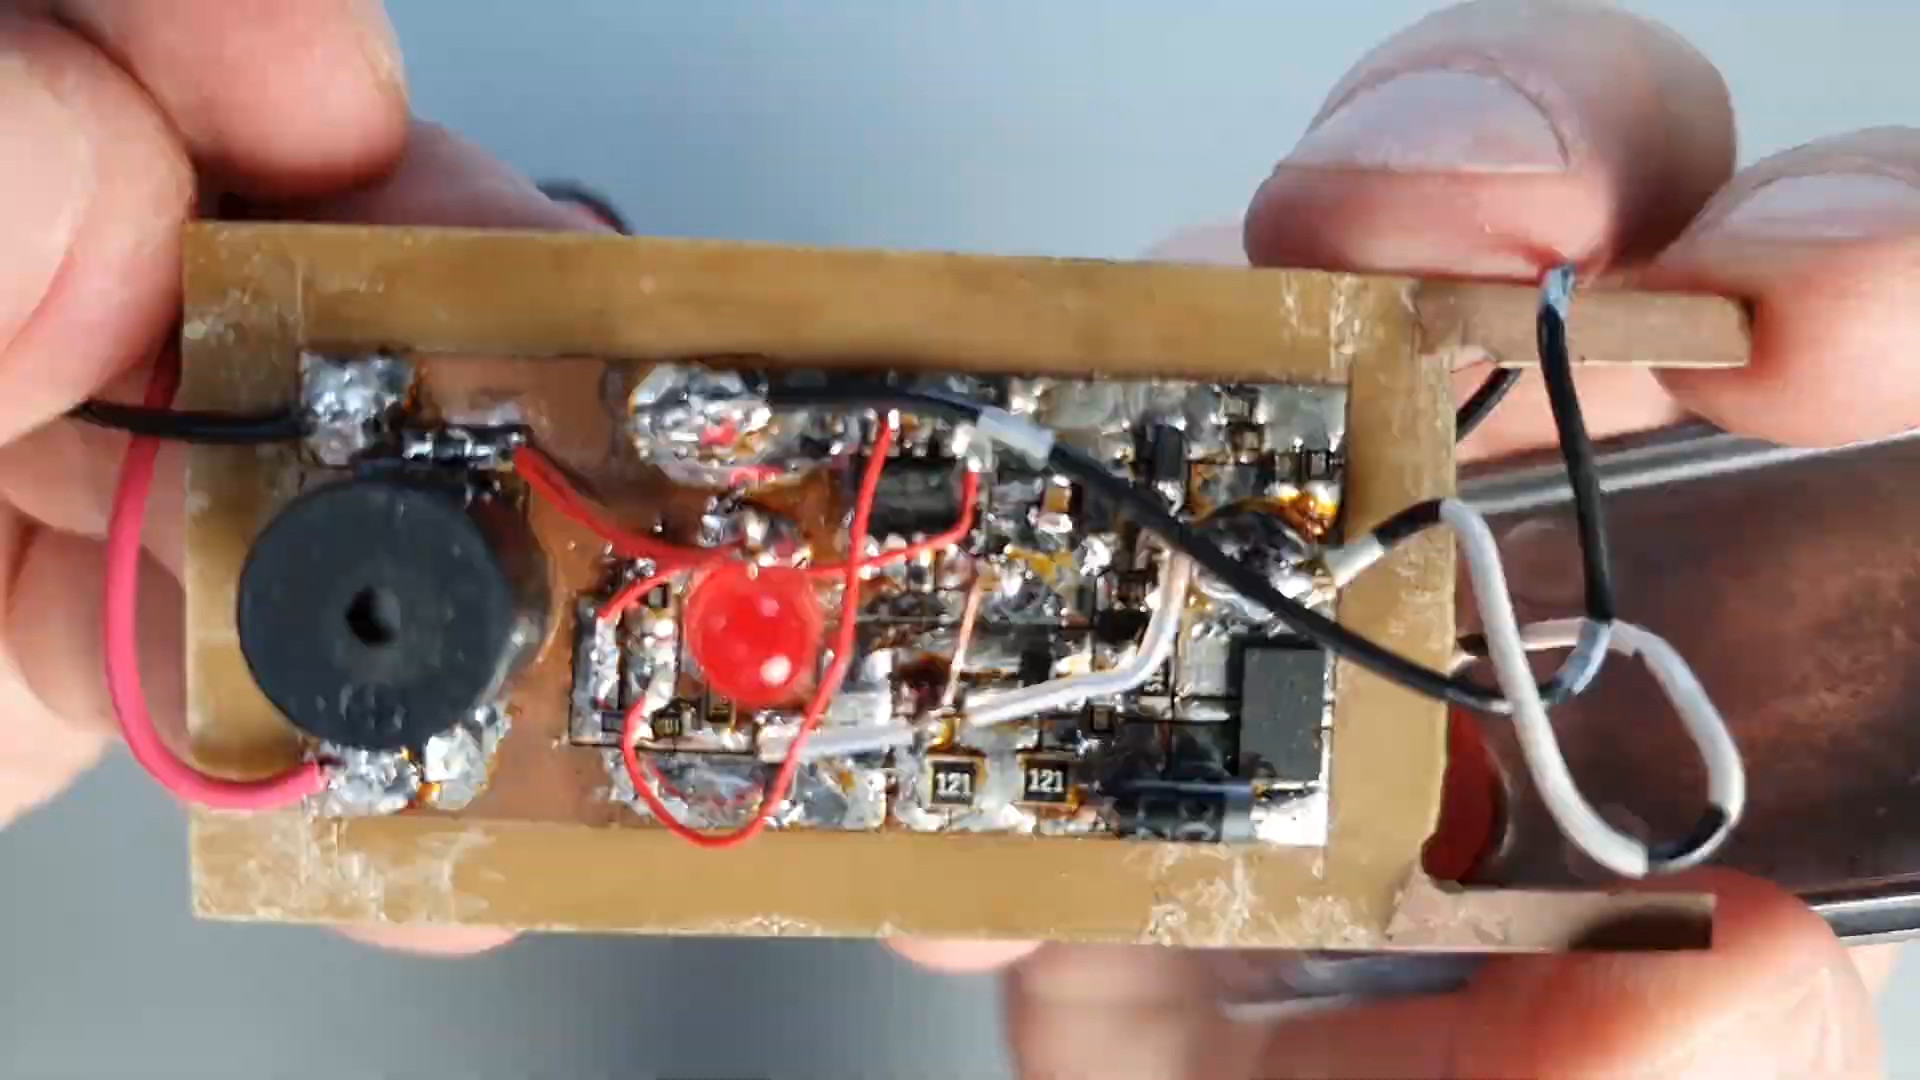
There’s no power switch or even labels, because it doesn’t need any. Just put the probes where you want ’em, and it either beeps and lights the LED or it doesn’t. It looks simple, but inside that blast-resistant enclosure are lots of cool features that certainly make it seem like the ideal tester to us.

Our favorite has to be the transient blocking unit that works like a little circuit breaker. They’re used to protect circuits from lighting and electrostatic discharge by way of depletion-mode MOSFETs and switches to protected mode in under a microsecond. Watch [Leo] build this workbench necessity and then abuse test it with mains power after the break.

Making your own tools, however simple or complex is a great experience. If you want to up your speedy prototyping game, [Leo]’s got you covered there with a special scratching tool for hand-scribing copper PCBs. Continue reading “Build An Everlasting Continuity Tester”

It’s Time For Watch Clocks To Make A Comeback

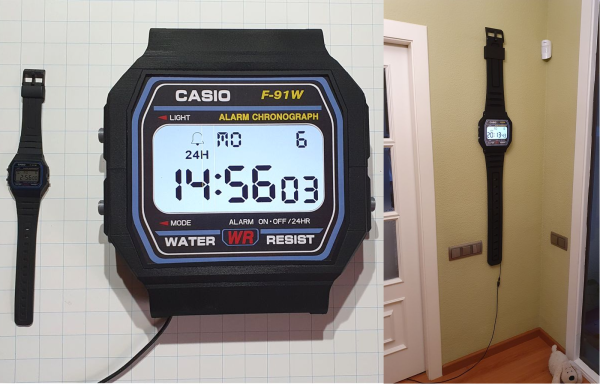
Along with all the colorful, geometric influence of Memphis design everywhere, giant wristwatch clocks were one of our favorite things about the 80s. We always wanted one, and frankly, we still do. Evidently, so did [Kothe]. But instead of some splashy Swatch-esque style, [Kothe] went the nerdy route by building a giant Casio F-91W to hang on the wall.

Not only does it look fantastic, it has the full functionality of the original from the alarm to the stopwatch to the backlit screen. Well, everything but the water resistance. The case is 3D-printed, as are the buckle and the buttons. [Kothe] might have printed the straps, but they were too big for the bed. Instead, they are made of laser-cut foam and engraved with all the details.

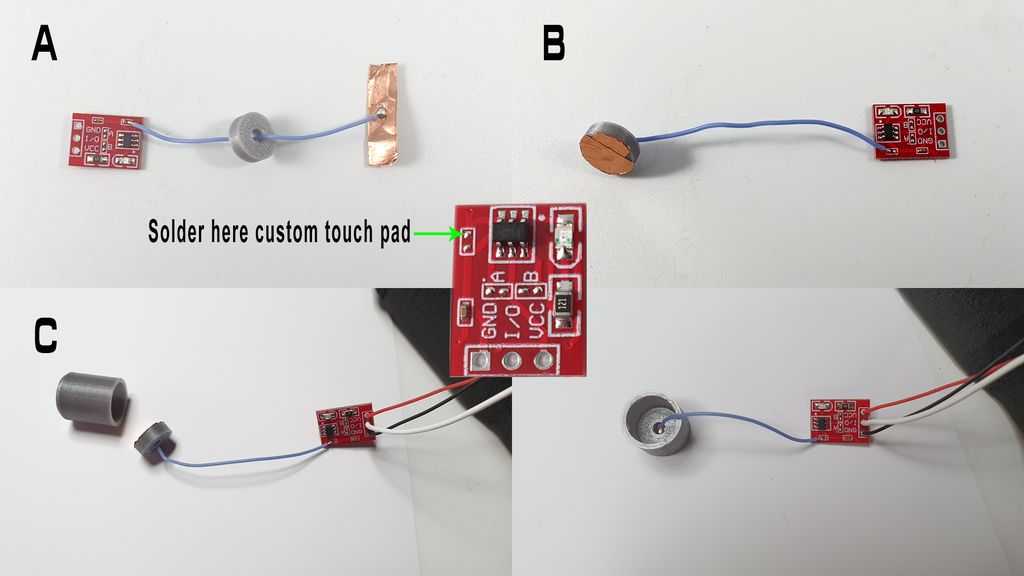
Inside there’s a 7″ touch display, a real-time clock module, and an Arduino Mega to make everything tick. To make each of the printed buttons work, [Kothe] cleverly extended a touch sensor module’s input pad with some copper tape. We think this could only be more awesome if it were modeled after one of Casio’s calculator watches, but that might be asking too much. Take a few seconds to watch the demo after the break.

Prefer your clocks less clock-like? Get a handle on the inner workings of this slot machine-based stunner.

Continue reading “It’s Time For Watch Clocks To Make A Comeback”

Robotic Cornhole Board Does The Electric Slide

There’s a reason why bowling lanes have bumpers and golf games have mulligans. Whether you’re learning a new game or sport, or have known for years how to play but still stink at it, everyone can use some help chasing that win. You’ve heard of the can’t-miss dart board and no-brick basketball goal. Well, here comes the robot-assisted game for the rest of us: cornhole.

The game itself deceptively simple-looking — just underhand throw a square wrist rest into a hole near the top of a slightly angled box. You even get a point for landing anywhere on the box! Three points if you make it in the cornhole. In practice, the game not that easy, though, especially if you’ve been drinking (and drinking is encouraged). But hey, it’s safer than horseshoes or lawn darts.

[Michael Rechtin] loves the game but isn’t all that great at it, so he built a robotic version that tracks the incoming bag and moves the hole to help catch it. A web cam mounted just behind the hole takes a ton of pictures and analyzes the frames for changes.

The web cam sends the bag positions it sees along with its predictions to an Arduino, which decides how it will move a pair of motors in response. Down in the cornhole there’s a pair of drawer sliders that act as the lid’s x/y gantry.

We love how low-tech this is compared to some of the other ways it could be done, even though it occasionally messes up. That’s okay — it makes the game more interesting that way. We think you should get 2 points if it lands halfway in the hole. Aim past the break to check out the build video.

Seems like there’s a robotic-assisted piece of sporting equipment for everything these days. If cornhole ain’t your thing, how’d you like to take a couple strokes off your golf game?

Continue reading “Robotic Cornhole Board Does The Electric Slide”

Open Source Stream Deck Does It Without Touch Screens

[Adam Welch] has built macro pads in the past out of pre-fab key matrices and handfuls of Cherry MX clones. But all the stickers and custom keycaps in the world wouldn’t make those macro pads as versatile as a stream deck — those visual shortcut panels with tiny touchscreens for each button that some streamers use to change A/V settings or switch between applications.

Let’s face it, stream decks are expensive. But 0.96″ OLED displays are not, and neither are SMD tactile buttons. Why not imitate a screen deck on the cheap by making it so the screens actuate buttons behind them? [Adam] based this baby on the clever design of [Kilian Gosewisch]’s FreeDeck, and they ended up working together to improve it with a dedicated PCB.

The brains of the operation is an Arduino Pro Micro, which addresses each screen individually via two 74HC4051 mux ICs. Thanks to an SD card module, there’s no need to flash the ‘duino every time you want to change a shortcut or its picture. Even if this deck doesn’t hold up forever, it won’t break the bank to build another one. Poke past the break for the build video, which has all the links you’d need to make your own, including a handy configurator.

There’s more than one way to do a visual macro pad. Here’s one that uses a single screen and splits it Brady Bunch style to match the matrix.

Continue reading “Open Source Stream Deck Does It Without Touch Screens”