The Jolly Cart-Pushing Robot

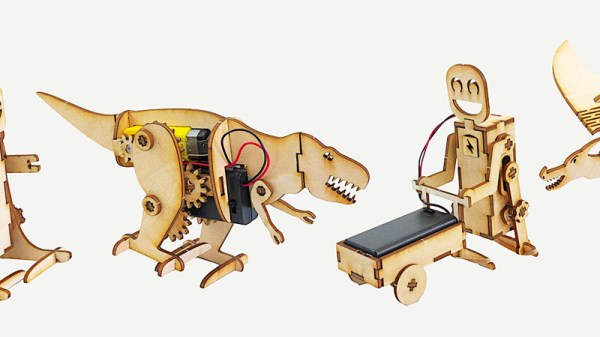
[Lance] loves making simple robots with his laser cutter. He finds great satisfaction from watching his robots operate using fairly simple mechanisms and designs a whole slew of them inspired by different animals, including a dinosaur and a dragon. His latest build is a jolly cart-pushing robot.

He cut each piece of his robot on his laser cutter, and in order to get the pieces to fit snugly together he made each tab a little bigger than its corresponding slot, ensuring the piece wouldn’t fall out. This also helps account for the loss in the material due to kerf, which is the bit of each piece of material that gets lost in the cut end of the laser cutter.

Making his robot walk was mostly as easy as attaching each leg to a simple DC motor such that the motor would rotate each leg in succession, pushing the robot along. From time to time, [Lance] also had to grease the robot’s moving parts using a bit of wax to help reduce friction. He even used a little rubber band to give the robot some traction.

[Lance] did a pretty good job detailing the build in his video. He also linked to a few other fun little robot designs that could entertain you as well. Pretty easy hack, but we thought you might find the results as satisfying as we did.

Robot companions may be here to stay. Time will tell.

Continue reading “The Jolly Cart-Pushing Robot”

Autonomous Multi-Task Performing Robot

[Ruchir] has been pretty into robotics for a while now and has always been amused by the ever-popular obstacle avoiding robot, but wanted something that could do more. So, like any good hacker, he decided to build something himself.

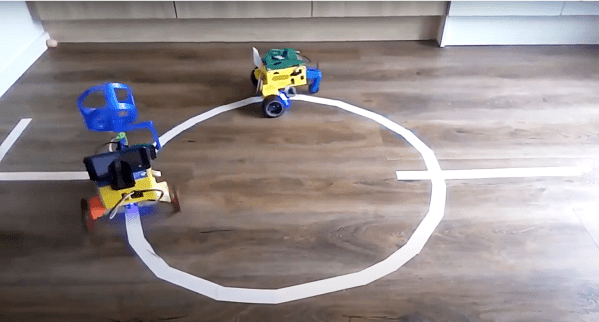
He wanted to incorporate all the popular beginner robot capabilities into a single invention. His robot can follow a line, detect an obstacle, and retrieve an object without switching between modes. It can even follow another robot, which is pretty neat.

His robot has a lot of the hardware you would expect. It uses a Raspberry Pi for all the heavy image processing, has optical sensors for line following and obstacle avoidance, and includes a speaker for audio feedback. What’s especially cool is the impressive interface, called the Regbot GUI, that [Ruchir] is using with his robot. According to the Wiki page, the Regbot GUI appears to accompany an educational robotics platform developed by Professor Jens Christian Andersen of the Technical University of Denmark for teaching controls to engineering students. [Ruchir] was able to adapt the GUI to his particular bot no problem.

Using the Regbot GUI, [Ruchir] can monitor all the robot’s sensor data in real-time (accelerometer, gyroscope, distance sensor, servo, encoder, etc.), dynamically adjust its calibration settings if needed, or even provide a universal killswitch in case the unthinkable happens. We’d say it’s definitely worth a look before you embark on your next robotics project.

Continue reading “Autonomous Multi-Task Performing Robot”

The Interactive Storytelling Radio

[8BitsAndAByte] are back and this time they’re using AI to create an interactive storyteller. With the help of a Raspberry Pi, they upcycled an old Cold War era radio they dug up and the results are pretty impressive.

The main controller board of the radio was intact, so it was easy to use all the preexisting hardware to control the speaker and to trigger a few of the Pi’s GPIO using the buttons and switches on the radio’s front panel. To add some artificial intelligence, they used Google’s AIY Voice Kit, allowing them to tap into Google’s seemingly endless artificial intelligence platform. This could be a “tables have turned moment,” but we’re probably being a bit too hopeful.

Anyway, they used a pretty interesting piece of software called Dialogflow that creates a somewhat natural conversational interaction akin to a chatbox. Dialogflow processes speech to text, as you would expect, but can also interpret contextual speech and provide contextual responses. Pretty neat…but maybe also a little creepy. Who knows? The jury is still out.

Anyway, if you’re like us and sometimes in need of a break from humans, then this project just might be for you.

Continue reading “The Interactive Storytelling Radio”

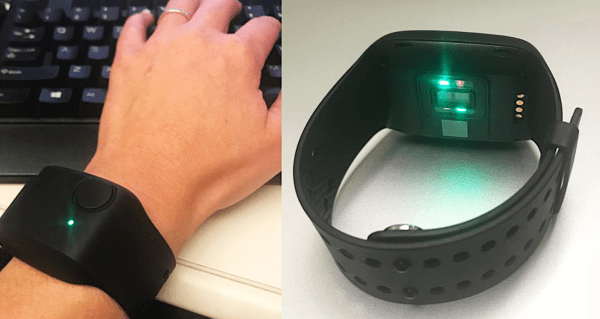
E4 Empatica device for measuring location, temperature, skin conductance, sleep, etc. on arm

Choosing The Optimal Sampling Rate For Your DIY Heart Rate Monitor

With wearables still trying to solidify themselves in the consumer health space, there are a number of factors to consider to improve the reliability of such devices in monitoring biometrics. One of the most critical such parameters is the sampling rate. By careful selection of this figure, developers can minimize errors in the measurement, preserve power, and reduce costs spent on data storage. For this reason, [Brinnae Bent] and [Dr. Jessilyn Dunn] wanted to determine the optimal sampling rate for wrist-worn optical heart rate monitors. We’ve shared their earlier paper on analyzing the accuracy of consumer health devices, so they’ve done a lot of work in this space.

The results of their paper probably don’t surprise anyone. The lower the sampling rate, the lower the accuracy of the measurement, and the higher the sampling rate the more accurate the measurement when compared to the gold standard electrocardiogram. They also found that metrics such as root mean square of successive differences (RMSSD), used for calculating heart rate variability, requires sampling rates greater than 64 Hz, the nominal sampling rate of the wearable they were investigating and of other similar devices. That might suggest why your wearable is a bit iffy when monitoring your sleeping habits. They even released the source code for their heart rate variability analysis, so there’s a nice afternoon read if you were looking for one.

What really stood out to us about their work is how they thoroughly backed up their claims with data. Something crowdfunding campaigns could really learn from.

The Google Chrome Dinosaur Game, In Real Life

[Ryan] wanted to hack the Google Chrome Dinosaur Game so he could control the dinosaur with his own movements. The game only requires two keyboard presses (up and down arrow keys), so controlling the game with the Arduino Keyboard library only requires a few simple function calls.

He uses the Arduino MKR board in his build, but notes any number of other boards would work as well. A force sensor detects his jumps and a stretch sensor detects him ducking. Both the stretch and force sensors are resistive transducers, so two simple voltage divider circuits (one for each sensor) are needed to convert changes in force to a voltage. You may need to adjust the sensor threshold to ensure the code responds to your movements, but [Ryan] makes that pretty easy to do in software as both thresholds are stored as global variables.

It’s a pretty simple hack, but could make for some good socially-distanced fun. What other hackable Google Chrome extensions do you like?

Continue reading “The Google Chrome Dinosaur Game, In Real Life”

Miles The Spider Robot

Who doesn’t love robotic spiders? Today’s biomimetic robot comes in the form of Miles, the quadruped spider robot from [_Robox].

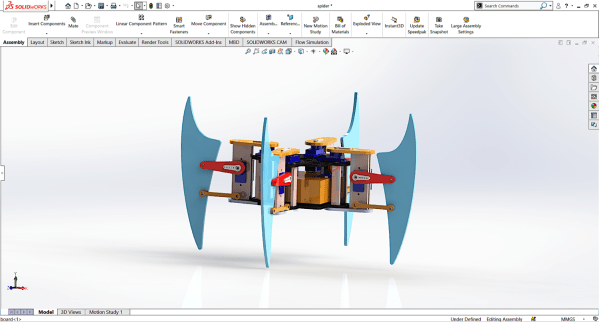
Miles uses twelve servos to control its motion, three on each of its legs, and also includes a standard HC-SR04 ultrasonic distance sensor for some obstacle avoidance capabilities. Twelve servos can use quite a bit of power, so [_Robox_] had to power Miles with six LM7805 ICs to get sufficient current. [_Robox_] laser cut acrylic sheets for Miles’s body but mentions that 3D printing would work as well.

Miles uses inverse kinematics to get around, which we’ve seen in a previous project and is a pretty popular technique for controlling robotic motion. The Instructable is a little light on the details, but the source code is something to take a look at. In addition to simply moving around [_Robox_] developed code to make Miles dance, wave, and take a bow. That’s sure to be a hit at your next virtual show-and-tell.

By now you’re saying “wait, spiders have eight legs”, and of course you’re right. But that’s an awful lot of servos. Anyway, if you’d rather 3D print your four-legged spider, we have a suggestion.

RGB LED Shutter Shades

[splat238] is back at it again with another cool RGB LED display project. We were contemplating whether or not our readers have had enough of these over the last few weeks, but we’ve learned over the years that you can never have too many LED projects.

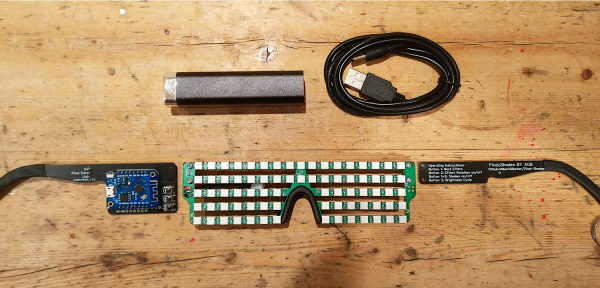
Instead of making a cool mask like we’ve covered before, [splat238] decided to trick-out some shutter shades. What’s really cool is he used the PCB itself as the frame, similar to another hack we’ve seen, which we’re sure also made his design process that much more convenient.

[splat238] got his boards pre-assembled since it would be really difficult to solder all those LEDs by hand. There are 76 of them in this design. It’s pretty helpful that he walks the reader through how to get the boards assembled, providing information on reliable fabrication and assembly houses that he’s had good experiences with. Pretty solid information if you don’t already have a go-to one-stop-house or have never designed for assembly before.

The glasses use an ESP8266-based microcontroller since it has plenty of space for storing LED patterns and has the potential benefit of including WiFi control in later revisions. However, we think you’ll be pretty happy with simply toggling through the patterns with a simple pushbutton.

The LEDs use a whopping 2.5 A at maximum and rely on an external power bank, so you’ll probably want to be really careful wearing this over an extended period of time. Maybe consider doing a bit of PWM to help reduce power consumption.

Another cool project [splat238]! Keep them coming. Continue reading “RGB LED Shutter Shades”