It would be fair to say that the Internet as we know it runs on Cisco hardware. While you might never see the devices first-hand, there’s an excellent chance that every web-bound packet leaving your computer or smartphone will spend at least a few milliseconds of its life traveling through hardware built by the San Jose, California based company. But of course, even a telecommunications giant like Cisco had to start somewhere.
Cisco’s first commercial router, the Advanced Gateway Server (AGS), was released in 1986 and helped put the company (and the Internet) on the path towards unfathomable success. [Andreas Semmelmann] had wanted to add one of these microwave-sized machines to his collection for some time, so when an AGS+ popped up in the local classifieds he didn’t hesitate to make the hour drive to go pick it up. But like many pieces of vintage computing equipment, it needed a little help getting back on its feet.
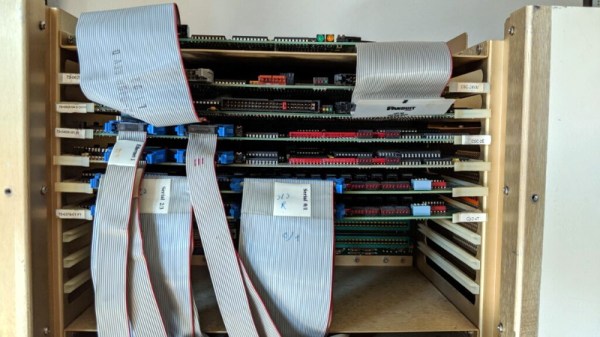
Since he had to take the router apart anyway to diagnose what ailed it, [Andreas] decided to take photographs along the way and document this piece of Internet history. He walks the reader through the massive processor, Ethernet, and serial cards that are housed in the unit’s rack-like enclosure. We appreciate him taking the scenic route, as it gives us a great look inside what would have been state-of-the-art telecommunications gear when this version of the AGS hit the market in 1989.
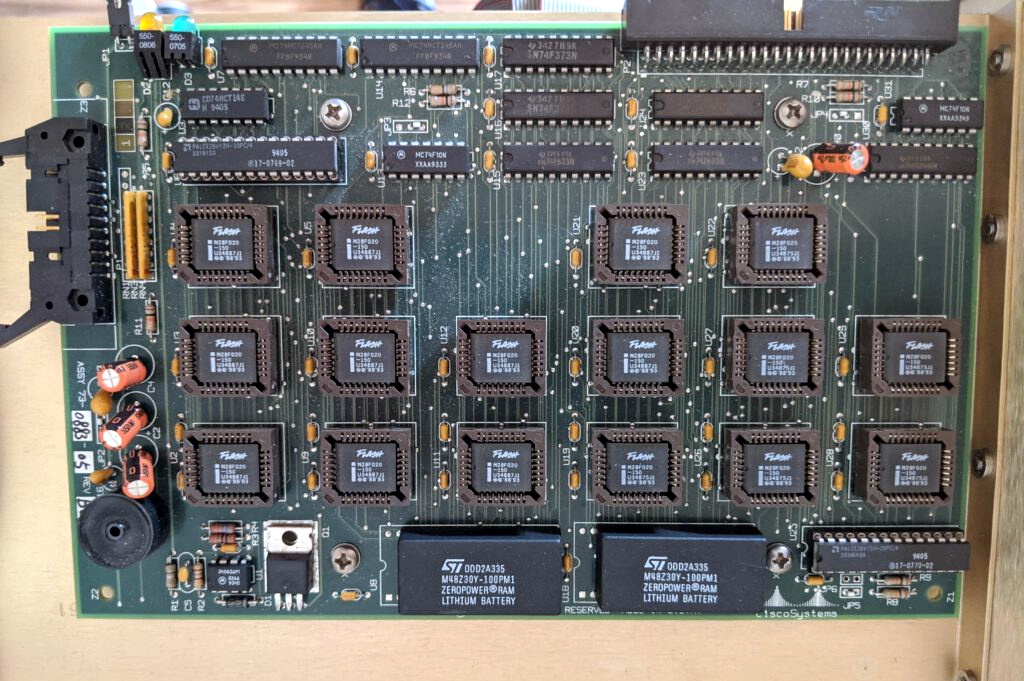
The walk-through is full of interesting details that make us appreciate just how far things have come in the last 32 years. Imagine yanking the EPROMs out of the board and firing up the UV eraser each time you needed to update your router’s firmware. Or needing a special adapter to convert the AUI-15 connectors on the back panel to the now ubiquitous RJ45 jack.
After this stroll down memory lane, [Andreas] gets to the actual repair work. It likely won’t surprise the regular Hackaday reader to find that the power supply wasn’t operating to spec, and that some aged capacitors and a shorted rectifier diode needed to be replaced to put it back on an even keel. But even with the PSU repaired, the router failed to start. The console output indicated the software was crashing, but hardware diagnostics showed no obvious faults.

With some part swapping, firmware flashing, and even a bit of assistance from Cisco luminary [Phillip Remaker], the issue was eventually identified as a faulty environmental monitoring (ENVM) card installed in the AGS+. As luck would have it the ENVM capability isn’t required to boot the router, so [Andreas] was able to just disconnect the card and continue on with his exploration of the hardware that helped build the Internet as we know it.
Considering its age, this piece of 1980s Cisco gear ended up being in relatively good shape. But that’s not always the case. Over the years we’ve found ourselves in awe of the incredible amount of time, effort, and skill, it takes to restore some of these classic machines. We have great respect for the dedicated individuals who are willing to take on the challenge of keeping these pieces of history up and running for future generations to marvel at.
[Thanks to Bob for the tip.]