DOOM Comes To The NRF5340

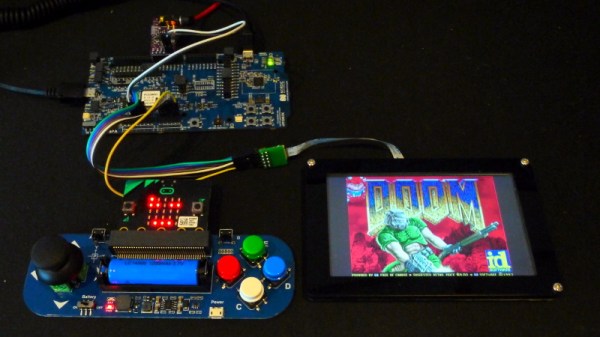
If you’re looking for a reminder of how powerful the tiny microcontrollers that run our everyday gadgets have become, check out the work impressive work [Audun Wilhelmsen] has done to get DOOM running on the Nordic Semiconductor nRF5340. This is the sort of Bluetooth SoC you’d expect to find in a headset or wireless keyboard, and yet it’s packing a 128 MHz processor that can go head to head with the Intel 486 that the iconic first person shooter recommended you have in your old beige box PC.

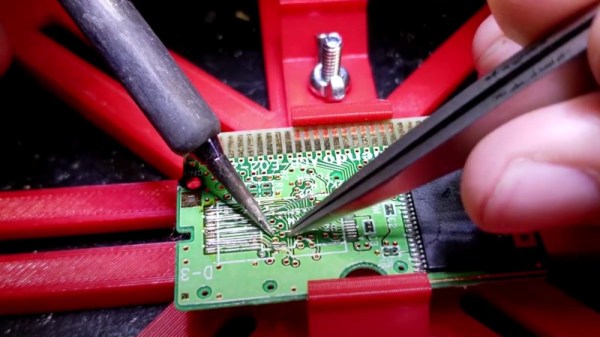
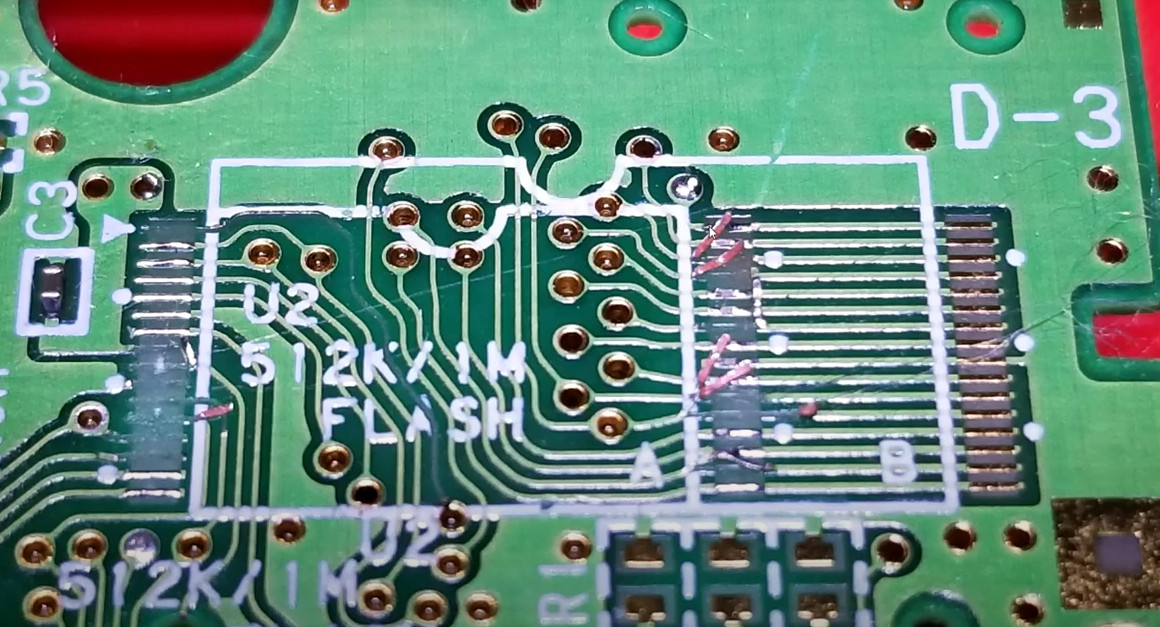
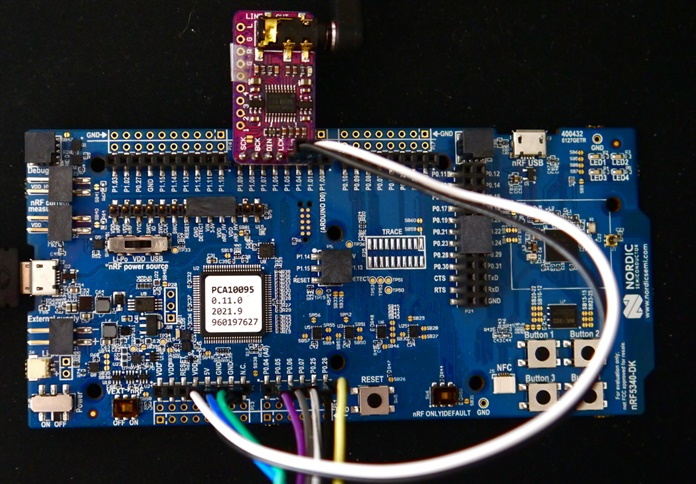
That said, porting the open source shooter over to the nRF5340 wasn’t exactly easy. The challenge was getting the game, which recommended your PC have 8 MB back in 1993, to run on a microcontroller with a paltry 512 KB of memory. Luckily, a lot of the data the game loads into RAM is static. While that might have been necessary when the game was running from a pokey IDE hard drive, the nearly instantaneous access times of solid state storage and the nRF5340’s execute in place (XIP) capability meant [Audun] could move all of that over to an SPI-connected 8 MB flash chip with some tweaks to the code.

nRF53 Development board with I2S DAC

In general, [Audun] explains that many of the design decisions made for the original DOOM engine were made with the assumption that the limiting factor would be CPU power rather than RAM. So that lead to things often getting pre-calculated and stored in memory for instant access. But with the extra horsepower of the nRF5340, it was often helpful to flip this dynamic over and reverse the optimizations made by the original developers.

On the hardware side, things are relatively straightforward. The 4.3″ 800×480 LCD display is connected over SPI, and an I2S DAC handles the sound. Bluetooth would have been the logical choice for the controls, but to keep things simple, [Audun] ended up using a BBC micro:bit that could communicate with the nRF5340 via Nordic’s own proprietary protocol. Though he does note that Bluetooth mouse and keyboard support is something he’d like to implement eventually.

If some of the software tricks employed by this hack sounded familiar, it’s because a very similar technique was used to get DOOM running on an IKEA TRÅDFRI light bulb a week or so back. Unfortunately it must have ruffled some feathers, as it was pulled from the Internet in short order. It sounds like [Audun] got the OK from his bosses at Nordic Semiconductor to go public with this project, so hopefully this one will stick around for awhile.

Continue reading “DOOM Comes To The NRF5340”

Teardown: Franz Crystal Metronome

I wish I could tell you that there’s some complex decision tree at play when I select a piece of hardware to take apart for this series, but ultimately it boils down two just two factors: either the gadget was something I was personally interested in, or it was cheap. An ideal candidate would check both boxes, but that’s not always the case. This time around however, I can confidently say our subject doesn’t fall into either category.

Now don’t get me wrong, at first glance I found the Franz Crystal Metronome to be intriguing in its own way. With that vintage look, how could you not? But I’m about as far from a musician as one can get, so you’d hardly find a metronome on my wish list. As for the cost, a check on eBay seems to show there’s something of a following for these old school Franz models, with ones in good condition going for $50 to $80. Admittedly not breaking the bank, but still more than I’d like to pay for something that usually ends up as a pile of parts.

That being the case, why are you currently reading about it on Hackaday? Because it exploits something of a loophole in the selection process: it doesn’t work, and somebody gave it to me to try and figure out why. So without further ado let’s find out what literally makes a Franz Crystal Metronome tick, and see if we can’t get it doing so gain.

Continue reading “Teardown: Franz Crystal Metronome”

Steady Hand Brings GBA Cart Back From The Grave

The flash chips used in Game Boy Advance (GBA) cartridges were intended to be more reliable and less bulky than the battery-backed SRAM used to save player progress on earlier systems. But with some GBA titles now hitting their 20th anniversary, it’s not unheard of for older carts to have trouble loading saves or creating new ones. Perhaps that’s why the previous owner tried to reflow the flash chip on their copy of Golden Sun, but as [Taylor Burley] found after he opened up the case, they only ended up making the situation worse.

A previous repair attempt left the PCB badly damaged.

When presented with so many damaged traces on the PCB, the most reasonable course of action would have been to get a donor cartridge and swap the save chips. But a quick check on eBay shows that copies of Golden Sun don’t exactly come cheap. So [Taylor] decided to flex his soldering muscles and repair each trace with a carefully bent piece of 30 gauge wire. If you need your daily dose of Zen, just watch his methodical process in the video below.

While it certainly doesn’t detract from [Taylor]’s impressive soldering work, it should be said that the design of the cartridge PCB did help out a bit, as many of the damaged traces had nearby vias which gave him convenient spots to attach his new wires. It also appears the PCB was designed to accept flash chips of varying physical dimensions, which provided some extra breathing room for the repairs.

Seeing his handiwork, it probably won’t surprise you to find that this isn’t the first time [Taylor] has performed some life-saving microsurgery. Just last year he was able to repair the PCB of an XBox controller than had literally been snapped in half.

Continue reading “Steady Hand Brings GBA Cart Back From The Grave”

Review: Inkplate 6PLUS

While the price of electronic paper has dropped considerably over the last few years, it’s still relatively expensive when compared to more traditional display technology. Accordingly, we’ve seen a lot of interest in recovering the e-paper displays used in electronic shelf labels and consumer e-readers from the likes of Amazon, Barnes & Noble, and Kobo. Unfortunately, while these devices can usually be purchased cheaply on the second hand market, liberating their displays is often too complex a task for the average tinkerer.

Enter the Inkplate. With their open hardware ESP32 development board that plugs into the e-paper displays salvaged from old e-readers, the team at e-radionica is able to turn what was essentially electronic waste into a WiFi-enabled multipurpose display that can be easily programmed using either the Arduino IDE or MicroPython. The $99 Inkplate 6 clearly struck a chord with the maker community, rocketing to 926% of its funding goal on Crowd Supply back in 2020. A year later e-radionica released the larger and more refined Inkplate 10, which managed to break 1,000% of its goal.

For 2021, the team is back with the Inkplate 6PLUS. This updated version of the original Inkplate incorporates the design additions from the Inkplate 10, such as the Real-Time-Clock, expanded GPIO, and USB-C port, and uses a display recycled from newer readers such as the Kindle Paperwhite. These e-paper panels are not only sharper and faster than their predecessors, but also feature touch support and LED front lighting; capabilities which e-radionica has taken full advantage of in the latest version of their software library.

With its Crowd Supply campaign recently crossing over the 100% mark, we got a chance to go hands-on with a prototype of the Inkplate 6PLUS to see how e-radionica’s latest hacker friendly e-paper development platform holds up.

Continue reading “Review: Inkplate 6PLUS”

Scratch Built Tracked Robot Reporting For Duty

Inspired by battle-hardened military robots, [Engineering Juice] wanted to build his own remote controlled rover that could deliver live video from the front lines. But rather than use an off-the-shelf tracked robot chassis, he decided to design and 3D print the whole thing from scratch. While the final product might not be bullet proof, it certainly doesn’t seem to have any trouble traveling through sand and other rough terrain.

Certainly the most impressive aspect of this project is the roller chain track and suspension system, which consists of more than 200 individual printed parts, fasteners, bearings, and linkages. Initially, [Engineering Juice] came up with a less complex suspension system for the robot, but unfortunately it had a tendency to bind up during testing. However the new and improved design, which uses four articulated wheels on each side, provides an impressive balance between speed and off-road capability.

Internally there’s a Raspberry Pi 4 paired with an L298 dual H-bridge controller board to drive the heavy duty gear motors. While the Pi is running off of a standard USB power bank, the drive motors are supplied by a custom 18650 battery pack utilizing a 3D printed frame to protect and secure the cells. A commercial night vision camera solution that connects to the Pi’s CSI header is mounted in the front, with live video being broadcast back to the operator over WiFi.

To actually control the bot, [Engineering Juice] has come up with a Node-RED GUI that’s well suited to a smartphone’s touch screen. Of course with all the power and flexibility of the Raspberry Pi, you could come up with whatever sort of control scheme you wanted. Or perhaps even go all in and make it autonomous. It looks like there’s still plenty of space inside the robot for additional hardware and sensors, so we’re interested to see where things go from here.

Got a rover project in mind that doesn’t need the all-terrain capability offered by tracks? A couple of used “hoverboards” can easily be commandeered to create a surprisingly powerful wheeled platform to use as a base.

Continue reading “Scratch Built Tracked Robot Reporting For Duty”

Repairing A 300W CO2 Laser, One Toasted Part At A Time

A couple months back, [macona] got his hands on a 300 watt Rofin CO2 laser in an unknown condition. Unfortunately, its condition became all too known once he took a peek inside the case of the power supply and was confronted with some very toasty components. It was clear that the Magic Smoke had been released with a considerable bit of fury, the trick now was figuring out how to put it back in.

The most obvious casualty was an incinerated output inductor. His theory is that cracks in the ferrite toroid changed its magnetic properties, ultimately causing it to heat up during high frequency switching. With no active cooling, the insulation cooked off the wires and things started to really go south. Maybe. In any event, replacing it was a logical first step.

If you look closely, you may see the failed component.

Unfortunately, Rofin is out of business and replacement parts weren’t available, so [macona] had to wind it himself with a self-sourced ferrite and magnet wire. Luckily, the power supply still had one good inductor that he could compare against. After replacing the coil and a few damaged ancillary wires and connectors, it seemed like the power supply was working again. But with the laser and necessary cooling lines connected, nothing happened.

A close look at the PCB in the laser head revealed that a LM2576HVT switching regulator had exploded rather violently. Replacing it wasn’t a problem, but why did it fail to begin with? A close examination showed the output trace was shorted to ground, and further investigation uncovered a blown SMBJ13A‎ TVS diode. Installing the new components got the startup process to proceed a bit farther, but the laser still refused to fire. Resigned to hunting for bad parts with the aid of a microscope, he was able to determine a LM2574HVN voltage regulator in the RF supply had given up the ghost. [macona] replaced it, only for it to quickly heat up and fail.

This one is slightly less obvious.

Now this was getting ridiculous. He replaced the regulator again, and this time pointed his thermal camera at the board to try and see what else was getting hot. The culprit ended up being an obsolete DS8922AM dual differential line transceiver that he had to source from an overseas seller on eBay.

After the replacement IC arrived from the other side of the planet, [macona] installed it and was finally able to punch some flaming holes with his monster laser. Surely the only thing more satisfying than burning something with a laser is burning something with a laser you spent months laboriously repairing.

We love repairs at Hackaday, and judging by the analytics, so do you. One of this month’s most viewed posts is about a homeowner repairing their nearly new Husqvarna riding mower instead of sending it into get serviced under the warranty. Clearly there’s something about experiencing the troubleshooting and repair process vicariously, with our one’s own hardware safely tucked away at home, that resonates with the technical crowd.

Developing A Power Over Ethernet Stack Light

A common sight on factory floors, stack lights are used to indicate the status of machinery to anyone within visual range. But hackers have found out you can pick them up fairly cheap online, so we’ve started to see them used as indicators in slightly more mundane situations than they were originally intended for. [Tyler Ward] recently decided he wanted his build own network controlled stack light, and thought it would double as a great opportunity to dive into the world of Power Over Ethernet (PoE).

Now the easy way to do this would be to take the Raspberry Pi, attach the official PoE Hat to it, and toss it into a nice enclosure. Write some code that toggles the GPIO pins attached to the LEDs in the stack light, and call it a day. Would be done in an afternoon and you could be showing it off on Reddit by dinner time. But that’s not exactly what [Tyler] had in mind.

An early Arduino-based prototype.

He decided to take the scenic route and designed his own custom PCB that combines an Ethernet interface, PoE hardware, and the ESP32 into one compact unit. It’s no great secret that it only takes a few extra components to plug the ESP32 into the network rather than relying on WiFi, but it’s still not something we see done very often by hobbyists. Rarer still is seeing somebody roll their own PoE solution, but thanks to the in-depth documentation [Tyler] has provided for his circuit, that may change in the future.

On the software side [Tyler] has developed a firmware for the ESP32 that supports both Art-Net and RDM protocols, which are subsets of the larger DMX protocol. That means the controller should be compatible with existing software designed for controlling theatrical lighting systems. If you’d rather take a more direct approach, the firmware also sports a web interface and simple HTTP API to provide some additional flexibility.

While it’s exceptionally impressive, not everyone will need such a robust solution. If you just want a quick and easy way to fire up your stack light, a USB controlled relay and some Python can get you where you need to go.