An Open Source IR Gateway Based On The ESP8266

The market is absolutely inundated with smart gadgets, with everything from coffee makers to TVs advertising that they support the latest and greatest in home automation platforms. Don’t worry about how many of those platforms and services will still up up and running in the next few years, the thing will probably stop working before then anyway. No sense worrying about the details in a disposable world.

Of course, not all of us are so quick to dump working hardware in the name of the latest consumer trend. Which is why [Viktor] has developed an open source infrared gateway that can connect your “dumb” devices to the latest flash in the pan backend service with nothing more than a software update. Though even modern smart TVs still include IR remotes, so there’s nothing stopping you from using it with newer gear if you don’t trust like the built-in implementation.

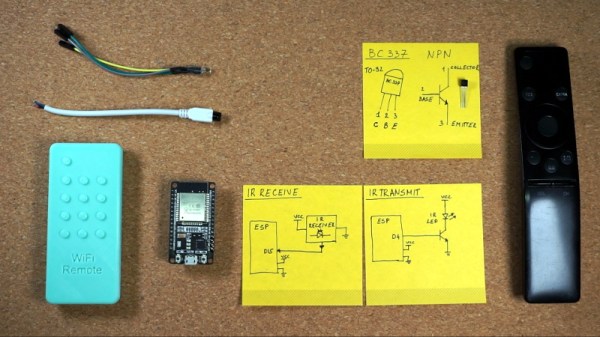
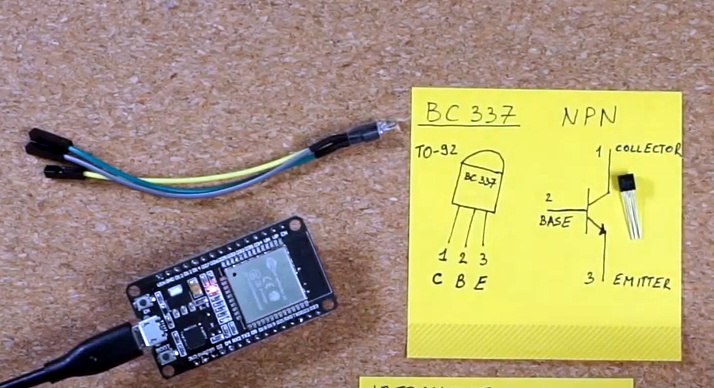
The hardware here is really quite simple, essentially boiling down to a few IR LEDs and an IR receiver hanging off the GPIO ports of an ESP8266. While the receiver isn’t strictly necessary, it does allow [Viktor] to rapidly implement new IR codes. He just points the existing remote at the board, hits a button, and the decoded command gets sent out over MQTT where he can easily snap it up.

[Viktor] has done the hard work of creating the PCB design and testing out different IR LEDs to find the ones with the best performance. But if you wanted to just throw something together in a weekend, you should be able to get his firmware running with little more than a bare ESP and a random IR LED salvaged from an old remote. But don’t be surprised if you get hooked on the concept and end up rolling your own home automation system.

Firmware Hints That Tesla’s Driver Camera Is Watching

Currently, if you want to use the Autopilot or Self-Driving modes on a Tesla vehicle you need to keep your hands on the wheel at all times. That’s because, ultimately, the human driver is still the responsible party. Tesla is adamant about the fact that functions which allow the car to steer itself within a lane, avoid obstacles, and intelligently adjust its speed to match traffic all constitute a driver assistance system. If somebody figures out how to fool the wheel sensor and take a nap while their shiny new electric car is hurtling down the freeway, they want no part of it.

So it makes sense that the company’s official line regarding the driver-facing camera in the Model 3 and Model Y is that it’s there to record what the driver was doing in the seconds leading up to an impact. As explained in the release notes of the June 2020 firmware update, Tesla owners can opt-in to providing this data:

Help Tesla continue to develop safer vehicles by sharing camera data from your vehicle. This update will allow you to enable the built-in cabin camera above the rearview mirror. If enabled, Tesla will automatically capture images and a short video clip just prior to a collision or safety event to help engineers develop safety features and enhancements in the future.

But [green], who’s spent the last several years poking and prodding at the Tesla’s firmware and self-driving capabilities, recently found some compelling hints that there’s more to the story. As part of the vehicle’s image recognition system, which usually is tasked with picking up other vehicles or pedestrians, they found several interesting classes that don’t seem necessary given the official explanation of what the cabin camera is doing.

If all Tesla wanted was a few seconds of video uploaded to their offices each time one of their vehicles got into an accident, they wouldn’t need to be running image recognition configured to detect distracted drivers against it in real-time. While you could make the argument that this data would be useful to them, there would still be no reason to do it in the vehicle when it could be analyzed as part of the crash investigation. It seems far more likely that Tesla is laying the groundwork for a system that could give the vehicle another way of determining if the driver is paying attention.

Continue reading “Firmware Hints That Tesla’s Driver Camera Is Watching”

HALWOP Recreates Retro Style With The Raspberry Pi

Modern computers are incredible feats of engineering, but there are many that still yearn for the simpler times. When keyboards clacked and a desktop computer quite literally dominated the top of your desk. There’s a whole community of folks who scratch that itch by restoring vintage computers, but not everyone has the time, money, or skill for such pursuits. Plus, even the most lovingly cared for Apple II isn’t going to help you watch YouTube.

Those who wish to recreate the look and feel of a vintage computer with modern internals will certainly be interested in the HALWOP by [Maz_Baz]. While its 3D printed case isn’t a replica of any one computer, it does draw inspiration from iconic machines like the Apple Lisa and IBM XT. It’s an amalgamation of design ideas that seemed like a good idea circa 1982 or so, with plenty of 90° angles and air vents to go around.

Considering the size of the Raspberry Pi 4 that powers the HALWOP, most of the case is just hollow plastic. But of course, the whole idea depends on it being almost comically large. On the plus side, [Maz_Baz] says you can use one of those empty compartments to hold a Anker PowerCore 26800 battery pack. At least in theory that makes it a “luggable” computer, though good luck trying to move it around.

In addition to the Pi 4 and battery pack, the HALWOP also uses a seven-inch touch LCD and Keychron K2 Bluetooth mechanical keyboard. Since everything is so modular, assembly is about as simple as it gets. Outside of the USB cables that power everything, you just need a long enough ribbon cable to connect the LCD to the Pi.

We know the purists don’t like the idea of a “retro” computer based on the Raspberry Pi, but of course, such projects aren’t about maintaining historical accuracy. They are a way to bridge the gap between modern technology and the unique aesthetics of a bygone era. Designs like the HALWOP allow a new generation to experience a taste of what computing was like in the early days, without giving up the ground that’s been gained in the intervening years.

Lo-Fi Art On A 32×32 Matrix

Display technology has improved by leaps and bounds over the last few years, thanks in no small part to the smartphone revolution. High-resolution LCD panels are dirt cheap and easy to interface with. There’s absolutely no logical reason to try and show images on a 32×32 array of RGB LEDs. But that didn’t stop [Felix Spöttel] from doing it anyway.

The project, which he calls thirtytwopixels, was designed to work in conjunction with MPD (Music Player Daemon) to show the album art for whatever is currently playing. The ultra-low resolution display added a certain element of abstractness to the artwork, which [Felix] said made it an interesting conversation starter. Guests would try and guess what the album art was depicting given the sparse rendition shown on the matrix.

[Felix] gives an excellent explanation of how to get the server and client-side software up and running should you want to recreate his setup, but his Python scripts also have a function where you can push an arbitrary image to the display if you don’t want to connect everything up to the MPD backend.

On the hardware side, thirtytwopixels uses the Raspberry Pi Zero W, a Adafruit RGB Matrix Bonnet, and a 32×32 LED matrix that uses the HUB75 interface. Even a relatively small LED matrix like this can get pretty thirsty, so [Felix] is using a 5 volt power supply that can deliver 4 amps to keep the electronics happy.

If you wanted to keep the low resolution aesthetic but make the display larger, we’ve seen WS2812B LED strips and 3D printed frames used to make a custom jumbo matrix which could surely be adapted for this concept.

Arduino Gets Old PC Booted And Back Into Action

How many people still have a PS/2 keyboard kicking around in 2020? Admittedly asking such a question of the Hackaday audience is probably cheating (there’s a decent chance one of you will type a comment on one just to prove a point), but even the most pedantic reader has to admit that it’s a long dead standard. So we’re hardly surprised to hear that [Turbaned Engineer] didn’t have one handy when he tried to boot a motherboard so old that he couldn’t access the BIOS with a USB keyboard.

But rather than waiting for an adapter to show up in the mail, he decided to rig up an Arduino Nano to mimic a PS/2 keyboard just long enough for him to navigate the system configuration. Since that basically meant he only needed the arrow keys and Enter, he was able to rig up a handful of momentary buttons to serve as input. We wouldn’t recommend typing out your memoirs with such a spartan board, but it’s certainly good enough to juggle around the order of boot devices.

The fun didn’t stop there, though. [Turbaned Engineer] also had to clean some corrosion and fix a blown resistor on a bank of RAM to drag this old soldier over the finish line. He didn’t have a case handy, so he made a free-form one using the polycarbonate packaging that ICs ship in. The final machine isn’t exactly a sleeper, but it’s good enough to play Super Mario Bros. 3 on the TV.

At the end of the day, the minimal input device [Turbaned Engineer] put together isn’t so far removed from other homebrew keyboards we’ve seen recently. It seems that QMK even has some basic support for the PS/2 interface. Not that it would come up very often, but a “retro” mode might be an interesting addition to your next custom keyboard build.

Heavy Metal Power Bank Uses Tool Batteries

At one time or another, most of us have seen a gadget for sale and thought we could build something similar for cheaper. Of course, we’re almost always wrong. Not about being able to build it, mind you. But when you add up the cost of the materials, the tool or two you almost inevitably end up buying, and the time spent chasing perfection, you’re lucky if you haven’t doubled the original price.

We’re not sure how much money [Taylor Hay] ended up saving by building his own portable power bank. But we do know it’s a gorgeous piece of hardware that’s certainly built far better than the average consumer gadget. The CNC-cut aluminum side panels look like something pulled out of a tank, and while we know some might balk at the 3D printed internal frame, we’re confident you could use this thing as an impromptu step stool without a problem.

Inside there’s 150 watt 240 VAC inverter, complete with a temperature-controlled fan to keep it cool under load. There are also four USB ports providing 2.1 A each, a standard 12 VDC accessory port, and a LED display that shows battery voltage and current being drawn. Rather than come up with his own battery pack, [Taylor] used a 3D printed interface that accepts an 18 V Milwaukee cordless tool battery. Naturally, the design could be adapted to take another brand’s cells if you were so inclined.

Around these parts, we know that a good project doesn’t have to be cheaper or even more practical than what’s already on the market. There’s an inherent value in building something exactly the way you want it that you simply can’t put a monetary price on.

Continue reading “Heavy Metal Power Bank Uses Tool Batteries”

A Double Shot Of Vintage Computing This Weekend

Going anywhere interesting this weekend? No, of course you aren’t. None of us are. So why not tune your computer or smartphone to the online stream of one of the virtual Vintage Computer Festivals that will be taking place between October 10th and 11th. Granted only one of them is in English, but we’ve often thought of blinky lights as something of a universal language anyway.

Vintage Computer Festival East, which normally would have happened in the Spring, has finally decided that 2020 is a wash for any in-person meetings and has decided to switch over to virtual. Interestingly, it sounds like they’ll be live streaming at least some of the exhibitor tables from the InfoAge museum in New Jersey where the physical event would have been held. So from an attendee perspective, the virtual event should be a bit closer to the real thing than if everyone had to figure out their own streaming setups from home. Presentations will run from 9:00 AM to 6:00 PM Eastern on both days.

On the other side of the globe, Vintage Computing Festival Berlin will be broadcasting their own exhibitions, workshops, and lectures. In an interesting use of the virtual format, they’ll be giving viewers an intimate look at vintage computers and technology that’s held in private collections, museums, or otherwise inaccessible storage and research facilities. Content will be streaming from 10:00 AM to 8:00 PM CEST on both days, with a musical performance overnight.

While there’s an understandable tendency to bemoan the trend of moving events online in the face of COVID-19, there are certainly situations where the format can actually bring you more content than you’d have access to otherwise. Especially when they end up being free, as is the case with both of these Festivals. We’re still eagerly awaiting the point where we can get back to attending these events in person, but we certainly aren’t complaining when so many incredible people are willing to put on these presentations without seeing a dime.