Over the last year we’ve seen a wave of portable computer builds that center around the Raspberry Pi taking up residence inside a commercial heavy-duty storage case. It’s not hard to see why; whether you spring for the Pelican case or get a cheaper alternative, these water-tight cases are far stronger than anything you’re going to 3D print or otherwise cobble together in the home shop. Especially if you can avoid popping any holes in the side.
Inspired by these builds but looking to make it even easier and cheaper to roll your own version, [Dmitry] recently took the wraps off of what he calls the Militarish Pi. You don’t need a CNC to cut out any face plates or a 3D printer to create an internal framework for all your components. You could even do it without soldering anything, if you really wanted to. Short of just buying one of these rigs pre-built from somebody, it’s hard to imagine it could get much easier than this.
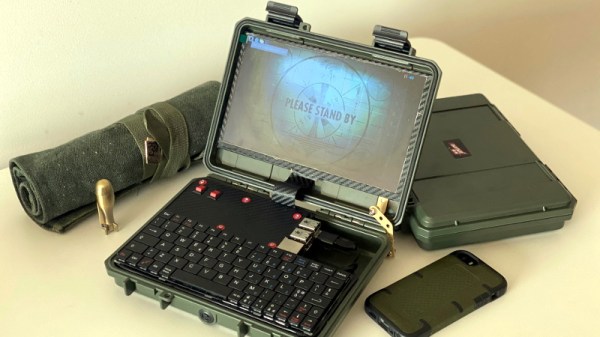
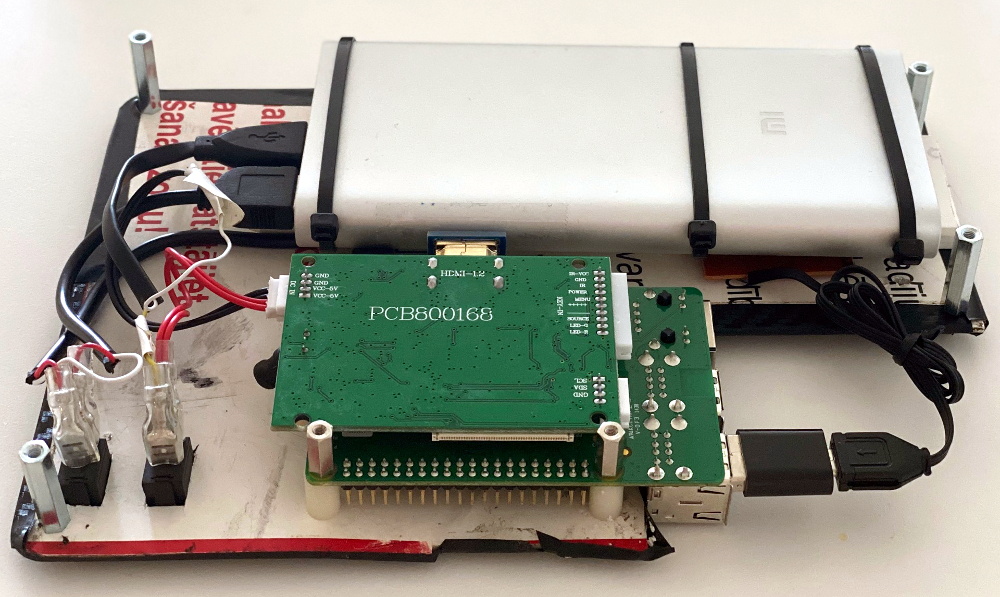 Most of the effort involves cutting the PVC foam sheet that holds the Raspberry Pi, battery pack, and the driver board for the LCD in the bottom of the $15 USD case [Dmitry] managed to track down on AliExpress. The “carbon fiber” sticker he put on the PVC sheet won’t do much for the structural integrity of the build, but it sure looks nice. Of course if you have access to the appropriate tools, you could certainly cut the plate out of something stouter. As for the display, the nine inch LCD is perfectly sized to press fit into the lid.
Rounding out the build, [Dmitry] found a cheap Android phone case that included a tiny USB keyboard which plugs right into the Pi and he’s looking to add a BlackBerry trackball to the setup down the line. We especially like the large open area that he’s kept around the Raspberry Pi’s ports that allow you to easily hook up to the network or plug in a flash drive. It could also be a nice compartment to keep your RTL-SDR for some mobile radio work.
For those that don’t mind spending name-brand money and have access to a 3D printer, the Raspberry Pi Quick Kit by [Jay Doscher] is another great way to get yourself a rough and tumble Pi without reinventing the wheel.