Capture Device Firmware Hack Unlocks All The Pixels

According to [Mike Walters], the Elgato Cam Link 4K is a great choice if you’re looking for a HDMI capture device that works under Linux. But the bad news is, it wouldn’t work with any of the video conferencing software he tried to use it with because they expect the video stream to be in a different pixel format. For most people, that would probably have been the end of the story. But you’re reading this on Hackaday, so obviously he didn’t give up without a fight.

Early on, [Mike] found there was a software workaround for this exact issue. The problem isn’t that the Elgato can’t generate the desired format, it’s that the video conferencing programs just don’t know how to ask it to switch modes. The software fix is to create a dummy Video4Linux device and use that to change the format in real-time using ffmpeg. It’s a clever trick if you’ve got a conference call coming up in a few minutes, but it does waste CPU resources and adds some unnecessary hoop jumping.

Putting the device into bootloader mode.

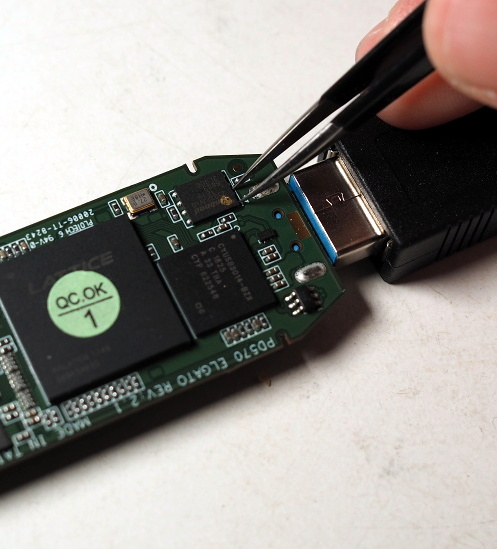
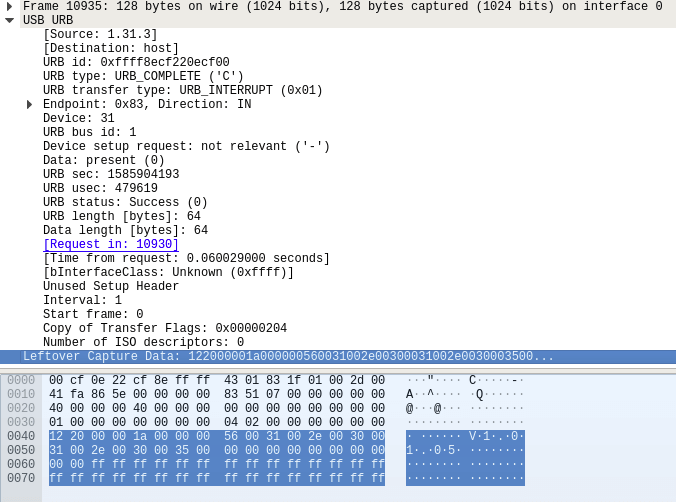
Inspired by the software fix, [Mike] wondered if there was a way he could simply force the Elgato to output video in the desire format by default. He found a firmware dump for the device online, and found where the pixel formats were referenced by searching for their names in ASCII with hexdump. Looking through the source for the Linux USB Video Class (UVC) driver, he was then able to determine what the full 16 byte sequence should be for each video mode was so he could zero out the unwanted ones. Then it was just a matter of flashing his modified firmware back to the hardware.

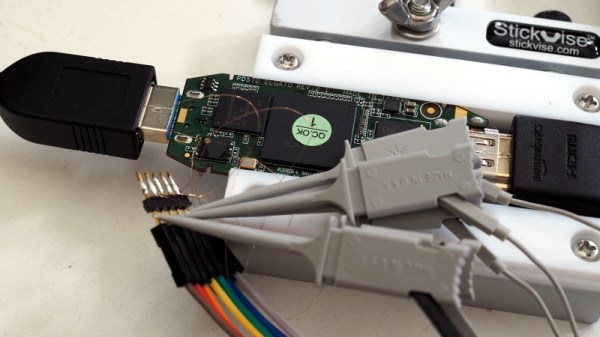
But there was a problem: with the modified firmware installed, the device stopped working. After investigating the obvious culprits, [Mike] broke out the oscilloscope and hooked it up to the Elgato’s flash chip. It turns out that due to a bug in the program he was using, the SPI erase commands weren’t getting sent during the flash. This lead to corrupted firmware which was keeping the Elgato from booting. After making a pull request with his fixes, the firmware flashed without incident and the capture device now does double-duty as a webcam when necessary.

We could certainly think of easier and quicker was to roll your own webcam, but we’re glad that [Mike] took the time to modify his Elgato Cam Link 4K and document it. It’s a fantastic example of practical firmware hacking, even if you’re not in the market for a new high-definition video conferencing rig.

Reverse Engineering An RGB Keyboard Under Linux

Hardware support under Linux is far better than it ever has been in the past. These days, most things “just work” out of the box, and you probably won’t have to compile any custom kernel modules. Certainly a far cry from where things were a decade ago. But that doesn’t mean everything will work to 100% of its abilities. Take for example, the Duck keyboard that [Cynthia Revström] has. Sure it works as a basic keyboard under any OS, but getting those fancy RGB LEDs working is another story entirely.

Don’t get the wrong idea here, [Cynthia] isn’t just trying to get the keyboard to flash along to music; the goal was to use the RGB lighting of the Ducky keyboard for notifications that the user can’t possibly ignore. Even the most laser-focused among us would have a hard time not noticing that the entire keyboard is blinking red. But the “DuckyRGB” software that you need to do something like that is Windows-only and apparently distributed via a sketchy Google Drive link. Yikes.

The first step to creating an alternative was to spin up a Windows VM and install DuckyRGB. From there, Wireshark could listen in between the virtual computer and the Ducky keyboard to see what the software was sending over the wire. After identifying a version number being sent in the clear, [Cynthia] was able to isolate the LED commands by searching for the hex color codes. From there, it was a relatively simple matter of writing some glue code to connect it up to an alert service and get notifications going.

There was only one problem; the keyboard didn’t work anymore. Turns out the tool that [Cynthia] wrote to control the keyboard’s LEDs was claiming the device so the kernel couldn’t access it for normal input. It took a detour with HIDAPI to get everyone playing together nicely, and now changing the color of your Ducky keyboard on Linux doesn’t turn it into a paperweight.

Even if you don’t have a Ducky keyboard, or aren’t particularly interested in having its LEDs blinked at you if you do, this project is a phenomenal example of practical USB reverse engineering. [Cynthia] says the inspiration for this project came from friend [Ben Cox], who’s write-up on creating USB userspace drivers we covered last year. If you’ve got and old USB gadget with Windows-only drivers, maybe it’s time you take a crack at unlocking it.

Using Spiral Mode To Rapidly Print Enclosures

We’ve often said that one of the best applications of desktop 3D printing is the production of custom enclosures. A bespoke case adds a touch of professionalism to any project, and considering the materials needed to print one will cost less than even the cheapest generic project box, it’s a no-brainer. There’s only one problem: it can take hours to print even a simple case.

To try and speed things up, [Electrobob] has been experimenting with running off enclosures using spiral or “vase” mode on his 3D printer. Unlike the normal layer-by-layer approach, in this mode, the printer’s hotend continually rises at a steady rate during the entire print. Think of it as akin to printing out a Slinky and you should get the idea.

Spiral printed boxes may need manual retouching

As you might expect, there are some trade-offs here. For one, the walls of the box can’t be very thick since the printer is only making one pass. The nozzle on most printers is 0.4 mm, but in his experiments, [Electrobob] has found he’s able to reliably double that to a wall thickness of 0.8 mm by adjusting the extrusion rate.

You also need to approach the design a bit differently during the CAD phase. Printing holes in the side of the enclosure, which would be easy enough to do normally, doesn’t really work when running in spiral mode. For those situations, [Electrobob] recommends designing a “pocket” into the side that you can come back and cut out with a knife. It will add a little time to the post-processing stage, but the time saved during the print will more than make up for it.

So how much faster are we talking about? In the example [Electrobob] shows in his write-up, the print time went from nearly two hours to just 18 minutes. The resulting enclosure obviously looks a bit different than the traditionally printed version, and isn’t as strong, but the concept still clearly holds promise for some applications. If you’re building a sensor network that needs a bunch of enclosures, those time savings will really add up.

Will 2020 (Finally) Be The Year Of Electronic Paper?

These days paper is being phased out whenever possible, and while we’re still far from being a completely digital society, the last decade or two has seen a huge reduction in the amount of paper the average person deals with on a daily basis. At the very least, we seem a lot closer to a future without the printed page than we are flying cars or any of the other concepts we generally associate with the far-flung future.

That said, there’s still something undeniably appealing about reading on paper. The idea of squirting ink on a piece of thin wood might seem increasingly archaic to us, but it sure does look nice when you hold it in your hand. Which is exactly why so much effort has been put into recreating the look of printed paper in electronic form; we all love the experience of paper, but the traditional execution doesn’t align itself particularly well with modern sensibilities.

Of course electronic “eReaders”, most notably the Kindle line from Amazon, have gone a long way towards making this a reality. At least for reading books, anyway. But what about magazines, newspapers, or even the lowly notebook we keep by the bench to jot down measurements or ideas? A PDF datasheet, with graphics where the grey tones matter? Being able to carry a whole bookshelf worth of novels in your bag is incredible, but despite what science fiction has promised us since 2001: A Space Odyssey, we’re still consuming plenty of media off of dead trees.

But that might be changing soon. This year will see the release of two tablets that promise to deliver an experience much closer to reading and writing on traditional paper than anything we’ve seen previously. They certainly aren’t cheap, and it’s too early to tell how much is just hype, but these devices could end up being an important step towards the paperless future we’ve been dreaming of.

Continue reading “Will 2020 (Finally) Be The Year Of Electronic Paper?”

Stitching Up Custom Belts

If you’ve got a 3D printer, you’re probably familiar with the reinforced belts that are commonly used on the X and Y axis. These belts either come as long lengths that you attach to the machine on either end, or as a pre-sized loop. Traditional wisdom says you can’t just take a long length of belt and make your own custom loops out of it, but [Marcel Varallo] had his doubts about that.

This is a simple tip, but one that could get you out of a bind one day. Through experimentation, [Marcel] has found that you can use a length of so-called GT2 belt and make your own bespoke loop. The trick is, you need to attach the ends with something very strong that won’t hinder the normal operation of the belt. Anything hard or inflexible is right out the window, since the belt would bind up as soon as it had to go around a pulley.

It seems the key is to cut both ends of the belt very flat, making sure the belt pattern matches perfectly. Once they’ve been trimmed and aligned properly, you stitch them together with nylon thread. You want the stitches to be as tight as possible, and the more you do, the stronger the end result will be.

[Marcel] likes to follow this up with a bit of hot glue, being careful to make sure the hardened glue takes the shape of the belt’s teeth. The back side won’t be as important, but a thin layer is still best. The end result is a belt strong enough for most applications in just a few minutes.

Would we build a 3D printer using hand-stitched GT2 belts? Probably not. But during a global pandemic, when shipments of non-essential components are often being delayed, we could certainly see ourselves running some stitched together belts while we wait for the proper replacement to come in. Gotta keep those face shields printing.

A Fantastic Raspberry Pi Handheld Just Got Better

Last year, we brought you word of the MutantC by [rahmanshaber]. The Raspberry Pi handheld was more than a little inspired by the classic T-Mobile Sidekick, with a sliding display and physical QWERTY keyboard. The design was a little rough around the edges and missing a few key features, but it was clear the project had a lot of potential.

Today, we’re happy to report that [rahmanshaber] has officially released MutantC_v2. It looks like the new version of this handheld, perhaps more properly categorized as a ultra-mobile PC (UMPC), successfully addresses a number of the shortcomings found in the original; so if you held off on building one last year, you might want to start warming up the 3D printer now.

The major improvement over the original is the inclusion of a battery, which makes the device truly mobile. This was something that we mentioned [rahmanshaber] was working on back when he released the first version, as it was easily the most requested feature from the community. We certainly wouldn’t say a miniature handheld computer is completely useless if it has to stay tethered, but there’s no arguing that being able to take it on the go is ideal.

This upgraded version of the design now officially supports the Raspberry Pi 4 as well, which previously [rahmanshaber] was advising against due to overheating concerns. Slotting in the latest-and-greatest edition of every hacker’s favorite Linux single board computer will definitely kick things up a notch, though we imagine the older and less power hungry iterations of the Pi will be plenty for the sort of tasks you’re likely to be doing on a gadget like this.

If you like the idea of having a diminutive Linux computer within arm’s reach of your bench but aren’t necessarily committed enough to build something like the MutantC, there are certainly simpler designs you can get started with.

Continue reading “A Fantastic Raspberry Pi Handheld Just Got Better”

The Evolution Of A 3D Printed Off-Road R/C Car

For about as long as hackers and makers have been using desktop 3D printers, there have been critics that say the plastic parts they produce aren’t good for much else than toys and decorative pieces. They claim that printed parts are far too fragile to be of any practical use, and are better suited as prototype placeholders until the real parts can be injection molded or milled. Sure. Try telling that to [Engineering Nonsense].

He recently wrote in (as did a few other people, incidentally) to share the latest version of his incredible 3D printed remote control car, and seeing it tearing around in the video after the break, “fragile” certainly isn’t a word we’d use to describe it. Though it didn’t get that way overnight. The Tarmo4 represents a year of development, and as the name suggests, is the fourth version of the design.

We know the purists out there will complain that the car isn’t entirely 3D printed, but honestly, it’s hard to imagine you could get much closer than this. Outside of the electronics, fasteners, tires, and shocks, the Tarmo4 is all plastic. That includes the gearbox and drive shafts. [Engineering Nonsense] even mentions in the video that he’s not happy with the tires he’s found on the market, and that they too will likely get replaced with printed versions in the future.

While the car is certainly an incredible technical achievement, what’s perhaps just as impressive is the community that’s developed around it in such a relatively short time. Towards the end of the video he shows off a number of custom builds based on previous iterations of the Tarmo. We’re sure that interest from the community has played a part in pushing the design forward, and it’s always good to see a one-off project become something bigger. Hopefully we’ll be seeing even more from this passionate community in the near future.

Just like the Open R/C Project, Tarmo proves that 3D printed parts are more than a novelty. If these diminutive powerhouses can run with printed gears and drive shafts, then you shouldn’t have anything to worry about when you run off the parts for your next project.

Continue reading “The Evolution Of A 3D Printed Off-Road R/C Car”