A Contact Lens Launcher That Knows The Weather

They say that necessity is the “Mother of Invention”, but over the years we’ve started to suspect that her cousin might be an underutilized microcontroller. How else can you explain projects like the latest from [MNMakerMan], which takes the relatively simple concept of a contact lens holder and manages to turn it into an Internet-connected electronic appliance? Not that we’re complaining, of course.

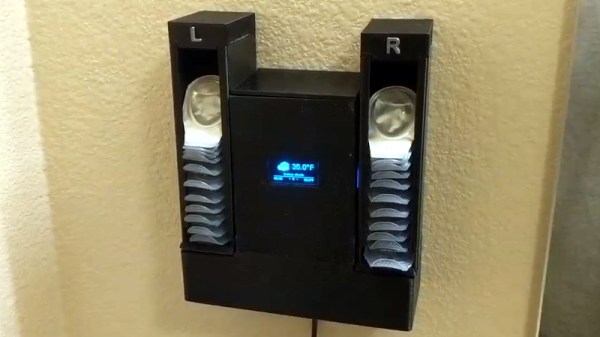
He started out with a simple 3D printed holder for his wall that would let him pull out his daily lenses, which worked well enough and gained some popularity on Thingiverse. But he wondered if there wasn’t some way he could use a servo to automate the process. While he was at it, he might as well play with some of the components he’s been meaning to get some hands-on experience with, such as those little OLED displays all the cool kids are using.

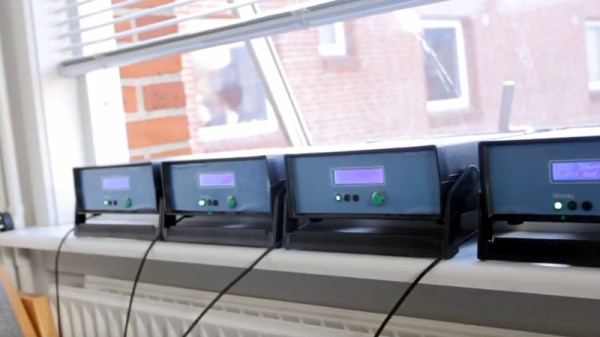
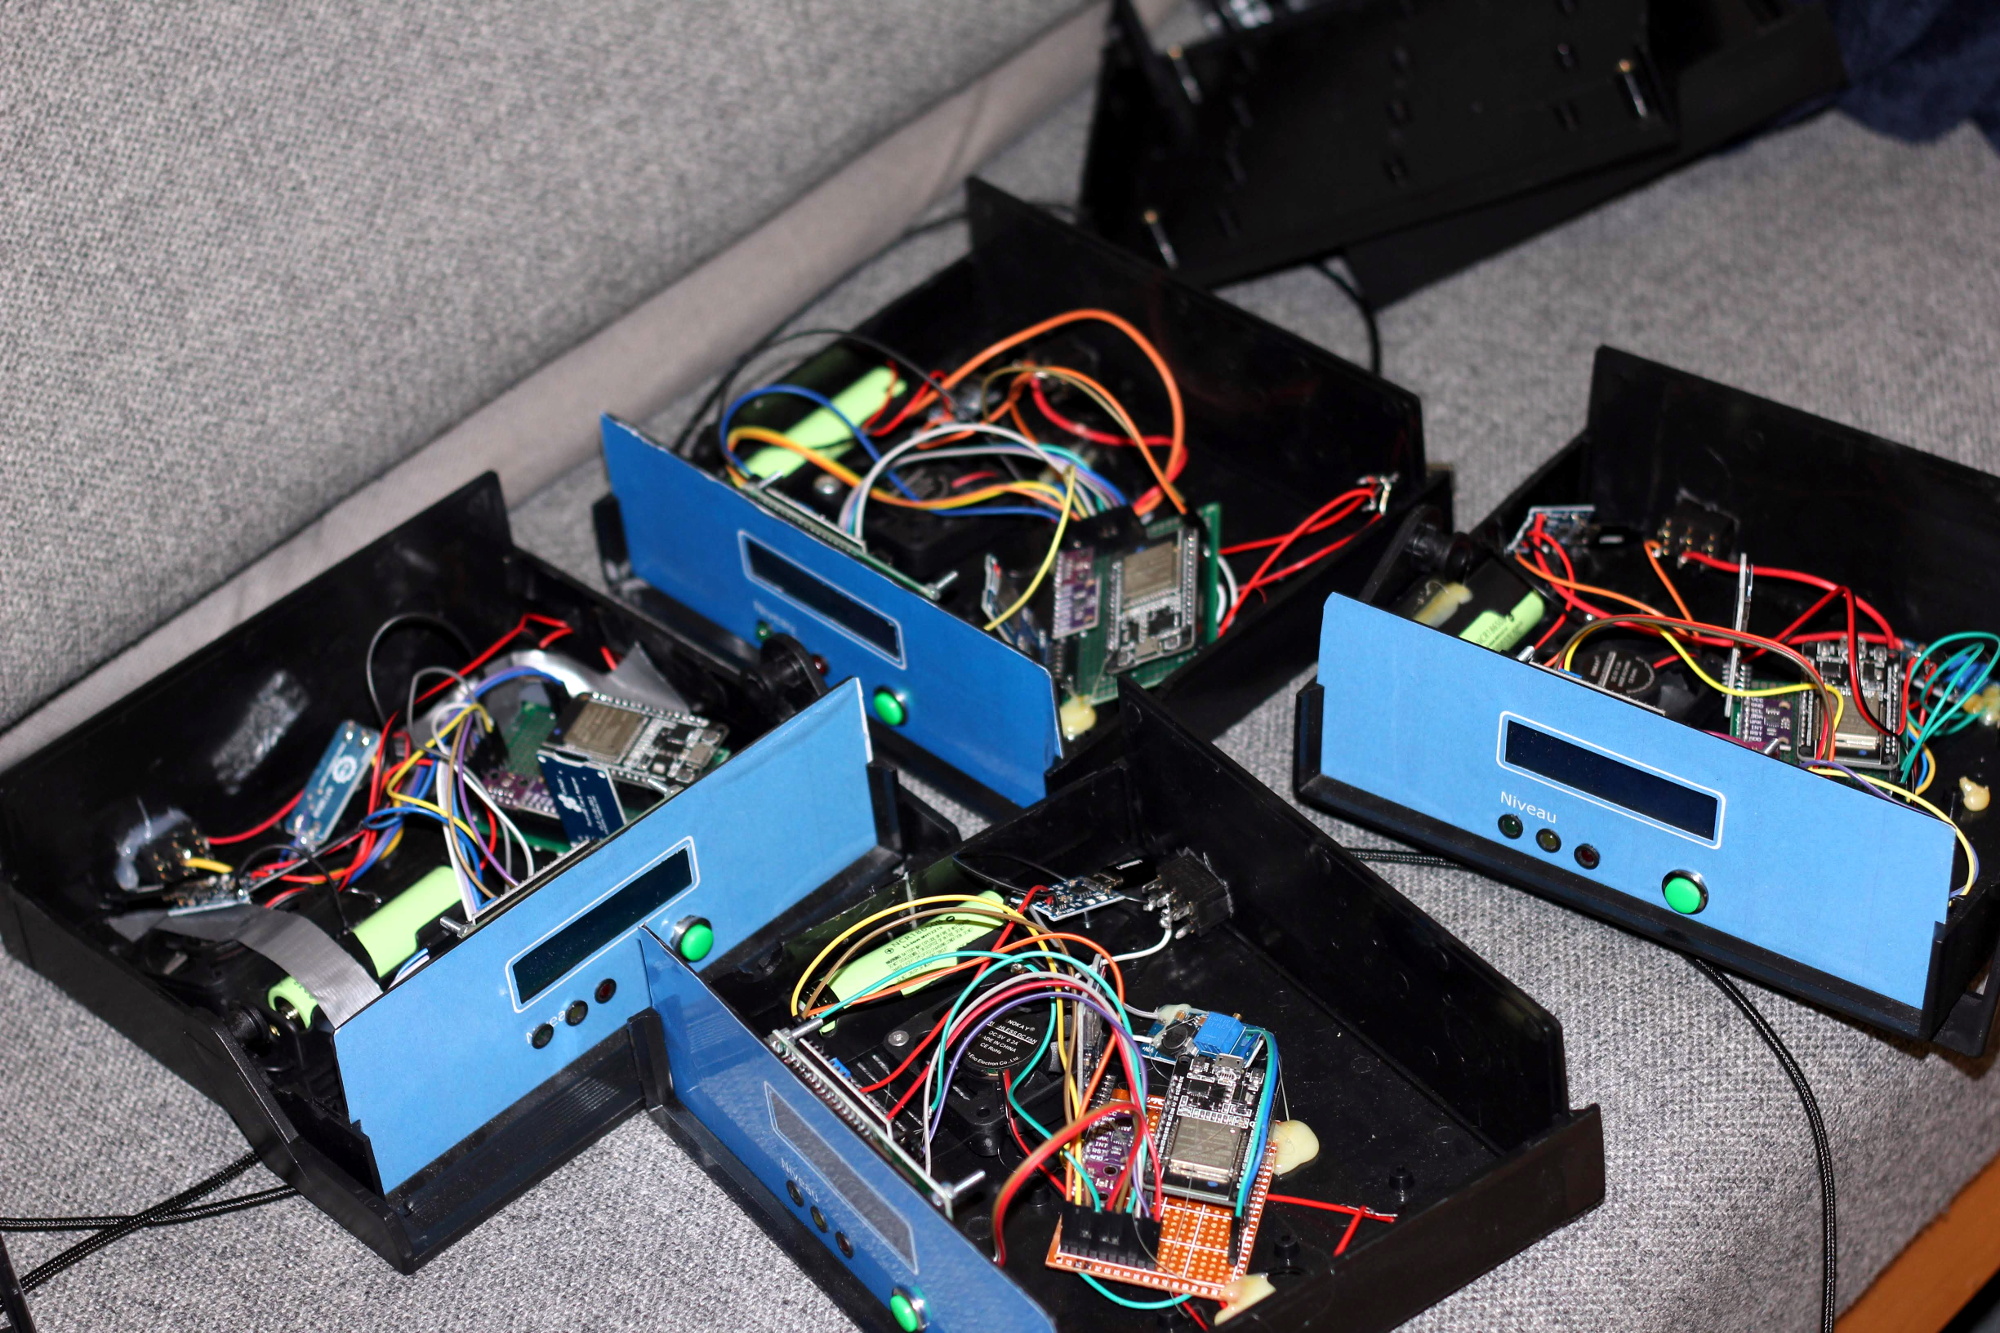
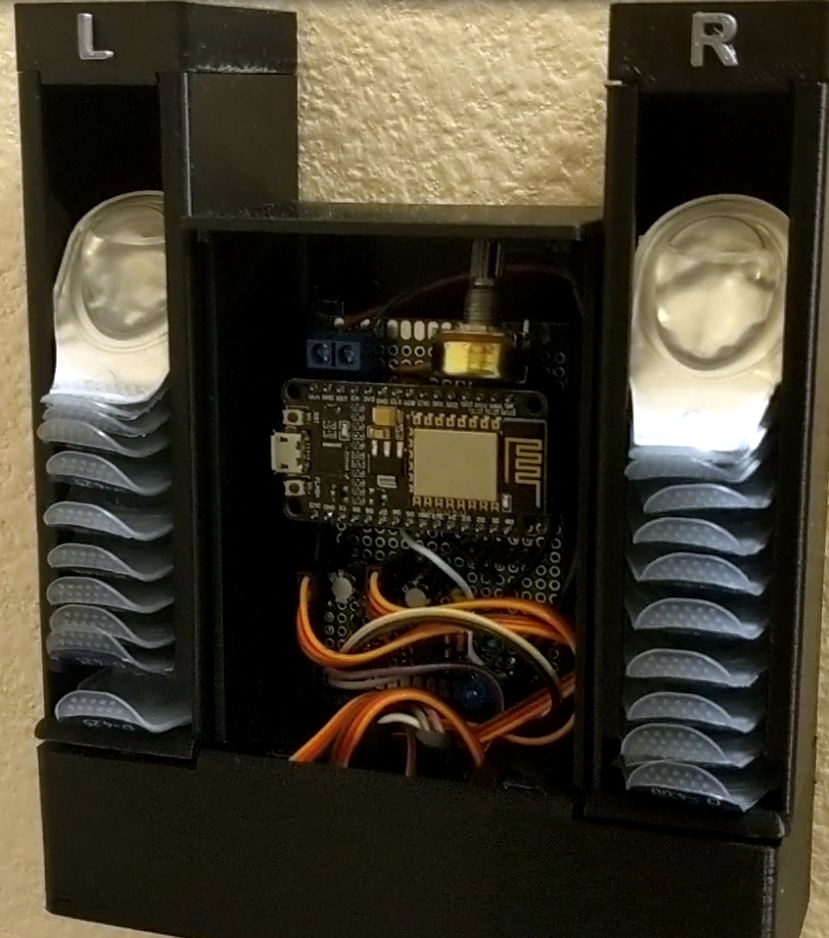
Modifying his original design to incorporate servos in the bottom, he added a central compartment that would house an ESP8266 and a simple proximity sensor made from an IR LED and photodiode. The sensor tends to be a little twitchy, so he left a potentiometer inside the device so he can fine tune it as needed.

Strictly speaking the OLED display isn’t actually required for this project, but since he had a WiFi capable microcontroller sitting there doing basically nothing all day anyway, he added in a feature that shows the weather forecast. It’s not much of a stretch to say that the first thing you’d want to see in the morning after regaining the sense of sight is a readout of what the day’s weather will be, so we think it’s a fairly logical extension of the core functionality. Bonus points if he eventually adds in a notification to remind him it’s time to order more lenses when the dispenser starts getting low.

If you don’t have any contact lenses you need dispensed, never fear. A similar concept can be used to fire off your customized swag at hacker events. Don’t have any of that either? Well in that case you can always build a candy dispenser for Halloween.

Continue reading “A Contact Lens Launcher That Knows The Weather”

Recreating Classic Model Kits With Modern Tech

It used to be that if you wanted to make a nice scale model of an airplane, you’d be building the frame out of thin balsa ribs and covering it all up with tissue paper. Which incidentally was more or less how they built most real airplanes prior to the 1930s, so it wasn’t completely unreasonable to do the same on a smaller scale. But once injection molded plastics caught on, wood and tissue model kits largely went the way of the dodo.

[Marius Taciuc] wanted to share that classic model building experience with his son, but rather than trying to hunt down balsa kits in 2019, he decided to recreate the concept with modern techniques. His model of the Supermarine Spitfire, the vanguard of the British RAF during the Second World War, recreates the look of those early model kits but substitutes 3D printed or laser cut components for the fragile balsa strips of yore. The materials might be high-tech, but as evidenced by the video after the break, building the thing is still just as time consuming as ever.

Using a laser cutter to produce the parts would be the fastest method to get your own kit put together (you could even cut the parts out of balsa in that case), but you’ll still need a 3D printer for some components such as the propeller and cowling. On the other hand, if you 3D print all the parts like [Marius] did, you can use a soldering iron to quickly and securely “weld” everything together. For anyone who might be wondering, despite the size of the final plane, all of the individual components have been sized so everything is printable on a fairly standard 200 x 200 mm print bed.

While there’s no question the finished product looks beautiful, some might be wondering if it’s really worth the considerable effort and time necessary to produce and assemble the dizzying number of components required. To that end, [Marius] says it’s more of a learning experience than anything. Sure he could have bought a simplified plastic Spitfire model and assembled it with his son in an afternoon, but would they have really learned anything about its real-world counterpart? By assembling the plane piece by piece, it gives them a chance to really examine the nuances of this legendary aircraft.

We don’t often see much from the modeling world here on Hackaday, but not for lack of interest. We’ve always been in awe of the lengths modelers will go to get that perfect scale look, from the incredible technology packed into tiny fighter planes to large scale reproductions of iconic engines. If you’ve got some awesome model making tips that you think the Hackaday readership might be interested in, don’t be shy.

Continue reading “Recreating Classic Model Kits With Modern Tech”

Building An Army Of ESP32 Air Quality Sensors

The ESP8266 and its heavyweight sibling the ESP32 are fantastic boards to develop with as they allow you to quickly and easily get a project online. Just tack a few sensors and some LEDs on them, and you’re well on the way to producing your own “Internet of Things”. The real challenge is utilizing the incredible capabilities these boards offer us to do something meaningful.

Judging by what he’s got so far, we think [Samuel Klit] is well on his way. He’s using the ESP32 and some off-the-shelf modular components to create an Internet-connected air quality monitoring station. But he’s not just building one or two of them, he’s building enough so they can be distributed and collect data over a wide area. Who knows, perhaps you’ll be building one next.

[Samuel] is using the CCS811 sensor which can pick up potentially harmful Volatile Organic Compounds (VOCs) and determine carbon dioxide concentrations, as well as a BMP280 sensor to read ambient temperature and atmospheric pressure. There’s also an SD card reader for local data storage, a 1602 LCD display that provides a basic user interface, and the electronics required to support the 18650 Li-Ion batteries which power the unit for up to 12 hours on a charge. Everything’s held in a professional looking enclosure that we’ll be sure to add to our next AliExpress order.

Collecting data is one thing, but what do you do with it once you’ve got it? To that end, each node runs a web interface that not only allows you to view current hardware status and download the locally stored data, but also provides an easy to understand visual representation of the environmental conditions. To get around the limited storage space for web assets on the chip, [Samuel] is calling out to Chart.js to inject some slick graphics into the web interface on-demand. The web interface is a particularly nice touch, and an excellent use of the power and capabilities offered by the ESP32.

We’ve previously seen air quality sensors added to Taxi cabs in Peru, the homes surrounding Barcelona’s Plaza del Sol, and of course [Radu Motisan] has done incredible work towards the goal of creating city-wide environmental monitoring networks. With increasingly capable technologies, it looks like citizens are studying the world around them in greater numbers than ever before.

Continue reading “Building An Army Of ESP32 Air Quality Sensors”

WOPR: Building Hardware Worth Sharing

It wouldn’t be much of a stretch to assume that anyone reading Hackaday regularly has at least progressed to the point where they can connect an LED to a microcontroller and get it to blink without setting anything on fire. We won’t even chastise you for not doing it with a 555 timer. It’s also not a stretch to say if you can successfully put together the “Hello World” of modern electronics on a breadboard, you’re well on the way to adding a few more LEDs, some sensors, and a couple buttons to that microcontroller and producing something that might come dangerously close to a useful gadget. Hardware hacking sneaks up on you like that.

Here’s where it gets tricky: how many of us are still stuck at that point? Don’t be shy, there’s no shame in it. A large chunk of the “completed” projects that grace these pages are still on breadboards, and if we had to pass on every project that still had a full-on development board like the Arduino or Wemos D1 at its heart…well, let’s just say it wouldn’t be pretty.

Of course, if you’re just building something as a personal project, there’s often little advantage to having a PCB spun up or building a custom enclosure. But what happens when you want to build more than one? If you’ve got an idea worth putting into production, you’ve got to approach the problem with a bit more finesse. Especially if you’re looking to turn a profit on the venture.

At the recent WOPR Summit in Atlantic City, there were a pair of presentations which dealt specifically with taking your hardware designs to the next level. Russell Handorf and Mike Kershaw hosted an epic four hour workshop called Strategies for your Projects: Concept to Prototype and El Kentaro gave a fascinating talk about his design process called Being Q: Designing Hacking Gadgets which together tackled both the practical and somewhat more philosophical aspects of building hardware for an audience larger than just yourself.

Continue reading “WOPR: Building Hardware Worth Sharing”

Arcade With LED Marquee Shows Off Your Game

We’ve seen a lot of arcade machine builds here on Hackaday. Seriously, a lot. Even more so since the Raspberry Pi took over the world and made it so you didn’t have to cannibalize an old laptop to build one anymore. It’s one of those projects with huge appeal: either you’re somebody who’s built their own arcade, or you’re somebody who wishes they had. But even after seeing all these builds, we occasionally come across a specimen that deserves special recognition.

LED display controller

[Al Linke] recently wrote in to tell us about his arcade build, which we think you’ll agree is worth a closer look. The core build is actually a modification of a previously published design, but what makes this one unique is the addition of a programmable LED matrix in the top that actually shows the logo and artwork for whatever game you’re currently playing. This display really helps sell the overall look, and instantly makes the experience that much more authentic. Sure you don’t need the marquee of your home arcade machine to show era-appropriate artwork…but we know you want it to.

So how does one interface their Raspberry Pi with this beautiful 64×32 LED marquee display? Well it just so happens that [Al] is in the business of making cool LED displays, and even has a couple successful Kickstarter campaigns under his belt to prove it. He’s developed a board that lets you easily connect up to low-cost HUB75 LED panels such as the one used in the arcade. It’s been a few years since we’ve last seen a project that tackled these specific LED displays, and it’s encouraging to see how far things have come since then.

Even if you’re somehow not in love with the LED marquee, this build really does stand on its own as a fantastic example of a desktop arcade machine. [Al] went to great length to document his build, including putting together several videos during different phases of construction. If you’re curious about the start of the art for home arcade builds, this project would be a pretty good one to use as a barometer.

Whether it’s a full-size replica of the machine you spent your youth standing in front of, or an entirely new design made to your exacting specifications, there’s few projects that are a better conversation starter than one of these beauties blinking away in your living room.

Continue reading “Arcade With LED Marquee Shows Off Your Game”

Developing The Ultimate Open Source Radio Control Transmitter

While we’ve come a long way in terms of opening up the world of radio control to open source software, a good deal of the hardware itself is still closed up. You can flash a cheap RC transmitter with a community developed firmware, in fact there’s a decent chance that’s what it ships with, but the hardware itself is still an immutable black box. That might be fine if you’re just flying an RC plane or quadcopter, but what if you’ve got something a bit more advanced in mind?

An in-development version of the hardware.

To address this issue, [Alireza Safdari] has spent the last several years working on a truly open source RC transmitter that can be modified and augmented to meet the user’s needs, called the Alpha V1. With the hardware and software nearing completion, he’s looking to get some community feedback on the system before the planned crowdfunding campaign kicks off.

From his personal experience, [Alireza] found that traditional RC transmitters have their limits when you start using them for robotics. You’ll often want input schemes or devices which would never occur to the remote’s designers, and you’ll almost certainly want to have more channels and functions than the original hardware will allow. One of the big advantages with the Alpha V1 is that the front and back of the controller are simple acrylic panels, meaning you can easily cut openings or drill holes in them to add more hardware without having to deal with the (relatively) ergonomic shapes of a traditional transmitter.

Of course, that’s only one half of the equation. When you add new hardware, you’ll need to make the software aware of it. To that end, [Alireza] says he and his team have developed a library of adaptable firmware modules which should make it very easy to add in new components without having to get bogged down with software configuration. In fact, he says the goal is to allow the user to add new hardware to the Alpha V1 without requiring them to write a single line of code.

The Alpha V1 communicates at 2.4 GHz using either XBee or Murata DNT24 radios, and supports as many as 72 individual channels as well as two-way telemetry. If your requirements aren’t quite so high, we recently covered a significantly less intimidating attempt at building an open source RC transmitter that might suit your needs.

Raspberry Pi Breathes Life Into A Scale Model SEGA

Miniature game consoles are all the rage right now. Many of the big names in gaming are releasing their own official “mini” versions of their classic machines, but naturally we see plenty of DIY builds around these parts as well. Generally they’re enclosed in a 3D printed model of whatever system they’re looking to emulate, but as you might expect that involves a lot of sanding and painting to achieve a professional look.

But for SEGA Genesis (or Mega Drive as it was known outside the US) fans, there’s a new option. A company by the name of Retro Electro Models has released a high-fidelity scale model of SEGA’s classic console, so naturally somebody hacked it to hold a Raspberry Pi. Wanting to do the scale detailing of the model justice, [Andrew Armstrong] went the extra mile to get the power button on the front of the console working, and even added support for swapping games via RFID tags.

[Andrew] uses the Raspberry Pi 3 A+ which ended up being the perfect size to fit inside the model. Fitting the Pi Zero would have been even easier, but it lacks the horsepower of its bigger siblings. The RFID reader is connected to the Pi over SPI, and the reed switch used to detect when the power switch has been moved is wired directly to the GPIO pins. The system is powered by a USB cable soldered directly to Pi’s PCB and ran out a small hole in the back of the case.

For input, [Andrew] is using a small wireless keyboard that includes a touch pad and gaming controls. Unfortunately, it has a proprietary receiver which had to be integrated into the system. In a particularly nice touch, he used snipped off component leads to “wire” the receiver’s PCB directly to the pins of the Pi’s USB port. Not only does it look cool, but provides a rigid enough connection that he didn’t even need to glue it down to keep it from rattling around inside the case. Definitely a tip to keep in the back of your mind.

The software side of this project is about what you’d expect for an emulation console, though with the added trickery of loading games based on their RFID tag. At this point [Andrew] only has a single “cartridge” for the system, so he simply drops the tags into the cartridge slot of the console to load up a new title. It doesn’t look like Retro Electro Models is selling loose cartridges (which makes sense, all things considered), so there might still be a job for your 3D printer yet if you want to have a library of scale cartridges to go with your console.

For those of you who were on Team Nintendo in the 1990’s, we’ve seen a similar build done with a 3D printed case. Of course, if even these consoles are a bit too recent for your tastes, you could build a miniature Vectrex instead.

Continue reading “Raspberry Pi Breathes Life Into A Scale Model SEGA”