Preserving Floppy Disks Via Logic Analyser

The floppy disk is a technology that is known only to the youth of today as the inspiration for the Save icon. There’s a lot of retro computing history tied up in these fragile platters, thus preservation is key. But how to go about it? [CHZ-Soft] has found an easy way, using a logic analyzer and a healthy dose of Python.

Floppy drives have particularly low-level interfaces, offering up little more than a few signals to indicate the position of the head on the disk, and pulses to indicate changes in magnetic flux. The data is encoded in the pattern of flux changes. This has important implications as far as preservation goes – it’s best to record the flux changes themselves, and create an image of the exact magnetic state of the disk, and then process that later, rather than trying to decode the disk at the time of reading and backing up just the data itself. This gives the best likelihood of decoding the disk and preserving an accurate image of floppy formats as they existed in the real world. It’s also largely platform agnostic – you can record the flux changes, then figure out the format later.

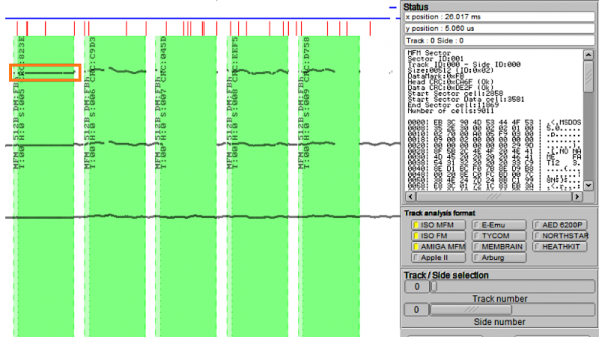
[CHZ-Soft] takes this approach, explaining how to use a Saleae logic analyser and a serial port to control a floppy drive and read out the flux changes on the disk. It’s all controlled automatically through a Python script, which automates the process and stores the results in the Supercard Pro file format, which is supported by a variety of software. This method takes about 14MB to store the magnetic image of a 720KB disk, and can even reveal a fingerprint of the drive used to write the disk, based on factors such as jitter and timing.

It’s an impressive hack that shows that preservation-grade backups of floppy disks can be achieved without spending big money or using specialist hardware. We’ve seen other projects in this space before, too.
Make Your Own Dowels At Home

Dowels are a useful woodworking technology making it easy to connect several pieces of timber, particularly with the aid of adhesive. However, depending on where you live, it can be difficult to come by a wide variety of stock. This is particularly important if you’re concerned about appearances – cheap pine dowels could spoil the look of a delicately finished hardwood piece, for example.

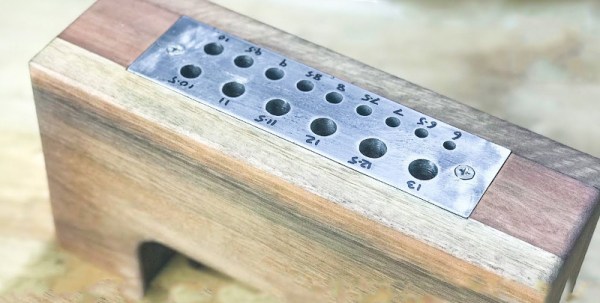
Thankfully, it’s easy to make your own dowels at home. [Pask Makes] has used a simple dowel plate before, but this time, decided to build the deluxe version. A thick steel plate is drilled with a series of holes, and then mounted to a wooden block. Square stock can then be forced through the holes to produce the dowels.

[Pask] notes that there are several methods to use the dowel plate. Hammering the wood stock through the holes works best for hardwoods, while fitting the square stock into the chuck of a power drill and forcing it through while spinning gives a better finish on softer woods. There are also useful tips on how best to produce dowels, with notes on strength and grain orientation.

It’s a useful tool to have in your workshop, and means you can turn just about any wood into dowels for your woodworking projects. If you’re fresh to the world of wood, worry not – we’ve got the primer to get you started. Video after the break.

Continue reading “Make Your Own Dowels At Home” →

Bad Apple!! Via The Arduino Mega

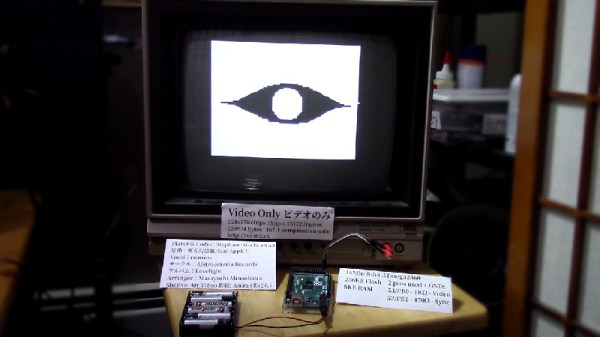
The Arduino Mega is a useful tool for the maker. Generally, once one has come up with plans for blinking LEDs that require more IO than is available on the Arduino Uno, one graduates to the Mega and goes for broke. However, it’s not typically what we’d consider as our first choice for video work. [Stephane] begs to differ, and coded this Bad Apple!! demo for the Arduino Mega 2560.

For those unfamiliar, video on the Arduino is actually somewhat of a solved problem – merely requiring a pair of resistors and some nifty code. The real meat of this hack is the video storage itself. It’s been done before, but by streaming data off an SD card or serial link. [Stephane] was determined to store everything on the Arduino itself, and thus the hack begun. Video data is stored as 1 bit per pixel, as it’s a simple black and white video as per the original inspiration. LZ77 compression was used to cram the data down without requiring too much RAM, which is a limited resource on the Mega. It’s video only, as the Mega is tapped out handling 3 minutes and 39 seconds of video storage, but future work may include syncing with a second Arduino to deliver the soundtrack.

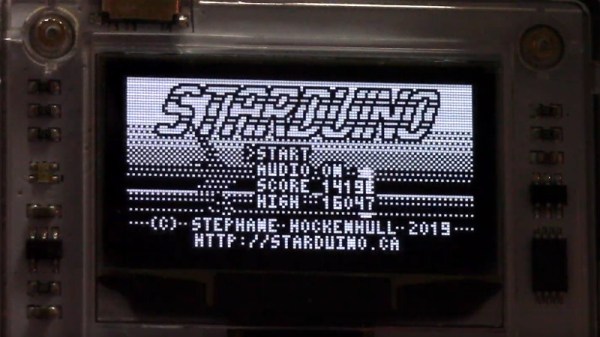
It’s a hack that shows off [Stephane]’s ability to get impressive performance out of limited platforms. We’ve seen this before, with his excellent Star Fox port to the Arduboy. Video after the break.

Continue reading “Bad Apple!! Via The Arduino Mega” →

Star Fox Comes To Arduboy

The original Star Fox for the SNES was a landmark game. With the Super FX chip built into the cartridge, it presented the first 3D accelerated home console experience. The series has spanned several consoles and over two decades. Now, it’s getting an (albeit unofficial) port to the Arduboy, thanks to [Stephane Hockenhull].

Impressively, the game fits in under 28KB, and [Stephane] hasn’t skimped on the development details. The process begun with setting up a basic 3D engine on the Arduboy, followed by some tests of various gameplay ideas. The final implementation bears a strong similarity to the original SNES gameplay. At this point, work moved out of the Arduino IDE into [Stephane]’s custom development environment to speed things along. A PC port was used to save time programming the flash every iteration.

The tricks used to pull this off are many and varied. There are neat hacks used to optimise the storage of the 3D model data, implement lightweight collision detection, and generate random levels. Everything was done in order to make the game fit into the smallest space possible.

Running smooth 3D graphics on a 16MHz 8-bit microcontroller is an impressive feat, and a testament to [Stephane]’s coding abilities. We can’t wait to see more 3D development on the platform. Meanwhile, if the Arduboy doesn’t quite have the look you want, there’s a solution for that too. Video after the break.

Continue reading “Star Fox Comes To Arduboy” →

Modular Feeders For SMD Component Tape

Making one of something is pretty easy, and making ten ain’t too bad. But what if you find yourself trying to make a couple of hundred of something on your home workbench? Suddenly, small timesavers start to pay dividends. For just such a situation, you may find these modular SMD tape feeders remarkably useful.

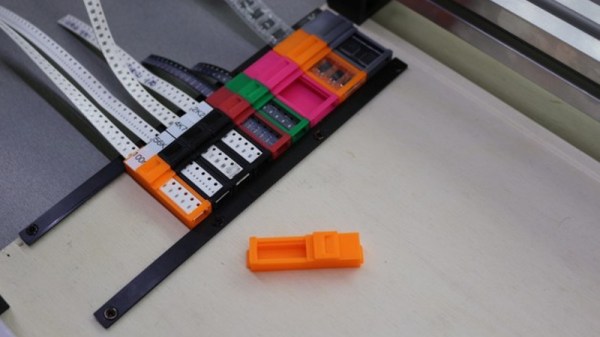
The tape feeders come in a variety of widths, to suit different size tapes. You’ve probably seen if you’ve ever ordered SMD components in quantity from Mouser, Digikey, et al. SMD components typically ship on large tape reels, which are machine fed into automated pick and place machines. However, if you’re doing it yourself in smaller quantities, having these manual tape feeders on your desk can be a huge help. Rather than having scraps of tapes scattered across the working surface, you can instead have them neatly managed at the edge of your bench, providing components as required.

The feeders are modular, so you can stack up as many as you need for a given job. Rails are provided to affix them to the relevant work surface. We’ve seen similar work before – like this 3D-printed bowl feeder for SMD parts.


Making Your Breadboard Projects A Little More Permanent

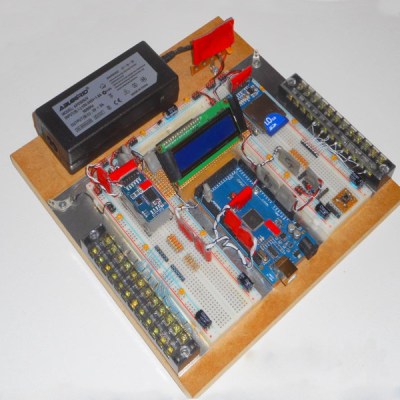
Many a budding electronics maker got their start not with a soldering iron, but with the humble breadboard. With its push connections, the breadboard enables electronics experimentation without requiring the specialised skill of soldering or any dangerous hot tools. What it lacks is a certain robustness that can make all but the simplest projects rather difficult to execute. [Runtime Micro] have shared a few tips on making things just a little more robust, however.

Applied correctly, these techniques have the added bonus of making a project neat, tidy, and easy to troubleshoot.

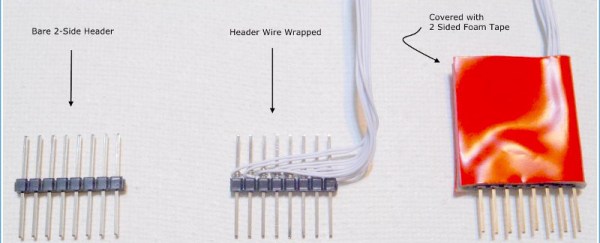
The fundamental principle behind this process is replacing point-to-point jumper wires with custom cables, made using 0.1″ pitch headers and wire-wrapping techniques. Other techniques include pinning down components with Blu-tack, and selecting components with the appropriate wire diameter to avoid them falling out of the breadboard’s spring clip contacts. There are also useful tips on using foam tape for appropriate strain relief.

While breadboards aren’t really suitable for projects dealing with high frequencies and can rapidly become unmanageable, these basic techniques should improve a project’s chance of success. These simple ways of improving connection quality and reducing the likelihood of things falling apart are likely to reduce frustration immensely.

However, once a maker has a taste for corralling electrons to do their bidding, soldering should be the first lesson on the agenda.

[Thanks to stockvu for the tip!]

Sugar As A Bed Adhesive For 3D Printing

3D printers, like most CNC machines, reward careful thought and trial and error. It’s important to use the correct machine settings and to prepare the build environment properly in order to get good results. Fused Filament Fabrication printers rely on melting plastic just so in the production of parts, and have their own set of variables to play with. [Mysimplefix] has been exploring various solutions to bed adhesion and found something that seems to work perfectly, right in the pantry.

That’s right, this solution to the problem of bed adhesion is more commonly stirred into your coffee every morning – it’s sugar. [Mysimplefix] shares their preferred process, consisting of first mixing up a sugar/water solution in the microwave, before applying it to the bed with a paper towel and allowing the water to evaporate off.

Several test prints are then shown, with major overhangs, to show the adhesive capabilities of the sugar. The results are impressive, with parts sticking well while the bed is hot, while being easy to remove once cool. The video deals with PLA, but we’d be interested to see the performance with other materials as well.

It’s a tidy solution, and we’d love to know your thoughts and experiences in the comments. We’ve had a good long think about adhesives ourselves, too.

Continue reading “Sugar As A Bed Adhesive For 3D Printing” →