Bavarian Alps, Dec. 1945:
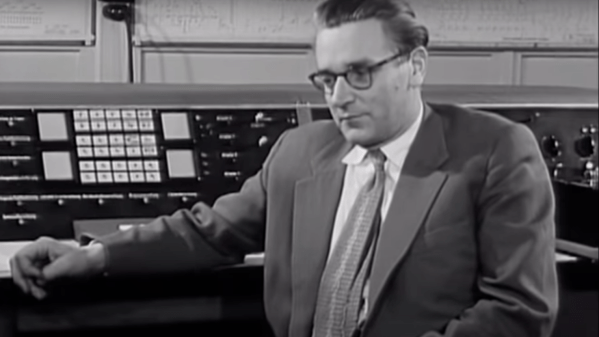
Since 1935, Berlin engineer Konrad Zuse has spent his entire career developing a series of automatic calculators, the first of their kind in the world: the Z1, Z2, Z3, S1, S2, and Z4. He accomplished this with a motley group of engineers, technicians, and mathematicians who were operating against all odds. With all the hardships and shortages of war and the indifference of their peers, the fact that they succeeded at all is a testament to their dedication and resourcefulness. And with the end of the war, more hardships have been piling on.
Two years ago, during the Battle of Berlin, bombers completely destroyed the Zuse family home and adjacent workshops on the Methfesselstraße, where they performed research and fabrication. All of the calculators, engineering drawings, and notes were lost in the rubble, save for the new Z4 nearing completion across the canal in another workshop on Oranienstraße. In the midst of all this, Zuse married in January of this year, but was immediately plunged into another crisis when the largest Allied air raid of the war destroyed the Oranienstraße workshop in February. They managed to rescue the Z4 from the basement, and miraculously arranged for it to be shipped out of the Berlin. Zuse, his family, and colleagues followed soon thereafter. Here and there along the escape route, they managed to complete the final assembly and testing of the Z4 — even giving a demonstration to the Aerodynamics Research Institute in Göttingen.
On arrival here in the Bavarian Alps, Zuse found a ragtag collection of refugees, including Dr Werner Von Braun and a team of 100 rocket scientists from Peenemünde. While everyone here is struggling just to stay alive and find food and shelter, Zuse is further worried with keeping his invention safe from prying eyes. Tensions have risen further upon circulation of a rumor that an SS leader, after three bottles of Cognac, let slip that his troops aren’t here to protect the scientists but to kill them all if the Americans or French approach.
In the midst of all this madness, Zuse and his wife Gisela welcomed a baby boy, and have taken up residence in a Hinterstein farmhouse. Zuse spends his time working on something called a Plankalkül, explaining that it is a mathematical language to allow people to communicate with these new machines. His other hobby is making woodblocks of the local scenery, and he plans to start a company to sell his devices once the economy recovers. There is no doubt that Konrad Zuse will soon be famous and known around the world as the father of automatic computers. Continue reading “The Other First Computer: Konrad Zuse And The Z3” →