Laser Engraver Uses All Of The DVD Drive

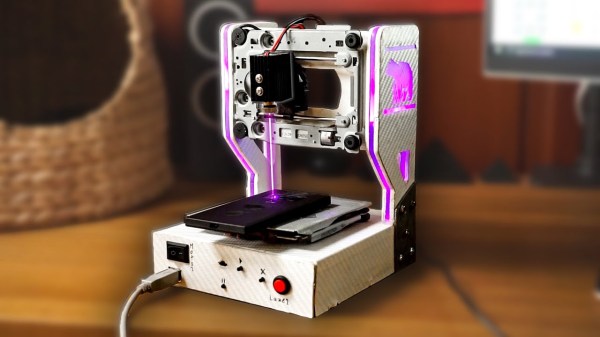
For the last ten to fifteen years, optical drives have been fading out of existence. There’s little reason to have them around anymore unless you are serious about archiving data or unconvinced that streaming platforms will always be around. While there are some niche uses for them still, we’re seeing more and more get repurposed for parts and other projects like this tabletop laser engraver.

The build starts with a couple optical drives, both of which are dismantled. One of the shells is saved to use as a base for the engraver, and two support structures are made out of particle board and acrylic to hold the laser and the Y axis mechanism. Both axes are made from the carriages of the disassembled hard drives, with the X axis set into the base to move the work piece. A high-output laser module is fitted to the Y axis with a heat sink, and an Arduino and a pair of A4988 motor controllers are added to the mix to turn incoming G-code into two-dimensional movement.

We’ve actually seen a commercial laser engraver built around the same concept, but the DIY approach is certainly appealing if you’ve got some optical drives collecting dust. Otherwise you could use them to build a scanning laser microscope.

Continue reading “Laser Engraver Uses All Of The DVD Drive”

Easy Graphene Production With A Laser Engraver

Graphene isn’t easy to produce at scale. But making small batches of graphene is doable in a few ways. [Robert Murray-Smith] decided to try producing “flash graphene.” This requires a big capacitor bank that is moderately expensive, so he decided to explain a different technique he read about using an ordinary laser cutter. Check it out in the video below.

We were a little disappointed that he didn’t actually make any graphene this time. He has, however, used other methods in other videos to create some type of graphene. In fact, he has many similar videos going back quite a ways as well as applications with concrete, capacitors, and more. We understand that this method doesn’t produce monolayer graphene, but actually creates a graphene “foam” with interesting properties. [Robert] talks about recent papers that show you can grow graphene on things other than Kapton tape using this method.

Continue reading “Easy Graphene Production With A Laser Engraver”

I’ve Got Two Turntables And A Laser Engraver

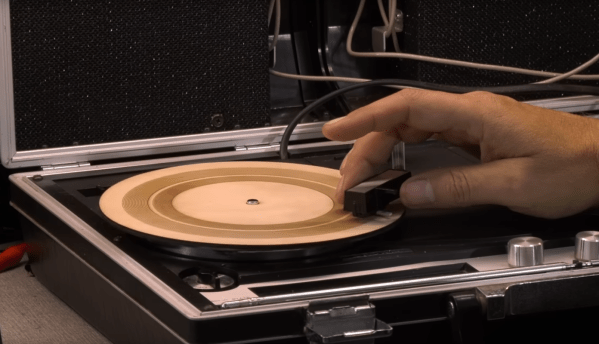
Digital media provides us with a lot of advantages. For something like recording and playing back music, digital copies don’t degrade, they can have arbitrarily high quality, and they can be played in a number of different ways including through digital streaming services. That being said, a number of people don’t feel like the digital experience is as faithful to the original sound as it could be and opt for analog methods instead. Creating analog copies of music is a much tougher matter though, as [Marco] demonstrates by using a laser engraver to produce vinyl records.

[Marco] started this month-long project by assembling and calibrating the laser engraver. It has fine enough resolution to encode analog data onto a piece of vinyl, but he had to create the software. The first step was to generate the audio sample, then process it through a filter to remove some of the unwanted frequencies. From there, the waveform gets made into a spiral, accounting for the changing speed of the needle on the record as it moves to the center. Then the data is finally ready to be sent to the laser engraver.

[Marco] did practice a few times using wood with excellent success before moving on to vinyl, and after some calibration of the laser engraver he has a nearly flawless 45 rpm record ready to hit the turntable. It’s an excellent watch if not for anything than seeing a working wood record. We’ve actually seen a similar project before (without the wood prototyping), and one to play records from an image, but it’s been quite a while.

Thanks to [ZioTibia81] for the tip!

Continue reading “I’ve Got Two Turntables And A Laser Engraver”

Mokeylaser: A DIY Laser Engraver That You Can Easily Build

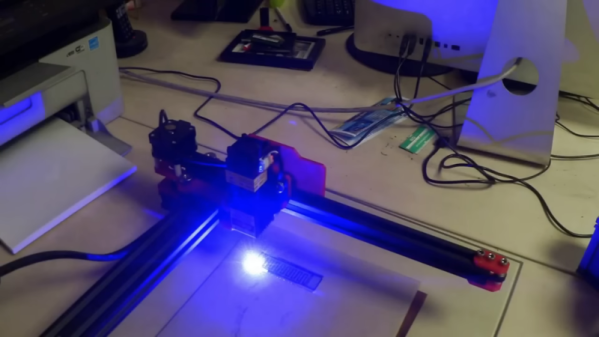
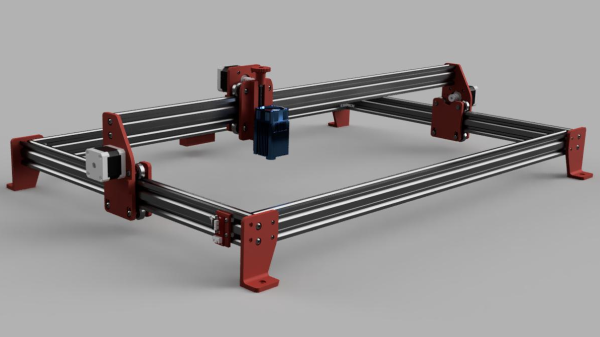
[Mark aka Mokey] borrowed his friend’s open-frame laser engraver for a while, and found it somewhat lacking in features and a bit too pricey for what it was. Naturally, he thought he could do better (video, embedded below.) After a spot of modelling in Fusion 360, and some online shopping at the usual places, he had all the parts needed to construct an X-Y bot, and we reckon it looks like a pretty good starting point. [Mark] had a Sainsmart FL55 5.5W laser module kicking around, so that was dropped into the build, together with the usual Arduino plus CNC shield combo running GRBL.

[Mark] has provided the full F360 source (see the mokeylaser GitHub) and a comprehensive bill-of-materials, weighing in at about $400, and based upon the usual 2040 aluminium extrusions. This makes MokeyLaser a reasonable starting point for further development. Future plans include upgrading the controller to something a bit more modern (and 32-bits) as well as a more powerful laser (we do hope he’s got some proper laser glasses!) and adding air assist. In our experience, air assist will definitely improve matters, clearing out the smoke from the beam path and increasing the penetration of the laser significantly. We think there is no need for more optical power (and greater risk) for this application. [Mark] says in the video that he’s working on an additional build video, so maybe come by later and check that out?

Obviously, MokeyLaser is by no means the only such beast we’ve featured, here’s the engravinator for starters. For even more minimalism, we covered a build with some smart optics doing all the work. But what if you don’t happen to have a 5W laser module “lying around” then perhaps try a more natural heat source instead?

Continue reading “Mokeylaser: A DIY Laser Engraver That You Can Easily Build”

Interesting Optics Make This Laser Engraver Fit In A Pocket

We’re going to start this post with a stern warning: building a laser engraver that can fit in your pocket is probably not a wise idea. Without any safety interlocks and made from lightweight components as it is, this thing could easily tip over and sear a retina before you’d even have time to react. You definitely should not build this, or even be in the same room with it. Got it?

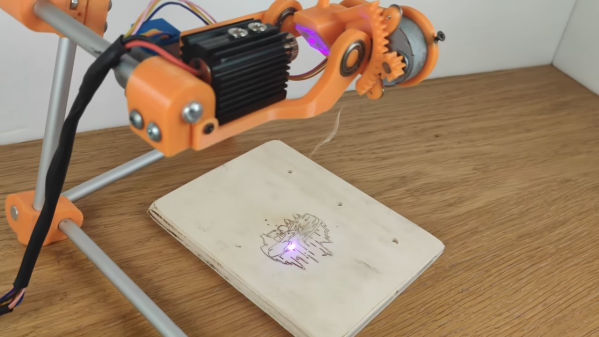
Safety concerns aside, [DAZ] has taken a pretty neat approach to making this engraver, eschewing the traditional X-Y gantry design in favor of something more like the galvanometers used for laser projectors, albeit completely homebrew and much, much slower than commercial galvos. Built mostly of 3D-printed parts, the scanning head of this engraver uses a single mirror riding on an angled block attached to gimbals with two degrees of freedom. The laser module and mirror gimbals are mounted on a stand made of light aluminum so that the whole thing is suspended directly over a workpiece; the steppers slew the mirror to raster the beam across the workpiece and burn a design.

The video below shows it at work, and again, we have to stress that this is about as close to this build as you should get. It shouldn’t be too hard to add some safety features, though — at a minimum, we’d like to see a tilt-switch that kills power if it’s knocked over, and maybe some kind of enclosure. Sure, that would probably spoil the pocketability of the engraver, but is that really a feature valuable enough to risk your eyesight for?

If there’s a laser build in your future, please read our handy guide to homebrew laser cutter safety — before you can’t.

Continue reading “Interesting Optics Make This Laser Engraver Fit In A Pocket”

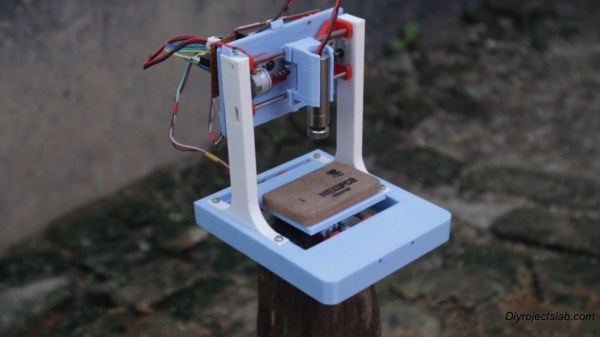
A 3D-printed mini laser engraver made from DVD-RW drive motors.

Mini Laser Engraver Could Carve Out A Place On Your Desk

Got a couple of old DVD-RW drives lying around, just collecting dust? Of course you do. If not, you likely know where to find a pair so you can build this totally adorable and fully dangerous laser engraver for your desk. Check out the complete build video after the break.

[Smart Tronix] doesn’t just tell you to salvage the stepper motors out of the drives — they show you how it’s done and even take the time to explain in writing what stepper motors are and why you would want to use them in this project, which is a remix of [maggie_shah]’s design over on Thingiverse. As you might expect, the two steppers are wired up to an Arduino Uno through a CNC shield with a pair of A4988 motor drivers. These form the two axes of movement — the 250mW laser is attached to x, and the platform moves back and forth on the y axis. We’d love to have one of these to mess around with. Nothing that fits on that platform would be safe! Just don’t forget the proper laser blocking safety glasses!

Need something much bigger that won’t take up a lot of space? Roll up your sleeves and build a SCARA arm to hold your laser.

Continue reading “Mini Laser Engraver Could Carve Out A Place On Your Desk”

Small Footprint Scara Laser Engraver Has Massive Build Area

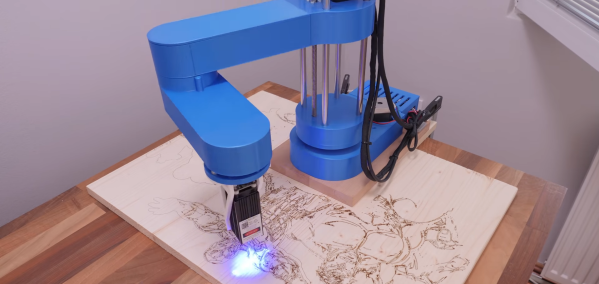
One of the limitations of the conventional Cartesian CNC platforms is that the working area will usually be smaller than its footprint. SCARA arms are one of the options to get around this, as demonstrated by [How To Mechatronics], with his SCARA laser engraver.

This robot arm is modified from the original build we featured a while back, which had a gripper mounted. It uses mainly standard 3D printer components with 3D printed frame parts. The arms lengths are sized to fold over the base and take up little table horizontal space when not in use. It can work in a large semi-circular area around itself, and if a proper locating and homing method is implemented, it can be moved around and engrave a large area section by section.

One of the challenges of SCARA arms is rigidity. As the cantilevered arm extends, it tends to lean over under its weight. In [How To Mechatronics]’s case, it showed up as skewed engravings, which he managed to mitigate to some degree in the Marlin firmware.

Another possible solution is to reduce the weight of the arms by moving the motors to the base, as was done with the Pybot or dual-arm SCARA printers like the RepRap Morgan.

Continue reading “Small Footprint Scara Laser Engraver Has Massive Build Area”