Universal Serial Bus has been the de facto standard for sending information to and from computer peripherals for almost two decades, but despite the word “universal” in the name this wasn’t always the case. Plenty of competing standards, including USB, existed in the computing world in the decades before it came to dominance, and if you’re trying to recover data from a computer without USB you might have to get creative with how it’s done.
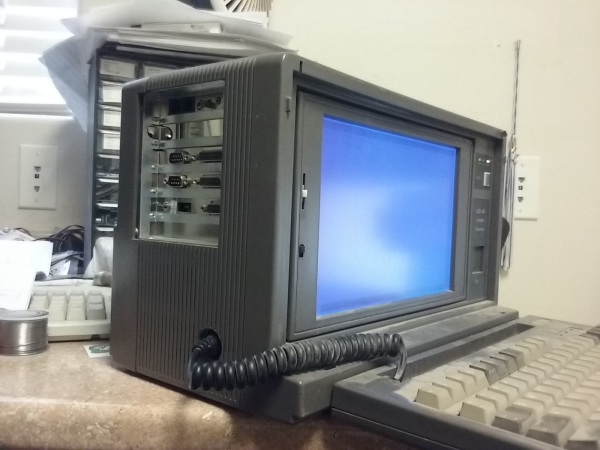
[Ben] recently came across a 80486 with this problem, so he had to get creative to recover the contents of the drive. He calls it the “lunchbox” computer due to its form factor, and while it doesn’t have USB it does have a tried-and-trusted serial port to communicate with other computers. [Ben] wrote up a piece of software for both the receiving computer and the sending computer in order to copy the drive sectors one by one across a serial link to a standalone computer running Windows XP, and was able to recover the contents of the drive that way instead.
All of the code [Ben] wrote is available on his GitHub page for anyone looking to boot up a 30-year-old computer again. While it might sound uncommon, computers of this vintage are still around running things like CNC machines or old mainframes.