Updating A 1999 Saab With An Arduino

Unless your car is fresh off the lot, you’ve probably had the experience of riding in a newer car and seeing some feature or function that triggered a little pang of jealousy. It probably wasn’t enough for you to run out and sign yourself up for a new car loan (which is what the manufacturer was hoping for), but it was definitely something you wished your older model vehicle had. But why get jealous when you can get even?

[Saabman] wished his 1999 Saab 9-5 had the feature where a quick tap of the turn signal lever would trigger three blinks of the indicator. Realizing this was an electronic issue, he came up with a way to retrofit this function into his Saab by adding an Arduino Pro Micro to the vehicle’s DICE module.

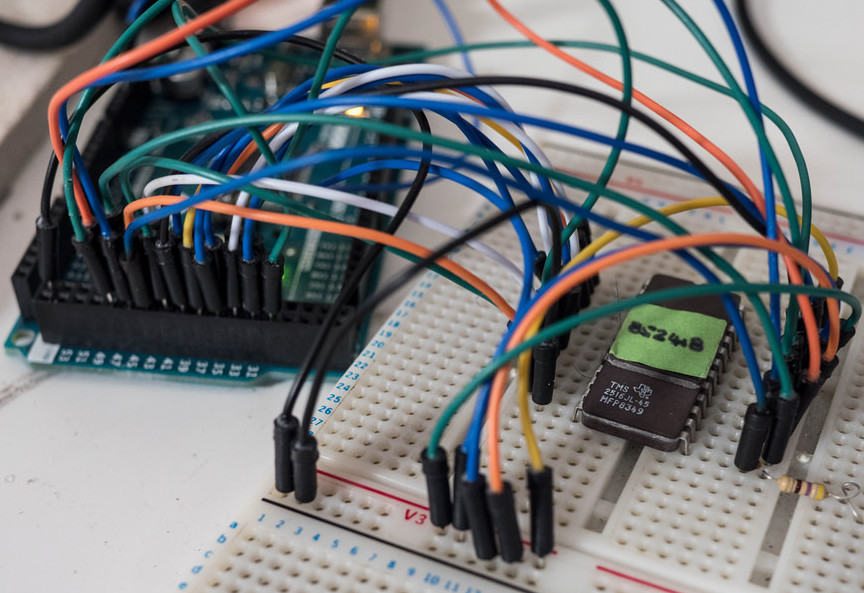
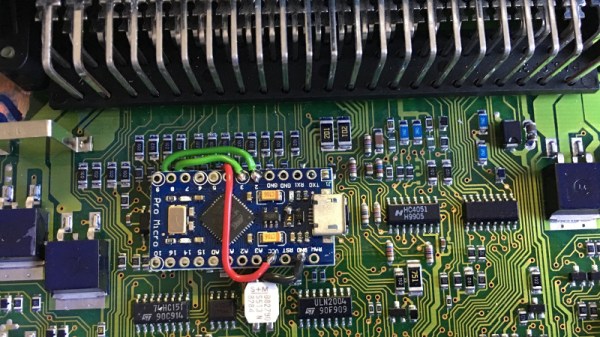
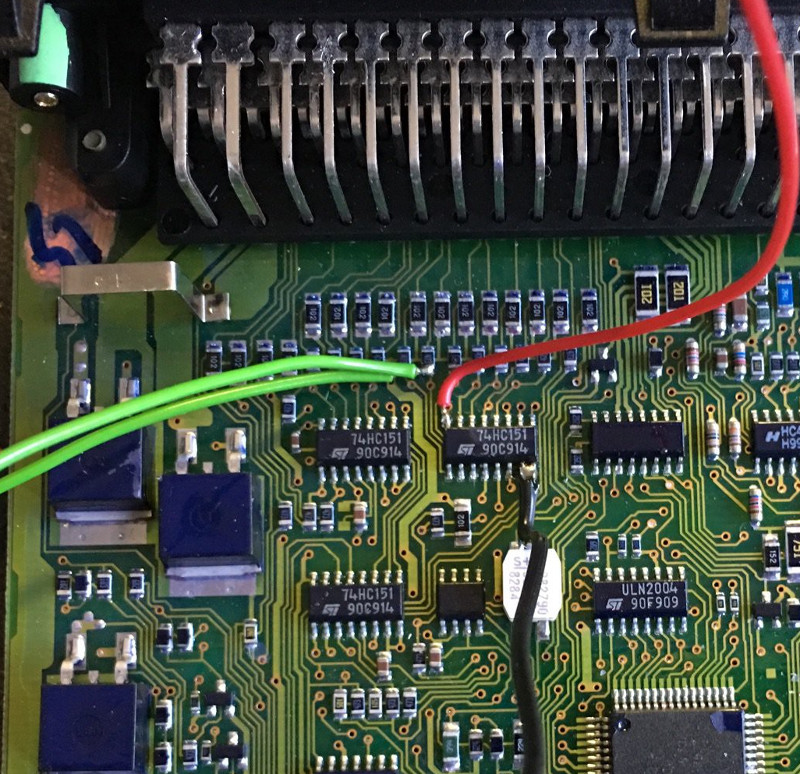
The DICE (which stands for Dashboard Integrated Central Electronics) module controls many of the accessories in the vehicle, such as the lighting and wipers. In the case of the blinkers, it reads the state of the signal lever switches and turns the blinkers on and off as necessary. After poking around the DICE board, [Saabman] found that the 74HC151 multiplexer chip he was after: the state of the blinker switches could be read from pins 1 and 2, and he’d even be able to pull 5 V for the Arduino off of pin 16.

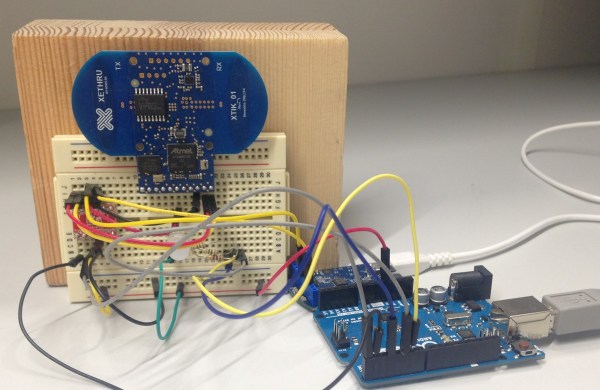
After prototyping the circuit on a breadboard, [Saabman] attached the Pro Micro to the top of the 74HC151 with some double sided tape and got to work on refining the software side of the project. The Arduino reads the state of the turn signal switches, and if they flick on momentarily it changes the pin from an input to an output and brings it high for three seconds. This makes the DICE module believe the driver is holding the turn lever, and will keep the blinkers going. A very elegant and unobtrusive way of solving the problem.

Hackers aren’t complete strangers to the garage; from printing hard to find parts to grafting in their favorite features from other car manufacturers, this slick Saab modification is in good company.

Continue reading “Updating A 1999 Saab With An Arduino”

Reviving An Electron Microscope With Arduino

We don’t know about you, but when our friends ask us if we want to help them fix something, they’re usually talking about their computer, phone, or car. So far it’s never been about helping them rebuild an old electron microscope. But that’s exactly the request [Benjamin Blundell] got when a friend from a local hackerspace asked if he could take a look at a vintage Cambridge Stereoscan 200 they had found abandoned in a shed. Clearly we’re hanging out with the wrong group of people.

As you might imagine, the microscope was in desperate need of some love after spending time in considerably less than ideal conditions. While some of the hackerspace members started tackling the hardware side of the machine, [Benjamin] was tasked with finding a way to recover the contents of the scope’s ROM. While he’s still working on verification, the dumps he’s made so far of the various ROMs living inside the Stereoscan 200 have been promising and he believes he’s on the right track.

The microscope uses a mix of Texas Instruments 25L32 and 2516 chips, which [Benjamin] had to carefully pry out after making sure to document everything so he knew what went where. A few of the chips weren’t keen on being pulled from their home of 30-odd years, so there were a few broken pins, but on the whole the operation was a success.

Each chip was placed in a breadboard and wired up to an Arduino Mega, as it has enough digital pins to connect without needing a shift register. With the wiring fairly straightforward, [Benjamin] just needed to write up some code to read the contents of the chip, which he has graciously provided anyone else who might be working on a similar project. At this point he hasn’t found anything identifiable in his ROM dumps to prove that they’ve been made successfully, all he really knows right now is that he has something. At least it’s a start.

More and more of these older electron microscopes are getting a second lease on life thanks to dedicated hackers in their home labs. Makes you wonder if there’s ever going to be a piece of hardware the hacker community won’t bend to their will.

LiftLocker Keeps Your Lift Safe From Attacking Garage Doors

Car lifts used to be a tool reserved for professional mechanics. Times are a-changing though. With the advent of reasonably priced four-post hydraulic lifts, more and more shade tree mechanics are joining the five-foot high club. Installing a lift in a home garage creates a few hazards, though. What happens when a family remotely opens the garage door while there is a car up on the lift? Garage door and lifted vehicle will meet – with expensive and/or dangerous results. [Joe Auman] saw this problem coming a mile away. He built the LiftLocker to make sure it never happens to him.

At its core, LiftLocker is a set of switched extension cords. Two cast-aluminum boxes hide the electronics. One box plugs in-line with the lift. The other box plugs in-line with the garage door opener. Each box includes a Sparkfun Redboard Arduino compatible, an RFM22 433 MHz Radio, and a relay. Input comes from a security system magnetic reed-switch. Both boxes are identical in hardware and code.

Operation is simple. One box and reed switch goes on the lift, the other on the garage door. If the lift is going up, its reed switch will open. The lift’s Arduino detects this and commands its RFM22 to send a signal to the other box on the garage door. Upon receiving this signal, the garage door controller will open its relay, disconnecting power to the garage door opener. Communication is two-way, so if the Lift controller doesn’t hear an ACK message from the garage door controller, everything will shut down. Click past the break to see the system in action.

Continue reading “LiftLocker Keeps Your Lift Safe From Attacking Garage Doors”

Newsflash: A Bunch Of Arduinos Is Not An Autonomous Car

Nobody’s perfect. Sometimes you’re up late at night writing a blog post and you stumble upon an incredible story. You write it up, and it ends up being, well, incredible. IEEE Spectrum took the bait on this video (embedded below) where [Keran McKenzie] claims to have built a self-driving car for under $1,000 AUS with Arduinos.

The video is actually pretty funny, and we don’t think it’s intended to be a mass-media hoax as much as a YouTube joke. After letting the car “take over” for a few seconds, it swerves and [Keran] pretends to have hit something. (He’s using his knees people!) There are lots of takes with him under the car, and pointing at a single wire that supposedly makes the whole thing work. Yeah, right.

Continue reading “Newsflash: A Bunch Of Arduinos Is Not An Autonomous Car”

Fingerprint Garage Door Won’t Open Every Time A Neighbor Microwaves A Burrito

With three kids, including himself, [Dave] faced the very real likelihood of someone absent-mindedly leaving the garage door open and being robbed blind. Rather than installing some plebeian solution, he compiled a feature list. And what a feature list it is!

The garage door needed to notify him of its status with strategically placed LEDs around the house, and give him full control on his devices. He wanted to open and close it using his existing key-code entry system. Lastly, it would be extra-cool if he could add some biometrics to it; in this case, a fingerprint sensor.

The core hardware is the staple Arduino augmented with a fingerprint module, a touch screen, some vitamins, and a WiFi break-out. He also worked up some casings in tinkercad: one for the indoor hardware, another with a flip cover for the outdoor fingerprint scanner.

We think [Dave] has accomplished what he set out to. We can just picture the would-be-thief staring at the finger print scanner and moving their operation one house over where the world is simpler. Video after the break.

Continue reading “Fingerprint Garage Door Won’t Open Every Time A Neighbor Microwaves A Burrito”

Using Arduino For Quadcopter Spectrum Analyzers

First-person-view (FPV) flying, by adding a camera, video transmitter, and video goggles to the meat on the ground, is one of the best ways to experience remote-controlled flight. For just a few hundred dollars, it’s the closest thing you’re going to get to growing wings and flying through the trees of your local park. One of the most popular and cheapest ways to go about this is the Boscam RX5808 wireless receiver – a $9 module able to pull down video from an aircraft over 5.8GHz radio. Stock, this radio module is just okay, but with a few modifications, it can be turned into a very good receiver with a spectrum analyzer and autoscan.

The Boscam RX5808 has three DIP switches to allow for eight different channels for receiving video, and this is where most RC hobbyists stop. But the module also has a very capable SPI interface, and by adding a simple Arduino, the complete capabilities of this receiver can be unlocked.

The core software for the build is [markohoepken]’s rx5808-pro and rx5808_pro_osd, and [crazyheea]’s rx5808-pro-diversity to enable all the capabilities available in the RX5808 receiver. With an off-the-shelf LCD, this mess of wires and boards turns into an auto-scanning spectrum analyzer that’s also able to put video from a drone onto a screen.

[garagedrone] put together a very complete demo video of the entire build. You can check that out below.

Continue reading “Using Arduino For Quadcopter Spectrum Analyzers”

Arduino Radar Watches You Breathe

We’ve all likely watched an episode of “Star Trek” and admired the level of integration on the sick bay diagnostic bed. With its suite of wireless sensors and flat panel display, even the 1960s imagining of the future blows away the decidedly wired experience of a modern-day ICU stay. But we may be getting closer to [Dr. McCoy]’s experience with this radar-based respiration detector.

[Øyvind]’s build, which takes the origin of the term “breadboard” to heart, is based on a not-inexpensive Xethru module, which appears to be purpose-built for detecting respiration. The extra-thick PC board seems to house the waveguides internally, which is a neat trick but might limit how the module can be deployed. The module requires both a USB interface and level shifter to interface the 2.8V levels of the module to the 5V Arduino Uno. In the video below, [Øyvind]’s prototype simply lights an RGB LED in response to the chest movement it detects, but there’s plenty of potential for development here. We’ve seen a laser-based baby breathing monitor before; perhaps this systems could be used to the same end without the risk of blinding your tyke. Or perhaps better diagnostics for sleep apnea patients than an intrusive night in a sleep study lab.

Clocking in at $249 for the sensor board and USB interface, this build is not exactly for the faint of heart or the light of wallet. But as an off-the-shelf solution to a specific need that also has a fair bit of hacking potential, it may be just the thing for someone. Of course if radar is your thing, you might rather go big and build something that can see through walls.

Continue reading “Arduino Radar Watches You Breathe”