Drill Jig Helps Mount WeMos D1 Mini

As far as ESP8266 boards go, the WeMos D1 Mini is a great choice if you’re looking to get started with hackerdom’s microcontroller du jour. It’s small, well supported, and can be had ridiculously cheap. Often going for as little as $3 USD each, we buy the things in bulk just to have spares on hand. But that’s not to say it’s a perfect board. For one, it lacks the customary mounting holes which would allow you to better integrate it into finished products.
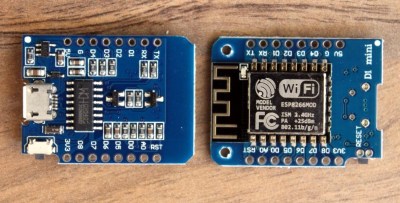
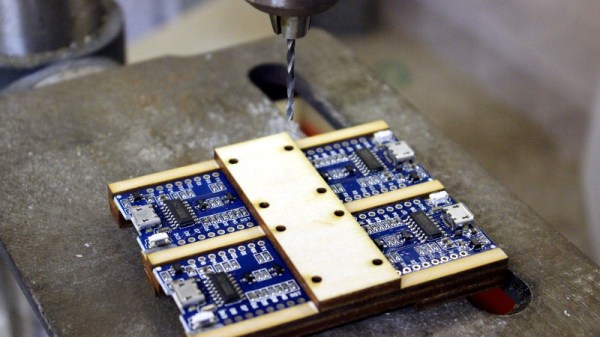
This minor annoyance was enough to spring [Martin Raynsford] into action. He noticed there was some open area on the D1 Mini’s PCB where it seemed he could drill through to add his own mount points, but of course popping holes in a modern PCB can be risky business. There’s not a lot of wiggle room between success and heartbreak, and it’s not like the diminutive D1 Mini is that easy to hold down to begin with. So he designed a laser-cut jig to allow him to rapidly add mounting holes to his D1 Mini’s assembly line style.

For those who might be skeptical, [Martin] reports he’s seen no adverse effects from drilling through the board, though does admit it’s possible the close proximity of the metal screw heads to the ESP8266’s antenna may have a detrimental effect. That said, he’s tested them in his projects out to 25 m (82 feet) with no obvious problems. He’s using a 2 mm drill bit to make his hole, and M2 x 6 mm machine screws to hold the boards down.

The jig design is released as a SVG and DXF for anyone with a laser cutter to replicate, but it shouldn’t be too difficult to extrude those designs in the Z dimension for hackers who haven’t yet jumped on the subtractive manufacturing bandwagon.

When a project makes the leap from prototype to in-house production, designing and building jigs become an essential skill. From flashing firmware to doing final checkout, the time and effort spent building a jig early on will pay for itself quickly in production.

Faux Aircon Units, Made Entirely From 2D Cuts

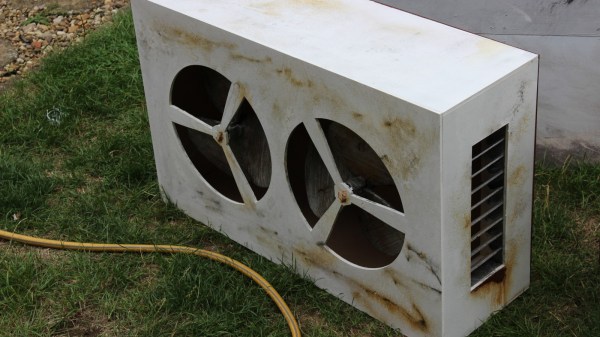
2D design and part fabrication doesn’t limit one to a 2D finished product, and that’s well-demonstrated in these Faux Aircon Units [Martin Raynsford] created to help flesh out the cyberpunk-themed Null Sector at the recent 2018 Electromagnetic Field hacker camp in the UK. Null Sector is composed primarily of shipping containers and creative lighting and props, and these fake air conditioner units helped add to the utilitarian ambiance while also having the pleasant side effect of covering up the occasional shipping container logo. Adding to the effect was that the fan blades can spin freely in stray air currents; that plus a convincing rust effect made them a success.

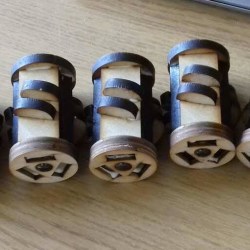
Fan hubs, showing spots for fan blades to be glued. With the exception of embedded bearings, the entire hub (like the rest of the unit) is made from laser-cut MDF.

The units are made almost entirely from laser-cut MDF. The fan blades are cut from the waste pieces left over from the tri-pronged holes, and really showing off the “making 3D assemblies out of 2D materials” aspect are the fan hubs which are (with the exception of bearings) made from laser-cut pieces; a close-up of the hubs is shown here.

Capping off the project is some paint and the rusted appearance. How did [Martin] get such a convincing rust effect? By using real rust, as it turns out. Some cyanoacrylate glue force-cured with misted water for texture, followed by iron powder, then vinegar and hydrogen peroxide with a dash of salt provided the convincing effect. He was kind enough to document the fake rust process on his blog, complete with photos of each stage.

Null Sector showcased a range of creativity; it’s where this unusual headdress was spotted, a device that also showed off the benefits of careful assembly and design.

Problems That Plagued An Edible Marble Machine

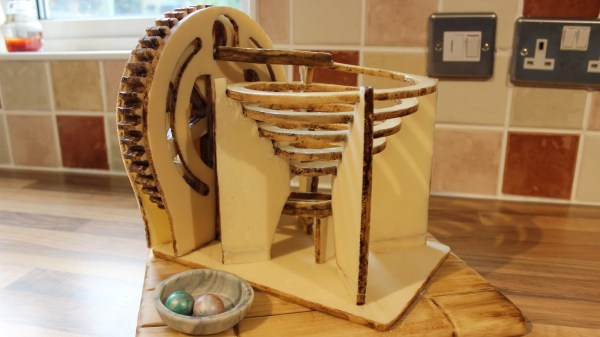
Prolific creator [Martin Raynsford] recently created a plus-sized edible version of his laser-cut Marble Machine for a Cake International exhibit and competition; it seemed simple to do at first but had quite a few gotchas waiting, and required some clever problem-solving.

Gears are three layers, stacked and cemented with sugar glue, and coated with a hard edible shine.

The original idea was to assemble laser-cut gingerbread parts to make the machine. Gingerbread can be laser-cut quite well, and at first all seemed to be going perfectly well for [Martin]. However, after a few days the gingerbread was sagging badly. Fiddling with the recipe and the baking was to no avail, and it was clear [Martin] needed to find something other than gingerbread to work with. After experimenting, he settled on a modified sugar paste which kept its shape and dried hard enough to work with. (While appearing to stretch most people’s definition of “cake” past the breaking point, the category [Martin] entered in the competition allows it.) The parts were cut by hand using laser-cut wood parts as a guide, then finished in a food dehydrator overnight.

The next problem was how to create the large spiral which forms the main ramp. The answer was to laser-cut a custom support structure that supported the piece while it dried out, and doubled as a way to transport the piece safely. High stress points got extra layers cemented with sugar glue, and some parts were reinforced internally with strands of uncooked spaghetti. Everything was sealed with an edible shine, which [Martin] says acts as a kind of varnish for cakes. A video demonstration is embedded below. Continue reading “Problems That Plagued An Edible Marble Machine”

Reuleaux Coaster

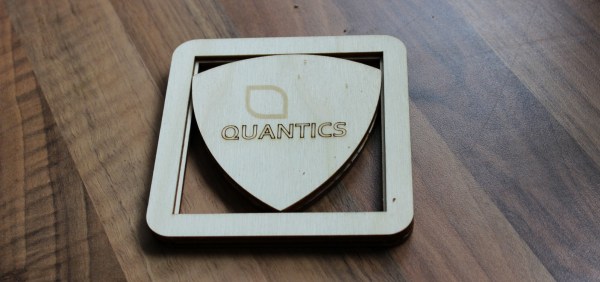
What’s better than a cool build? A cool build with valuable advice! Add a few flashy pictures and you have [Martin Raynsford]’s Reuleaux triangle coasters blog post. [Martin Raynsford] wanted to share his advice about the importance of using jigs and we’re sold. He was able to make 100 coasters in a single day and if he’s like us, after number ten, the work gets a little hurried and that is when mistakes are made.

Jig is a broad term when it comes to tooling but essentially, it holds your part in place while you work on it. In this case, a jig was made to hold the coaster pieces while they were glued together. [Martin Raynsford] didn’t need any registration marks on the wood so even the back is clean. If you look closely, the coaster is two parts, the frame and the triangle. Each part is three layers and they cannot separated once the glue dries. If any part doesn’t line up properly, the whole coaster is scrap wood.

This robot arm engraved 400 coasters in a day but maybe you would prefer if you simply had your beer delivered to your new coasters.

Continue reading “Reuleaux Coaster”

This Method Of Gluing Onto Curves Sucks!

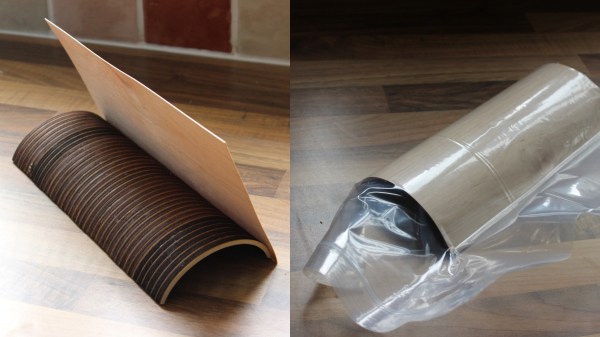
Sometimes the right tool for a job can be unusual, and this sucked only in the sense that vacuum sealing was involved. Recently [Martin Raynsford] found himself in a situation of needing to glue a wood veneer onto a curved surface, but faced a shortage of clamps. His clever solution was to vacuum-seal the whole thing and let the contour-hugging plastic bag take care of putting even pressure across the entire glued surface. After the glue had set enough to grip the materials securely, the bag was removed to let the whole thing dry completely. Gluing onto a curved surface has never been so clamp-free.

The curved piece in question was made from dozens of layers of laser-cut plywood, stacked and glued to make the curved lid of a custom-built chest. It might have been just the right shape, but it wasn’t much to look at. As you can see, giving it a wood veneer improved the appearance considerably. Wood veneers are attractive and versatile; we’ve seen for example that LEDs will shine through wood veneer quite easily.

Improved Game Tokens With Laser Cutting And Clever Design

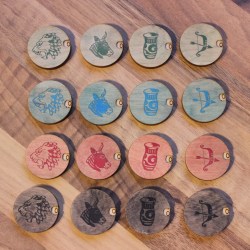
[Martin Raynsford] is a prolific project maker, especially when it comes to using a laser cutter. These laser-cut token counters for the board game Tigris & Euphrates demonstrate some clever design, and show that some simple touches can make a big difference.

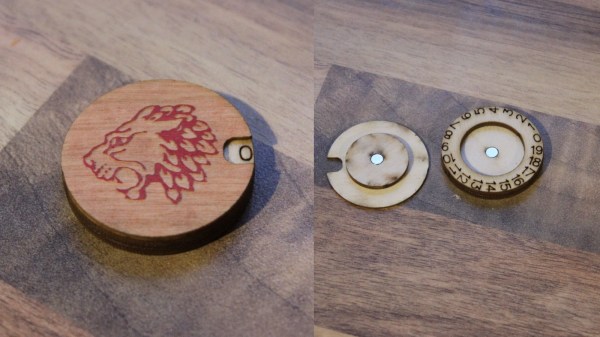
In the digital version of the game, the tokens conveniently display a number representing their total power value. [Martin] liked this feature, and set out to design a replacement token for the tabletop version that could display a number while still keeping the aesthetic of the originals. The tokens were designed as a dial with a small cutout window to show a number, but the surface of the token showing color and icon is still mostly unchanged.
Magnets hold the top and bottom together, and because of the small size of the assembly, no detents are needed. Friction is enough to keep things from moving unintentionally. The second noteworthy design feature is the material for the top layer of the token. This layer is made from 0.8 mm birch plywood; a nice and thin top layer means a wider viewing angle because the number is nearer to the surface. If the top layer were thicker, the number would be recessed and harder to see.

[Martin] made the design file available should anyone wish to try it out. No stranger to games, he even once game-ified the laser itself, turning it into a physical version of Space Invaders. Be sure to check it out!


Two-Piece Boxes Thanks To Laser-Cut Flex Hinges

It sounds like a challenge from a [Martin Gardner] math puzzle from the Scientific American of days gone by: is it possible to build a three-dimensional wooden box with only two surfaces? It turns out it is, if you bend the rules and bend the wood to make living hinge boxes with a laser cutter.

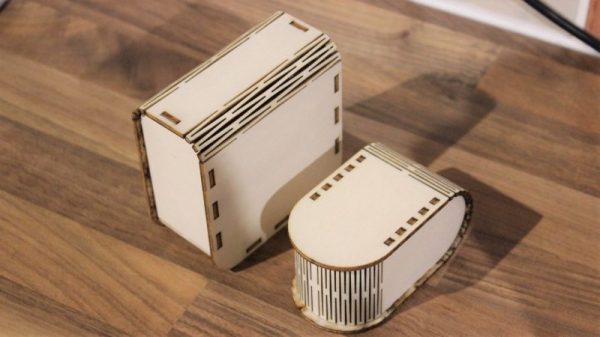
[Martin Raynsford] clearly wasn’t setting out to probe the limits of topology with these boxes, but they’re a pretty neat trick nonetheless. The key to these boxes is the narrow to non-existent kerf left by a laser cutter that makes interference fits with wood a reality. [Martin]’s design leverages the slot and tab connection we’re used to seeing in laser-cut boxes, but adds a living flex-hinge to curve each piece of plywood into a U-shape. The two pieces are then nested together like those old aluminum hobby enclosures from Radio Shack. His GitHub has OpenSCAD scripts to parametrically create two different styles of two-piece boxes so you can scale it up or (somewhat) down according to your needs. There’s also a more traditional three-piece box, and any of them might be a great choice for a control panel or small Arduino enclosure. And as a bonus, the flex-hinge provides ventilation.

Need slots and tabs for boxes but you’re more familiar with FreeCAD? These parametric scripts will get you started, and we’ll bet you can port the flex-hinge bit easily, too.