Custom Tool Helps Hakko Set Threaded Inserts

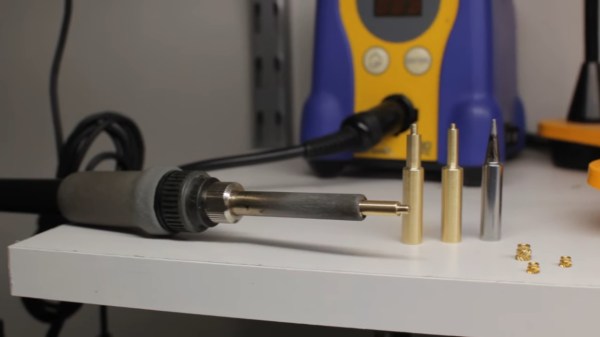
When the tool you need doesn’t exist, you have to make it yourself. Come to think of it, even if the tool exists, it’s often way more fun to make it yourself. The former situation, though, is one that [Sean Hodgins] found himself in with regard to threaded inserts. Rather than suffer from the wrong tool for the job, he machined his own custom threaded insert tool for his Hakko soldering iron.
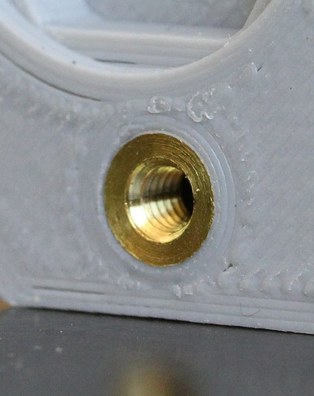
Like many of us, [Sean] has embraced the use of heat-set threaded inserts to beef up the mechanical connections on his 3D-printed parts. [Sean] dedicated a soldering iron to the task, equipping it with a tip especially for the job. But it was the flavor of iron proverbially known as a “fire stick” and he found that this iron was too hot for PLA prints. As the new owner of a lathe, he was able to make quick work of the job using a piece of brass rod stock. Luckily, Hakko tips just slip on the heating element, so no threading operations were needed. [Sean] made insert tips for multiple sized inserts, and the results speak for themselves.

If you haven’t tried these out yet, check out [Joshua Vasquez’s] excellent guide on heat-set inserts. You’ll find this guide to the relative merits of the different types useful when ordering inserts. And if you’ve got the itch to buy a lathe now, we’ve got you covered there too.

Continue reading “Custom Tool Helps Hakko Set Threaded Inserts”

State Of The Art For Nixies Gets A Boost From Dalibor Farny’s Supersize Prototype

Never one to pass up on a challenge, artisanal Nixie tube maker [Dalibor Farný] has been undertaking what he calls “Project H”, an enormous array of 121 Nixie tubes for an unnamed client. What’s so special about that? Did we mention that each Nixie is about the size of a sandwich plate?

Actually, we did, back in May when we first noted Project H in our weekly links roundup. At that time [Dalibor] had only just accepted the project, knowing that it would require inventing everything about these outsized Nixies from scratch. At 150 mm in diameter, these will be the largest Nixies ever made. The design of the tube is evocative of the old iconoscope tubes from early television history, or perhaps the CRT from an old oscilloscope.

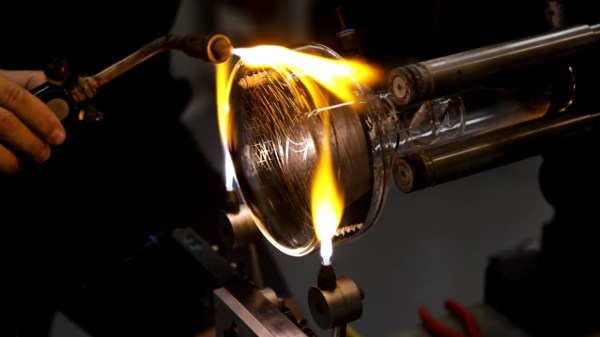
Since May, [Dalibor] has done most of the design work and worked out the bugs in a lot of the internal components. But as the video below shows, he still has some way to go. Everything about his normal construction process had to be scaled up, so many steps, like the chemical treatment of the anode cup, are somewhat awkward. He also discovered that mounting holes in the cathodes were not the correct diameter, requiring some clench-worthy manual corrections. The work at the glassblower’s lathe was as nerve wracking as it was fascinating; every step of the build appears fraught with some kind of peril.

Sadly, this prototype failed to come together — a crack developed in the glass face of the tube. But ever the pro, [Dalibor] took it in stride and will learn from this attempt. Given that he’s reduced the art of the Nixie to practice, we’re confident these big tubes will come together eventually.

Continue reading “State Of The Art For Nixies Gets A Boost From Dalibor Farny’s Supersize Prototype”

1/3 Scale Hybrid RC Car With A Scratch-Built 125cc V10 Engine

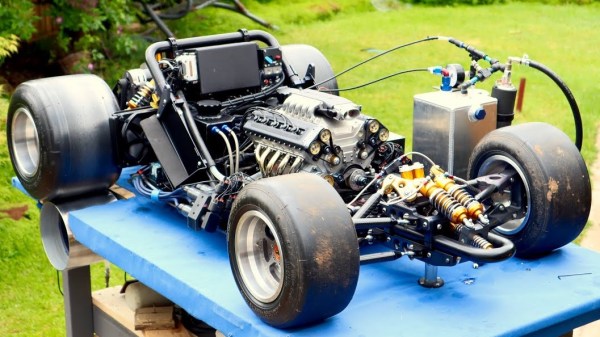
Scale model engines are fascinating pieces of engineering, and RC cars are always awesome to play with, no matter your age. [Keith57000] has gone over the top on both, creating a seriously impressive hybrid RC car built around a custom 125 cc V10 engine.

[Keith57000] started building the V10 engine back in 2013, after completing a 1/4 scale V8. The build is documented in a forum thread with lots of pictures of his beautiful craftsmanship. Most of the mechanical components were machined on a manual lathe and milling machine. No CNC, just lots of drawings and measurements, clever use of dividing heads, and careful dial reading. The engine also features electronic fuel injection with a MegaSquirt controller.

The rest of the car is just as impressive as the power plant. The chassis is bent tube, with machined brackets and carbon fiber suspension components. Two electric skateboard motors are added to give it a bit more power. The three speed gearbox is also custom, built with gears scavenged from a pit bike and angle grinder. It uses two small pneumatic pistons to do the shifting, with a clever servo mechanism that mechanically switches the solenoid valves. Check out all fourteen build videos on his channel for more details.

An amateur project of this complexity is never without speed bumps, which [Keith57000] details in the videos and build thread. It has taken seven years so far, but it is without a doubt the most impressive RC car we’ve seen. His skill with manual machine tools is something we rarely get to see in the age of CNC. We’re looking forward to the finished product, hopefully screaming around a track with a FPV cockpit.

Digging In The Dirt Yields Homebrew Inductors

Let’s say you’re stranded on a desert island and want to get the news from the outside world. You’ll have to build your own crystal radio, of course, but your parts bin is nowhere to be found and Digi-Key isn’t delivering. So you’ll need to MacGuyver some components. Capacitors are easy with a couple of pieces of tinfoil, and a rectifier can be made from a pencil and a razor blade. But what about an inductor? Sure, air-core inductors will work, but just because you’re marooned doesn’t mean you’ve abandoned your engineering principles. Luckily, you’ve read [AC7ZL]’s treatise of making inductors from dirt, and with sand in abundance, you’re able to harvest enough material to put together some passable ferrite-core inductors.

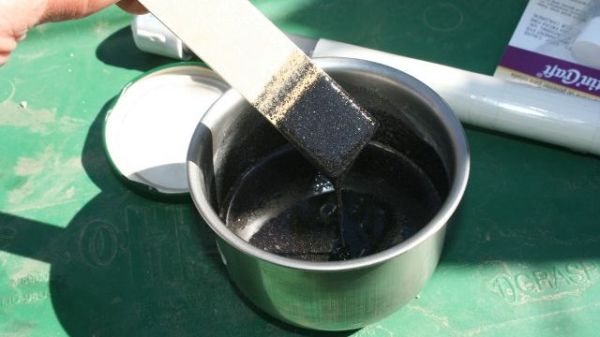
Obviously, making your own inductive elements isn’t practical even in fanciful and contrived situations, but that doesn’t make the doing of it any less cool. The story begins with a walk in the Arizona desert many years ago, where [AC7ZL], aka [H.P. Friedrichs], spied bands of dark sand shooting through the underlying lighter sediments. These bands turned out to be magnetite, one of many iron-bearing minerals found in the area. Using a powerful magnet from an old hard drive and a plastic food container, he was able to harvest magnetite sand in abundance and refine it with multiple washing steps.

After experimentally determining the material’s permeability — about 2.3 H/m — [AC7ZL] proceeded with some practical applications. He was able to make a bar antenna for an AM radio by packing the sand into a PVC pipe and rewinding the coils around it. More permanent cores were made by mixing the sand with polyester resin and casting it into bars. Toroids were machined from fat bars of the composite on a lathe, much to the detriment of the cutting tools used.

The full-length PDF account of [AC7ZL]’s experiments makes for fascinating reading — the inductive elements he was able to create all performed great in everything from a Joule Thief to a Hartley oscillator up to 27 MHz. We love these kinds of stories, which remind us of some of the work being done by [Simplifier] and others.

Adding Luxury Charging Features To An Entry-Level EV

The Nissan Leaf is the best-selling electric car of all time so far, thanks largely to it being one of the first mass produced all-electric EVs. While getting into the market early was great for Nissan, they haven’t made a lot of upgrades that other EV manufacturers have made and are starting to lose customers as a result. One of those upgrades is charge limiting, which allows different charging rates to be set from within the car. With some CAN bus tinkering, though, this feature can be added to the Leaf.

Limiting the charging rate is useful when charging at unfamiliar or old power outlets which might not handle the default charge rate. In Europe, which has a 240V electrical distribution system, Leafs will draw around 3 kW from a wall outlet which is quite a bit of power. If the outlet looks like it won’t support that much power flow, it’s handy (and more safe) to be able to reduce that charge rate even if it might take longer to fully charge the vehicle. [Daniel Öster]’s modification requires the user to set the charge rate by manipulating the climate control, since the Leaf doesn’t have a comprehensive user interface.

The core of this project is performed over the CAN bus, which is a common communications scheme that is often used in vehicles and is well-documented and easy to take advantage of. Luckily, [Daniel] has made the code available on his GitHub page, so if you’re thinking about trading in a Leaf for something else because of its lack of features it may be time to reconsider.

Continue reading “Adding Luxury Charging Features To An Entry-Level EV”

Prop-Driven Cardboard RC Car Doesn’t Skimp On Performance

[Kryzer Channel] takes making a DIY RC car to a whole new level with this prop-driven electric car that is made almost entirely out of cardboard (YouTube video, also embedded below.) By attaching an electric motor with a push prop to the back of the car, [Kryzer] avoids the need for any kind of drive system or gearing. Steering works normally thanks to some scratch-built linkages, but the brake solution is especially clever.

Braking is done by having a stocky servo push a reinforced stub downward, out of a hole in the center of the car. This provides friction against the road surface. After all, on an RC car a functional brake is simply not optional. Cutting the throttle and coasting to a stop works for a plane, but just won’t do for a car.

Winding thread around metal components then saturating with CA glue makes a durable assembly.

Layers of corrugated cardboard and hot glue make up the bulk of the car body, and some of the assembly techniques shown off are really slick and make the video really worth a watch. For example, the construction of the wheels (starting around 2:24) demonstrates making them almost entirely out of cardboard, saturated with CA glue for reinforcement, with a power drill acting as a makeshift lathe for trimming everything down. A section of rubber inner tube provides the tire surface and a piece of hard plastic makes a durable hub. Wraps of thread saturated in CA glue, shown here, is another technique that shows up in several places and is used in lieu of any sort of fasteners.

The well-edited video (embedded below) is chock full of clever assembly and construction. Unsurprisingly, this is not [Krazer]’s first cardboard vehicle: their video channel has other impressive cardboard models and racers to show off.

Continue reading “Prop-Driven Cardboard RC Car Doesn’t Skimp On Performance”

Under Pressure: How Aluminum Extrusions Are Made

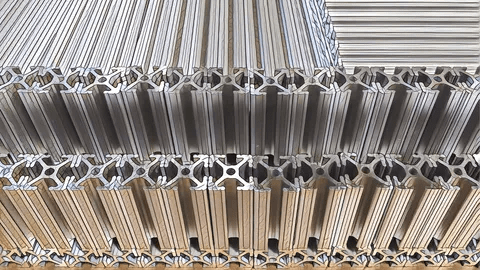
At any given time I’m likely to have multiple projects in-flight, by which of course I mean in various stages of neglect. My current big project is one where I finally feel like I have a chance to use some materials with real hacker street cred, like T-slot extruded aluminum profiles. We’ve all seen the stuff, the “Industrial Erector Set” as 80/20 likes to call their version of it. And we’ve all seen the cool projects made with it, from CNC machines to trade show displays, and in these pandemic times, even occasionally as sneeze guards in retail shops.

Aluminum T-slot profiles are wonderful to work with — strong, lightweight, easily connected with a wide range of fasteners, and infinitely configurable and reconfigurable as needs change. It’s not cheap by any means, but when you factor in the fabrication time saved, it may well be a net benefit to spec the stuff for a project. Still, with the projected hit to my wallet, I’ve been looking for more affordable alternatives.

My exploration led me into the bewilderingly rich world of aluminum extrusions. Even excluding mundane items like beer and soda cans, you’re probably surrounded by extruded aluminum products right now. Everything from computer heatsinks to window frames to the parts that make up screen doors are made from extruded aluminum. So how exactly is this ubiquitous stuff made?

Continue reading “Under Pressure: How Aluminum Extrusions Are Made”