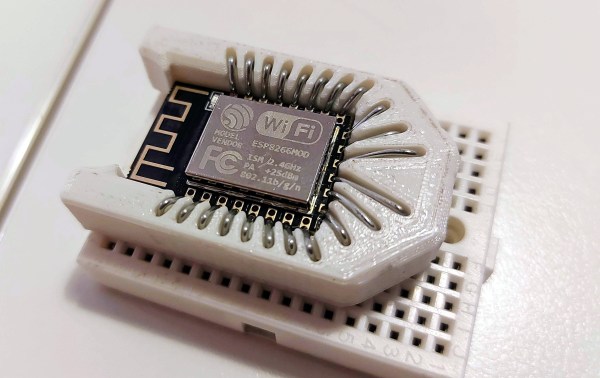
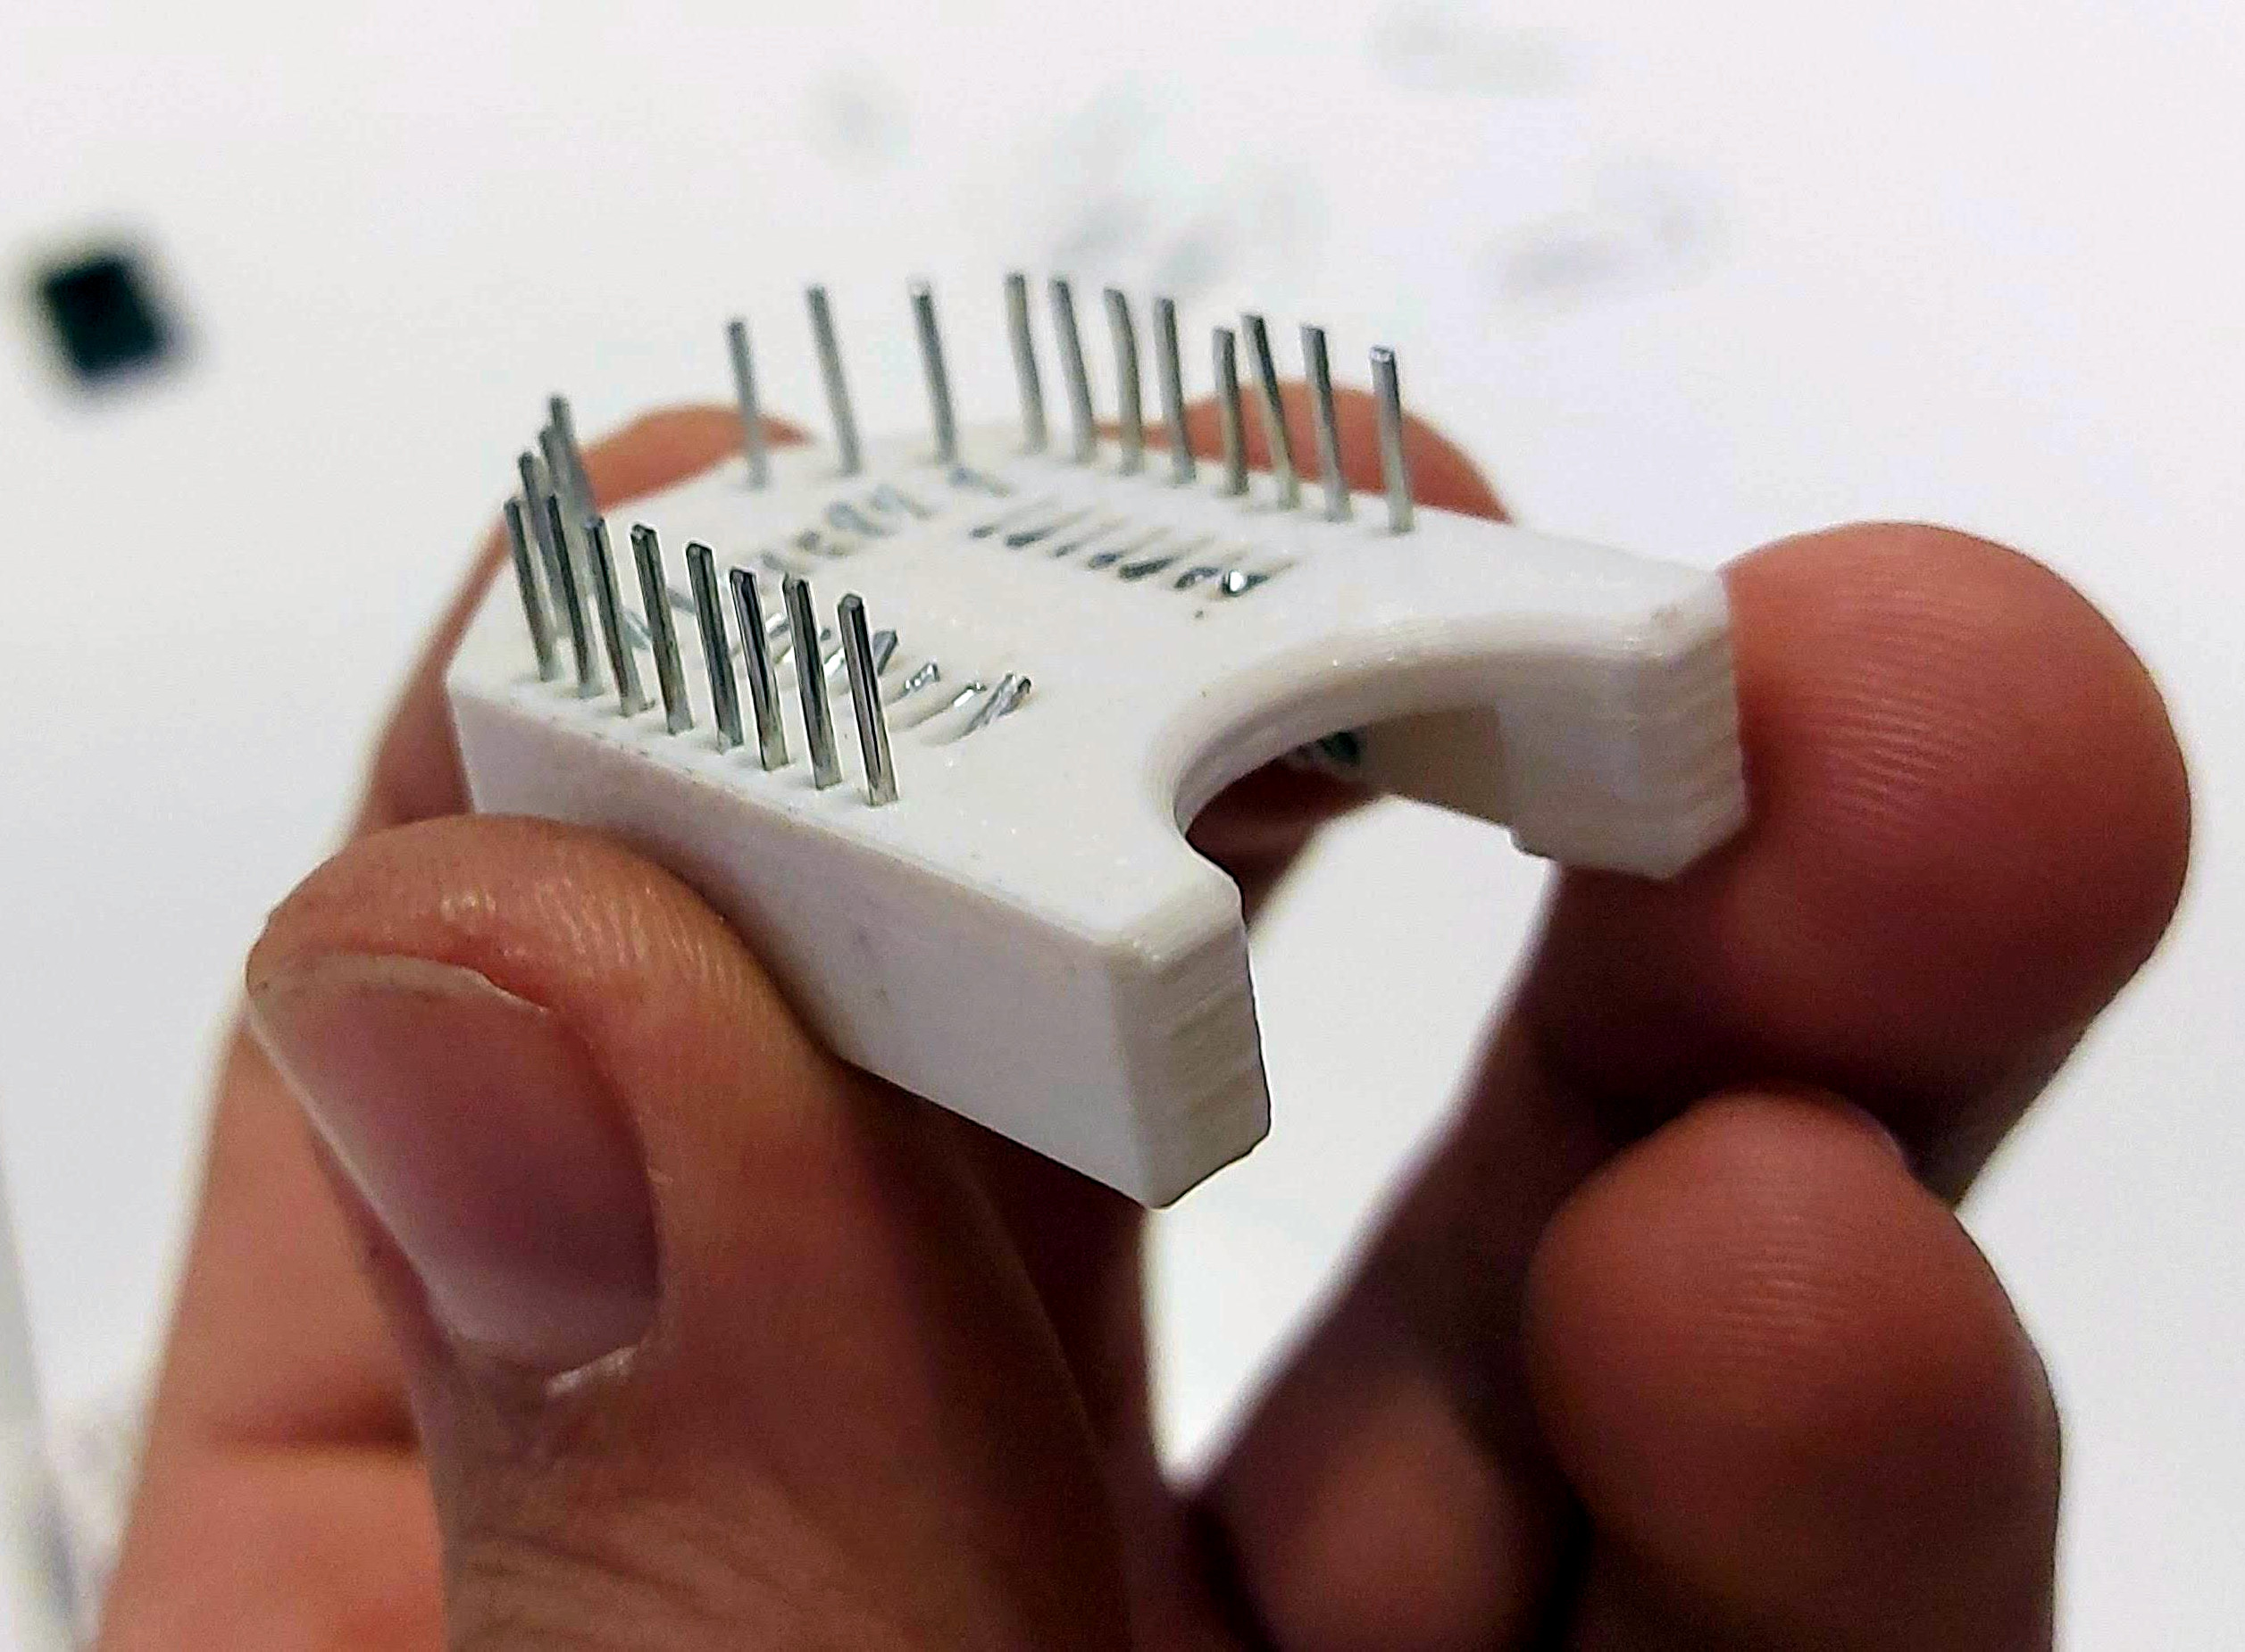
This certainly looks like a handy solution. All you have to do is print the thing, add all the wires, and stick your ESP in there. Even that wire is easy to find; [tweeto] used 0.8 mm paper clips which are sturdy, conductive, and haunting the darkest corners of every desk drawer. They’re also a little bit on the thick side, so [tweeto] plans to test out 0.6mm copper wire in the future.
The challenge with this type of print is to design something that will stand up to repeated breadboardings without losing legs or falling apart. [tweeto]’s elegant solution is a tiny groove for each wire in the bottom of the socket — it keeps the wire in place by countering the play caused by inserting it into and removing it from a breadboard. See how [tweeto] bends the paper clips in the short video after the break.
Back in April of 2019, inspired by iconic films such as Blade Runner and Akira, [Chris Watson] embarked on a journey to create his very own cyberpunk roadster from a 1991 Mazda MX-5. After pouring an incredible amount of blood, sweat, and fiberglass into the project, he now has a vehicle that wouldn’t look out of place cruising the streets of Neo Tokyo. Even if you’re not usually into car mods, his impeccably photographed build log is an absolutely fascinating journey.
But as impressive as the car itself might be, what really caught our attention was the computer sitting on the dash. From early on, [Chris] wanted the vehicle to have a companion cyberdeck that would be used to control various onboard systems. At this point it’s just for show, but he says ultimately it will be integrated with the electric motor he plans to install in place of the MX-5’s original power plant. We can’t wait to see it.
Of course, the lack of a practical application has hardly stopped us from admiring any of the other cyberdecks we’ve covered thus far. This one started out life as a laptop with a broken screen, which [Chris] beheaded and connected it to 15″ external display mounted in the top of a heavy-duty case. With a new SSD and a fresh copy of Linux Mint to verify all the hardware was still functional, he put together an MDF bezel for the display that includes some faux antennae and covered aircraft style switches.
When this futuristic roadster is making an appearance at a car show or contest, [Chris] makes sure to load up some suitably high-tech looking imagery on the display. It even shows some flashing technobabble error messages pulled from The Fast & The Furious.
Traditionally we haven’t covered many custom car projects, though to be fair, we traditionally haven’t seen many that looked like this either. But between ever more technologically advanced vehicles and the insightful car modding column helmed by our very own [Lewin Day], we expect tricked out rides may become an increasingly common sight on these pages.
[TinkersProjects] experimented with making their own flexible PCB for LED modules inside a special fixture, and the end result was at least serviceable despite some problems. It does seem as though the issues can be at least partially blamed on some knockoff Kapton tape, which is what [TinkersProjects] used as a backing material.
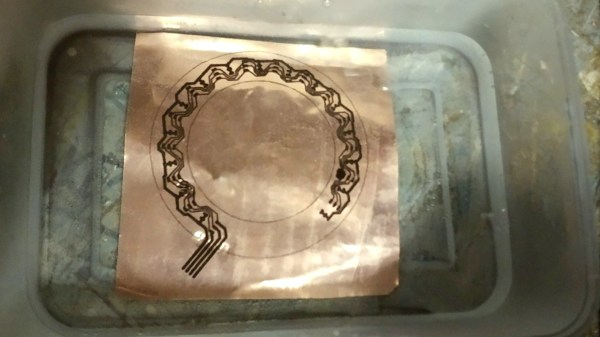
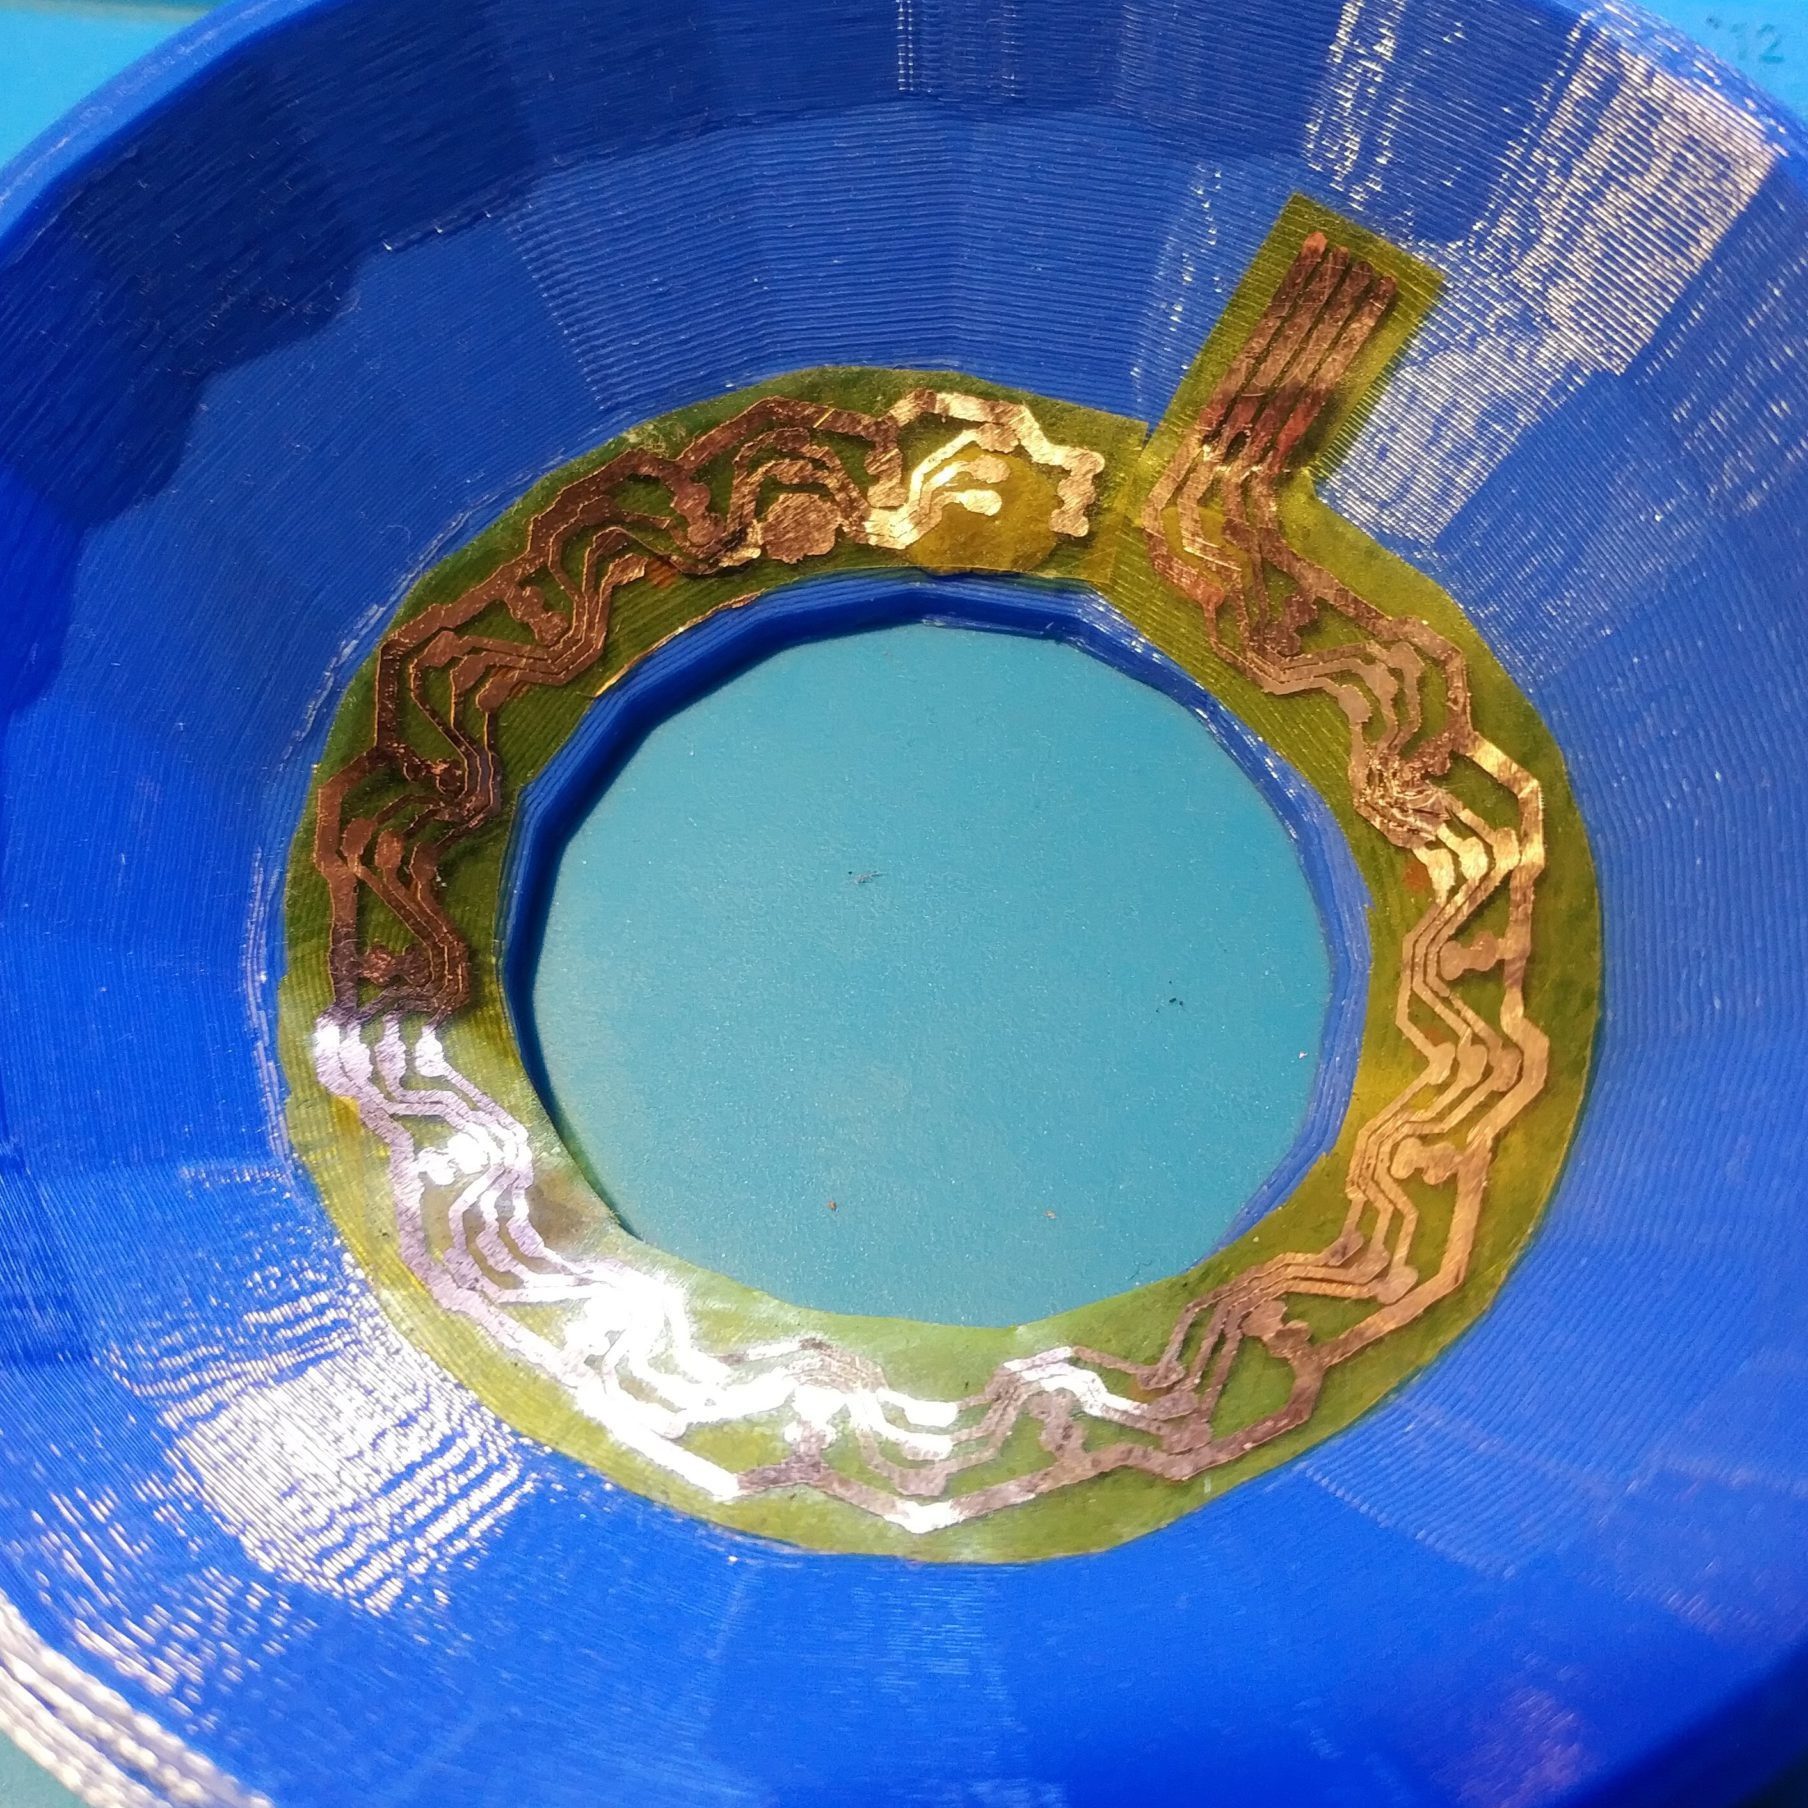
Incomplete etching on this DIY flexible PCB, but still salvageable.
The approach was simple: after buying some copper foil and wide Kapton tape, simply stick the foil onto the tape and use the toner transfer method to get a PCB pattern onto the copper. From there, the copper gets etched away in a chemical bath and the process is pretty much like any other DIY PCB. However, this is also where things started to go wonky.
Etching was going well, until [TinkersProjects] noticed that the copper was lifting away from the Kapton tape. Aborting the etching process left a messy board, but it was salvageable. But another problem was discovered during soldering, as the Kapton tape layer deformed from the heat, as if it were a piece of heat shrink. This really shouldn’t happen, and [TinkersProjects] began to suspect that the “Kapton” tape was a knockoff. Switching to known-good tape was an improvement, but the adhesive left a bit to be desired because traces could lift easily. Still, in the end the DIY flexible PCB worked, though the process had mixed results at best.
Flexible PCBs have been the backbone of nifty projects like this self-actuating PoV display, so it’s no surprise that a variety of DIY PCB methods are getting applied to it.
There are a ton of ways to go about building your own reflow oven. Most of these builds start with, well, an oven — usually a toaster oven — with a small but significant minority choosing to modify a hotplate. But this might be the first time we’ve seen a waffle iron turned into a reflow oven.
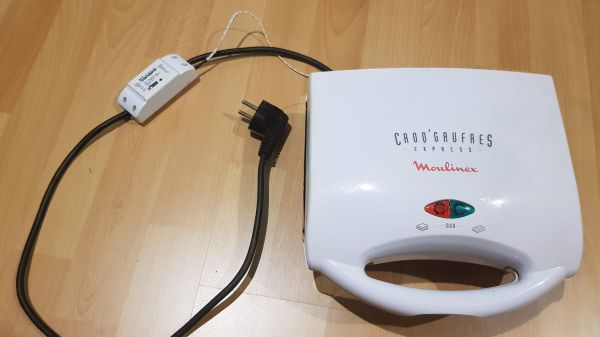
Of course, what [Vincent Deconinck] came up with is not an oven per se. But his “RefloWaffle” certainly gets the job done. It started with an old waffle maker and a few experiments to see just how much modification it would take to create the various thermal reflow profiles. As it turned out, the original cooking surfaces had too much thermal inertia, so [Vincent] replaced them with plain copper sheets. That made for quicker temperature transitions, plus created some space between the upper and lower heating elements for the SMD board.
As for control, [Vincent] originally used an Arduino with a relay and a thermocouple, but he eventually built a version 2.0 that used a hacked Sonoff as both controller and switch. Adding the thermocouple driver board inside the Sonoff case took a little finagling, but he managed to get everything safely tucked inside. A web interface runs on the Sonoff and controls the reflow process.
We think this is a great build, one that will no doubt see us trolling the thrift stores for cheap waffle irons to convert. We’ve seen some amazing toaster oven reflows, of course, but something about the simplicity and portability of RefloWaffle just works for us.
Google’s fledgling Stadia service leverages the Chrome ecosystem to deliver streamed PC games on mobile devices, web browsers, and TVs. While not strictly required, the company even offers a dedicated Stadia controller that connects directly to the streaming servers over its own WiFi connection to reduce overall system latency. Of course, being a Google product, the controller has a tiny microphone that’s always listening in for interacting with the voice assistant.
[Heikki Juva] didn’t like the privacy implications of this, but unfortunately, there appears to be no way to turn off this “feature” in software. He decided the most expedient solution would be to simply remove the microphone from the controller, but it turns out there was a problem. By researching previous teardowns, he found out that it’s nearly impossible to take the controller apart without damaging it.
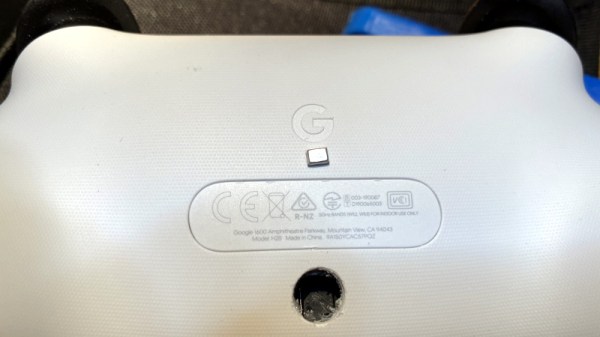
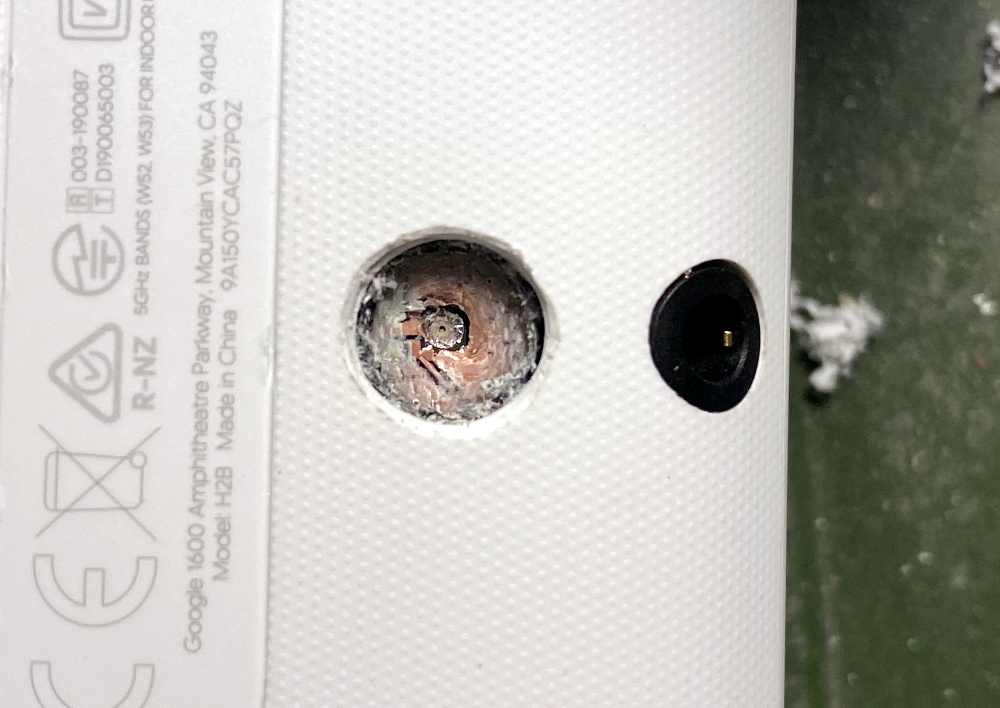
Getting close to the target.
So [Heikki] came up with a bold idea. Knowing roughly the position of the microphone, he would simply drill through the controller’s case to expose and ultimately remove the device. The operation was complicated by the fact that, from the teardown video he saw, he knew he’d also have to drill through the PCB to get to the microphone mounted to the opposite side. The only bright spot was that the microphone was on its own separate PCB, so physically destroying it probably wouldn’t take the whole controller out with it.
Now we don’t have to explain why drilling into a gadget powered by an internal lithium-ion battery is dangerous, and we’re not necessarily vouching for the technique [Heikki] used here. But when presented with a sealed unit like this, we admit there weren’t a lot of good options. The fact that the user should have to go to such ridiculous lengths to disable the microphone in a game controller is a perfect example of why we should try to avoid these adversarially designed devices, but that’s a discussion for another time.
In the end, with a steady and and increasingly larger bits, [Heikki] was able to put a 7 mm hole in the back of the Stadia controller that allowed him to extract the microphone in one piece. Removing the microphone seems to have had no adverse effect on the device as, surprisingly enough, it turns out that a game controller doesn’t actually need to listen to the player. Who knew?
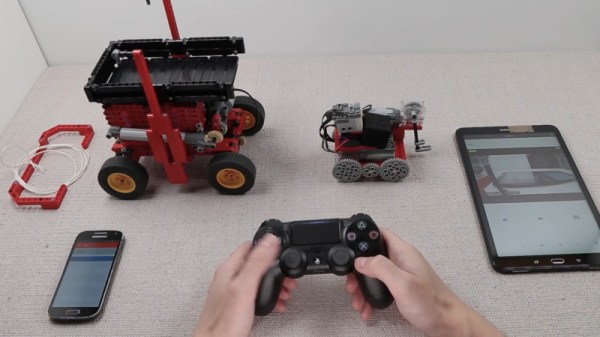
Breaking and entering is a felony offense, and one that risks the interloper receiving serious bodily harm for the trouble. Sending in a robot instead is an attractive alternative. While we doubt any actual intention to use their creation for evil, [Brick Experiment Channel] have nonetheless built a viable heist bot out of Lego.
The robot in question is actually two, that work together to execute their mission. Once lowered in the house, the scissor lift bot drives into position next to a coffee table. It then lifts its companion bot into position by extending its motor-driven linear actuators. The recovery bot then drives out onto the table, snatches a set of keys with its arm, and returns to the lift bot, before exiting the house. It’s all achieved with the use of the SBrick, a third-party Lego accessory which allows remote control of Lego motors over Bluetooth. A wireless camera also helps out with vision for the platform.
Lego really does make it easy to build quick, functional mechanisms without a whole lot of fuss. We’ve seen it employed in all sorts of ways, like this handy film scanner. Video after the break.
Previously, subscriber-based WiFi had been installed on subways and in subway stations. It was provided privately by two phone carriers and free only for their subscribers. The coverage was spotty and slow, and in 2017 the government took over and implemented a better system. With this announcement, the whole public transportation system is now covered with stable and free WiFi.
We also noticed that the government has released the details of the 220,000 WiFi access points to the public. This includes the location, IP address, and RSSI data for use by people and companies wanting to develop location-based services. What is the state of free WiFi access points in your region, and does it extend to public transportation? Do you find it reliable, or do you use your data plan when out and about?
 This certainly looks like a handy solution. All you have to do is print the thing, add all the wires, and stick your ESP in there. Even that wire is easy to find; [tweeto] used 0.8 mm paper clips which are sturdy, conductive, and haunting the darkest corners of every desk drawer. They’re also a little bit on the thick side, so [tweeto] plans to test out 0.6mm copper wire in the future.